Changing Paper Tray Sizes
8 - 4
Service and Supplies
Changing Paper Tray Sizes
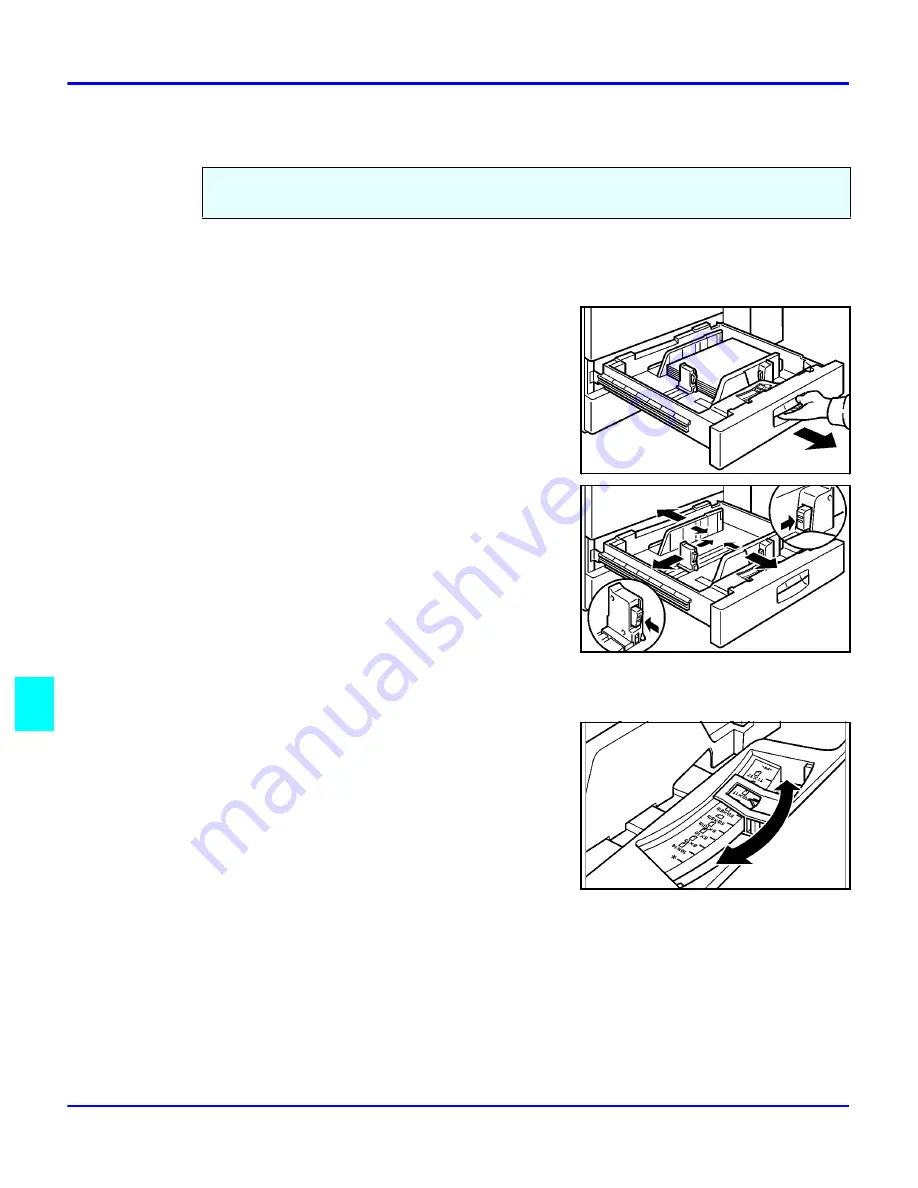
Changing Paper Size of Tray 2
1
Pull the Paper Tray out until it stops.
2
While pushing the Release Lever, adjust the
Paper Side Guides and the Rear Guide to the new
paper size.
3
Fan the copy paper and insert it into the Paper
Tray.
•
The tray holds up to 550 sheets of 20 lb. bond
paper.
•
Do not load paper above the maximum height
line.
4
Set the Paper Size Selector at the innermost part
of the Tray to the new paper size.
•
To adjust the paper size to one not available
with the paper size selector:
1.Set the Paper Size Selector to the * mark
on the right.
2.Press the Users Tool/Counter key.
3.Touch the System Settings key.
4.Touch the Paper Size Setting key.
5.Touch the Tray 2: Paper Size Setting key.
6.Select your desired paper size.
7.Touch the OK key.
8.Touch the Exit key.
You can change the paper size in Tray 2 to accept additional sizes of paper. To change the size
of paper you use in Tray 1 and Tray 3, you must call your Lanier Service Technician.
Summary of Contents for 5455
Page 9: ...Important Safeguards ...
Page 11: ...Chapter 1 Making Copies ...
Page 16: ...Making Copies 1 4 Making Copies Notes ...
Page 17: ...Chapter 2 Component Identification ...
Page 19: ...Chapter 3 Copier Functions ...
Page 45: ...Chapter 4 Copying Methods ...
Page 83: ...Chapter 5 User Tools ...
Page 108: ...Copy Document Server Settings 5 24 User Tools Notes ...
Page 109: ...Chapter 6 Special Copier Functions ...
Page 132: ...Dual Connect Copying 6 22 Special Copier Functions Notes ...
Page 133: ...Chapter 7 Using the Finisher ...
Page 140: ...Selecting the Output Tray 7 6 Using the Finisher Notes ...
Page 141: ...Chapter 8 Service and Supplies ...
Page 157: ...Chapter 9 Specifications ...
Page 169: ...Glossary ...
Page 170: ...Chapter Overview Definitions for the most often used terms are listed here ...
Page 177: ...Index ...
Page 178: ...Chapter Overview Use the index to locate topics listed in the Operator Guide ...
Page 182: ...I 4 ...


