101
|
www.lakeshore.com
4.6 Imaging and
Probing the
Sample
A clear image of the sample is necessary for properly landing the probe tip. Landing
the tip with a poor image can result in intermittent contact, scratches on the sample
or probe damage. If you cannot obtain a proper image, please refer to section 6.3.4.
Lake Shore recommends that you practice imaging the sample and landing probes
before cooling the probe station.
Remember to raise the probes 3 mm to 4 mm above the sample after practicing.
Each probe type and sample surface behaves slightly differently when landing
probes. These instructions are general guidelines. Lake Shore recommends
developing a standard operating procedure for your lab that is optimal for the probes
and samples being used (see section 2.6.7). The plan can be developed by repeating
steps 6, 7, and 8 in section 4.6.2 until contact resistance measurements are
repeatable.
4.6.1 Using the
Microscope to Image
the Sample
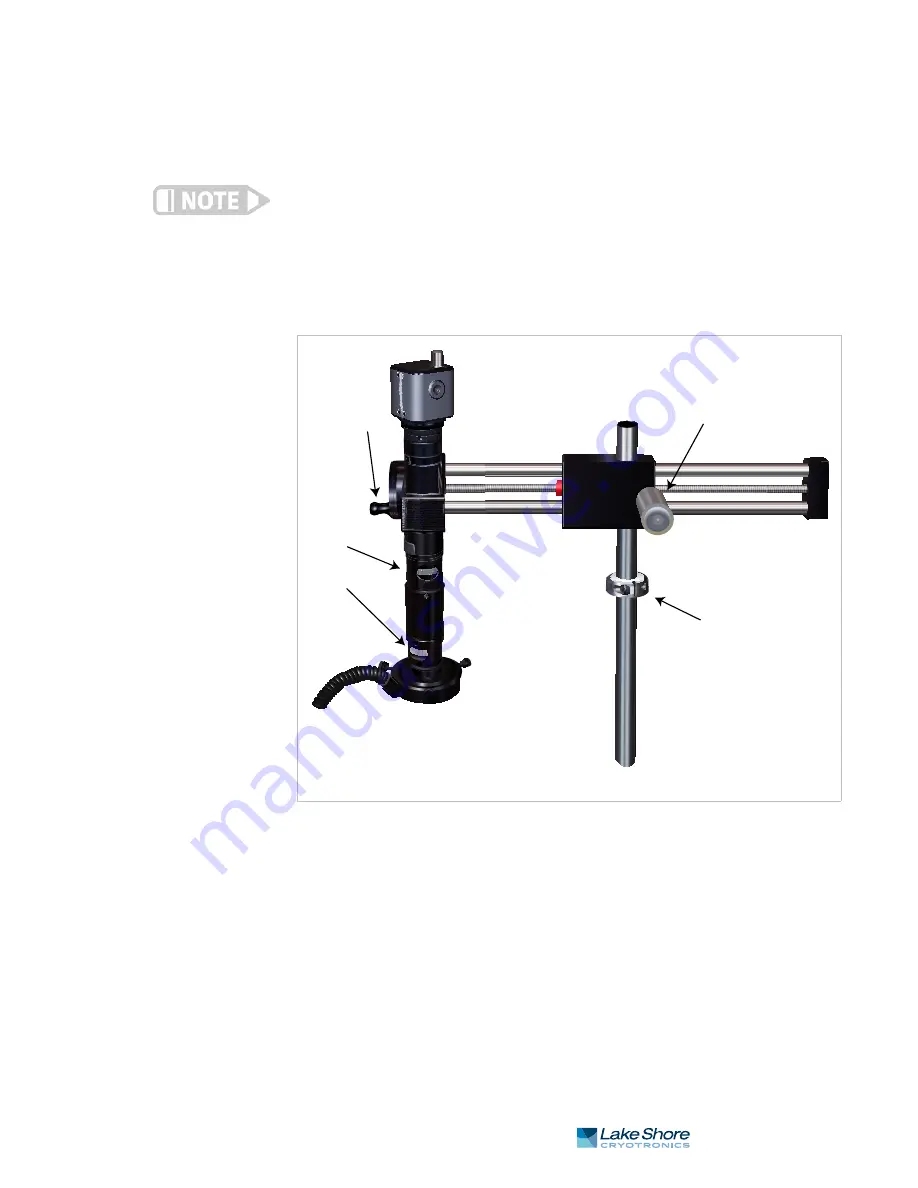
Follow this procedure to use the microscope to image the sample.
1. Remove the dust cap from the bottom of the microscope.
2. Loosen the thumbscrew on the vertical microscope shaft, swing the microscope
over the center of the viewport, and tighten the thumbscrew. This process is
repeated for fine positioning, providing the first axis of motion.
3. Rotate the hand dial until the microscope is over the center of the viewport. This
process is repeated for fine positioning, providing the second axis of motion.
4. Turn on the monitor, camera, and light source.
5. Adjust the light source to 50% to begin. As the image is refined, use the least
amount of light necessary to view the sample. Turn the light source off during
extended measurements to reduce thermal radiation to the sample.
6. Zoom the microscope to its lowest magnification setting to begin. As the image is
refined, zoom as necessary to obtain the desired view.
FIGURE 4-11
Microscope controls
9
9 209
999 2022
3
3.5
3.5
.75X
Hand dial
Zoom
Quick release handle
Shaft collar
Focus


