24
P1
P2
P3
P6
P4
P5
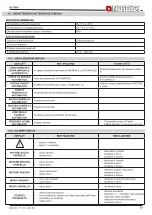
Off - 1 - 2 - 3 - 4 - 5 - 6 h
IT - EN - DE - FR - SP
On - Off
10 - 30 %
MANUAL
AUTOMATIC
SLEEP
Code ...
LANGUAGE
BUZZER
DISLPAY
TECHNICAL
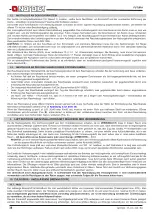
7. CONTROL BOARD
OPERATION
This electronic device manages the automatic pressed wood BRIQUETTES feed system (
ALS
– Briquette’s Automatic
Loading System).
7.1. USER MENU
MENU
The selection of MANUAL and AUTOMATIC mode occurs by pressing and holding the
P1
button. The operation mode status will
be shown on the display. Enter the MENU by pressing the
P2
button (next) or
P3
button (previous).
SLEEP MENU
Pressing the
P6
button you will access the
SLEEP MENU
. Press the
P6
button and set the time after which the stove switch
from AUTOMATIC to MANUAL mode by acting on the
P4
–
P5
button (Off – 1,2,3,4,5,6 h). Press the
P6
button to confirm the selection.
Press the
P1
button to return to the previous menu. Press the
P2
and
P3
buttons simultaneously to activate the SLEEP mode. “Switch-off
in --- minutes” appears on the display. The SLEEP feature can ONLY be activated from the AUTOMATIC mode. Press and hold the P1
button to disable the SLEEP feature,and move to MANUAL mode.
LANGUAGE MENU
Pressing the
P2
button you will access the
LANGUAGE MENU
. Press the P6 button and set the menu language by
pressing the
P4
–
P5
button (ITALIAN – ENGLISH – GERMAN – FRENCH - SPANISH). Press the
P6
button to confirm the selection.
Press the
P1
button to return to the previous menu.
BUZZER MENU
Pressing the
P2
button you will access the
BUZZER MENU
. Press the
P6
button and set the acoustic signal status by
pressing the
P4
–
P5
button (ON - OFF). Press the
P6
button to confirm the selection. Press the
P1
button to return to the previous menu.
DISPLAY MENU
Pressing the
P2
button will access the
DISPLAY MENU
. Press the
P6
button and set the brightness by pressing the
P4
–
P5
button (from 10 to 31). Press the
P6
button to confirm the selection. Press the
P1
button to return to the previous menu.
Pressing the
P2
button you will access the
TECHNICAL MENU
, a menu which is ONLY enabled for Technical Support personnel.
8. FLUE
Essential requirements for correct appliance operation:
• the internal section must preferably be circular;
• the appliance must be thermally insulated and impermeable and built with suitable materials which are resistant to heat, combustion
products and any condensation;
• there must be no narrowing and vertical passages with deviations must not be greater than 45°;
• if already used, it must be clean;
• the technical data from the instruction manual must be respected;
If the flues are of a square or rectangular section, the internal edges must be rounded with a radius of not less than 20 mm.
For the rectangular section, the maximum ratio between the sides must be ≤ 1.5.
A section which is too small causes a reduction in draught. A minimum height of 4 m is advisable.
The following materials are
FORBIDDEN
and compromise the good operation of the appliance: asbestos cement, galvanised steel, rough
shows some example solutions.
The minimum section must be 4 dm
2
(for example 20x20 cm) for appliances whose pipe dimensions are less than 200 mm, or 6.25
dm
2
(for example 25x25 cm) for appliances with a diameter of more than 200 mm
.
The draught created by your flue must be sufficient but not excessive.
A section of the flue which is too large can present a volume which is too large to heat and therefore cause operating difficulties for the
appliance; to avoid this, it is necessary to intubate the appliance for its entire height. A section which is too small causes a reduction in
draught.
The flue must be at a suitably distance from flammable or combustible material using suitable insulation or an air space.
It is
FORBIDDEN
to pass system piping or air ducts inside the flue. It is also forbidden to create moveable or fixed openings on the flue
itself, for the connection of further different appliances (See chapter CONNECTING A FIREPLACE OR OPEN HEARTH TO THE FLUE).
Summary of Contents for FUTURA
Page 2: ......
Page 58: ...FUTURA 58 8291003 IT EN DE RU 16 0 C 60 C 10 C 60 C 95 230 50 60 2 5 A 250 16 1 P1 16 2...
Page 59: ...FUTURA 8291003 IT EN DE RU 59 60 16 3 LED SLEEP SLEEP SLEEP stby GND I2 F1...
Page 60: ...FUTURA 60 8291003 IT EN DE RU 17 17 1 20 20 17 2 P1 SLEEP 3 P1 SLEEP 1...
Page 61: ...FUTURA 8291003 IT EN DE RU 61 1...
Page 70: ...FUTURA 8291003 IT EN DE RU 45 A A 19 19 MA E 19 DIMENSIONS 19 DIMENSIONI...
Page 71: ...FUTURA 46 8291003 IT EN DE RU...
Page 72: ...FUTURA 8291003 IT EN DE RU 47...
Page 73: ...FUTURA 48 8291003 IT EN DE RU...
Page 74: ......


