background image


27

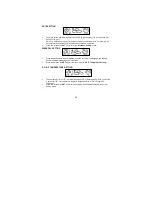
EXIT THE MANUAL SETTING MODES 

• 

To return to the normal display mode from anywhere in manual setting mode simply 
press the SNZ key anytime. 

• 

If no keys are pressed for about 15 seconds in setting mode, the weather wall clock will 
automatically switch back to normal display mode. 


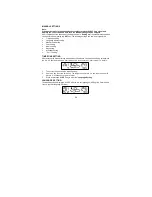
ALARM SETTING 

To enter into the alarm setting mode: 
1. 

Hold the ALM key for 2 seconds. The hour digits start flashing. 

2. 

Press the + key to set the hour. 

3. 

Press and release the ALM key to set the minutes. The minute digits start flashing. 

4. 

Press and release the + key to set the minutes.  If the + key is held, the unit will increase 
by 5. 

5. 

Press and release again the ALM key to exit the Alarm setting mode or wait for 15 
seconds automatic timeout. 


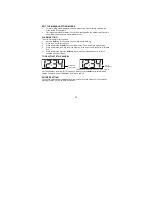
TO DEACTIVATE THE ALARM: 


The alarm will be automatically ON when the alarm time is 

set. To deactivate  the alarm (OFF), press and release once the ALM key in normal mode 
display. The alarm icon will disappear, the alarm is now off. 


SNOOZE SETTING 

The snooze can only be activated during alarm time for a snooze duration of 10 minutes by 
pressing the SNZ key on the back of the clock.  


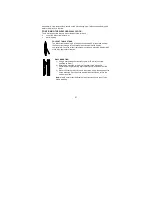
Alarm icon 
(((

))) (ON) 

Alarm 
icon(OFF) 

Summary of Contents for WS6158-IT

Page 1: ...ute second Alarm setting with snooze function Calendar display Weekday display 3 languages to choose from German English and French Function keys Instant Transmission is the up and coming state of the...

Page 2: ...re to Weather Station by 868 MHz Wall mounting case Mounting at a sheltered place Avoid direct rain and sunshine TO INSTALL AND REPLACE BATTERIES IN THE WEATHER WALL CLOCK The weather wall clock uses...

Page 3: ...0 the date as 1 1 and weekday will be displayed 4 Do not press any buttons for 10 minutes 5 The Weather wall clock will start receiving data from the transmitter The remote temperature will then be di...

Page 4: ...raphic location In normal cases there should be no reception problems within a 1500km radius of Frankfurt Once the outdoor temperature is displayed on the Weather station the DCF tower icon in the clo...

Page 5: ...exit the setting mode key To toggle between the date alarm time seconds display To change the values in manual set mode To stop the snooze function ALM key To enter into the alarm set mode To set the...

Page 6: ...ing Month setting Day setting Weekday setting C or F setting TIME ZONE SETTING After entering the manual setting mode as described above the time zone can be set between the 0 to 12 hour and then runs...

Page 7: ...inute digits will start flashing 4 Set the desired minutes by pressing and releasing the key If the key is held the units will increase by 5 5 Press and release the SET key to move to the Year Setting...

Page 8: ...ay Setting mode WEEKDAY SETTING 1 The weekday symbols will be displayed on LCD2 in the pre set language and flashing Set the desired weekday by use of the key 2 Press and release the SET key to enter...

Page 9: ...o set the minutes The minute digits start flashing 4 Press and release the key to set the minutes If the key is held the unit will increase by 5 5 Press and release again the ALM key to exit the Alarm...

Page 10: ...ulty because it is not raining It simply means that the air pressure has dropped and the weather is expected to get worse but not necessarily rain Note After setting up readings for weather forecasts...

Page 11: ...e the indicator is pointing downwards Note Once the weather tendency indicator has registered a change in air pressure it will remain permanently visualized on the LCD OUTDOOR TEMPERATURE TRANSMITTER...

Page 12: ...HANGING THE DISPLAY UNIT DATE ALARM TIME AND SECONDS There are three possibe display units to view the date alarm time and seconds Default unit Date To change the display unit 1 Press the key The disp...

Page 13: ...all clock below the battery compartment Once the foldout table stand is extended place the weather wall clock in an appropriate location WALL MOUNTING 1 Using a straightedge horizontally space at 70 m...

Page 14: ...on any metal surfaces or in any position where a large metal or highly polished surface is in the immediate vicinity garage doors double glazing etc Before securing in place please ensure that the Te...

Page 15: ...Temperature checking interval Indoor every 20 seconds Outdoor every 4 seconds Transmission distance maximum 100 meters in open field depending upon surrounding structures mounting location and possibl...

Page 16: ...e User manual is highly recommended for the benefit of the user The manufacturer and supplier cannot accept any responsibility for any incorrect readings and any consequences that occur should an inac...

Reviews: