background image

Model: 308A-146                       www.lacrossetechnology.com/support                                  Page | 9  
 

3.


Set the second outdoor sensor to Channel 2 and insert 2-AA batteries. 

4.


Set the third outdoor sensor to Channel 3 and insert 2-AA batteries. 

5.


Press and hold 

CH

 button on the forecast station until a beep sounds. The forecast 

station will search for all outdoor sensors. 

6.


Press the 

TX

 button on the back of each outdoor sensor to transmit RF signal.  

7.


When RF connection is established, the respective temperature & humidity for each of 

the selected channels will appear on the main unit.  

8.


Allow the sensors and the forecast station to stay 5-10 feet apart for 15 minutes to 

establish a solid connection. 

9.


Install the battery covers on each sensor. 

10.After 15 minutes place the outdoor sensors in appropriate locations (see “position the 

outdoor sensor”). 

Press and release the 

CH

 button to view channel 1, 2 or 3 on the forecast station when 

multiple sensors are used. 

Note

: You cannot change channels if only one sensor is connected. 


Channel Scroll (AUTO) 


Press and release the 

CH

 button until the word AUTO appears in the outdoor data 

area. The forecast station will automatically rotate through the channels for all 
connected sensors.   


Press and release the 

CH

 button to lock the forecast station into one channel. Then view 

channels individually with a press of the 

CH

 button. 


MIN/MAX (View, Reset) 


This forecast station features daily minimum and maximum temperatures each day 

starting at midnight (12:00 AM). The forecast station automatically resets the 
min/max temperatures at midnight (12:00 AM).  


View MIN/MAX 


MAX: From a normal display press and release the MIN/MAX button once to view 

maximum temperature and humidity values for Indoor and Outdoor data. The word 
MAX will appear next to the indoor and outdoor temperature. 


MIN: From a normal display press and release the MIN/MAX button twice to view 
minimum temperature and humidity values for Indoor or Outdoor data. The word MIN 

will appear next to the indoor and outdoor temperature.  


Reset MIN/MAX 


Hold the MIN/MAX button for 5 seconds to manually reset all indoor and outdoor 
minimum and maximum values. (The forecast station automatically resets the min/max 

temperatures at midnight: 12:00 AM). 
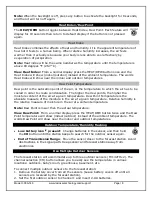
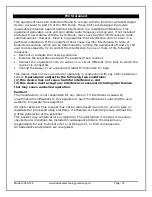
 

Low Battery icon 


Low battery icon for  forecast station or outdoor sensor. 


If the icon is displayed in the Outdoor Temperature section, replace batteries in 

the outdoor sensor. 


If the icon is displayed in the Indoor Temperature section, replace batteries in 

the forecast station. 


Low 

Battery 

Icon 

Summary of Contents for 308A-146

Page 1: ...door readings Temperature Humidity Heat Index Dew Point MIN MAX Snooze Light button Forecast icons Sunny Partly Sunny Cloudy Rainy Stormy All icons are shown in this illustration Indoor readings Tempe...

Page 2: ...plug the AC adapter and remove batteries from the forecast station sensor and press any button 20 times After 15 minutes return to Step 1 above Table of Contents WIRELESS COLOR FORECAST STATION 1 Quic...

Page 3: ...ging barometric pressure Measure in out temperature and humidity with daily min max records all on one easy to read color display with adjustable brightness Features 12 24 hour time with snooze alarm...

Page 4: ...ht will illuminate for 8 seconds when using only battery power with a press release of the SNOOZE LIGHT button STEP 3 Ensure that the sensor is within 10 feet of the forecast station Remove battery co...

Page 5: ...Time Display Press to switch from Fahrenheit to Celsius temperature readings MIN MAX Button Default Time Display Press once to view MAX values then MIN values Hold for 2 seconds to reset all MIN MAX v...

Page 6: ...me Note When in 12 hour format AM or PM will show in front of the hour 1 12H will flash 2 Press and release the or C F button to select 24 hour time 3 Confirm with the SET button and move to Set Time...

Page 7: ...m time 2 Press and release the ALARM button to deactivate the Alarm 3 The bell icon will disappear indicating the alarm is no longer active Snooze 1 When the alarm sounds press the SNOOZE LIGHT button...

Page 8: ...moisture content of the air at a given temperature Dew Point Temperature is the absolute measure of the moisture in the air at a given temperature Relative humidity is the relative measure of moistur...

Page 9: ...ugh the channels for all connected sensors Press and release the CH button to lock the forecast station into one channel Then view channels individually with a press of the CH button MIN MAX View Rese...

Page 10: ...s preferred The maximum wireless transmission range to the forecast station is over 300 feet 91 meters in open air not including walls or floors Be sure the outdoor sensor is mounted vertically Care a...

Page 11: ...or primary power TX142THv2 Outdoor Sensor Battery life is over 24 months when using reputable battery brands for both Alkaline and Lithium batteries Dimensions Forecast Station 6 3 L x 2 75 W x 4 25 H...

Page 12: ...equipment into an outlet on a circuit different from that to which the receiver is connected Consult the dealer or an experienced radio TV technician for help This device must not be co located or ope...

Reviews: