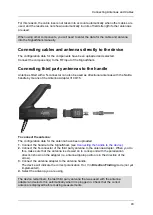
Connecting Antennas and Cables
41
electrical properties of the high quality coaxial cable could otherwise be affected by
torsion forces. If the nut seems difficult to do up, undo it and start again. About 4 turns are
needed to make a secure connection.
To unplug the connectors:
1.
Unscrew the coupling nut from the N-connector.
2.
Pull the control cable plug back using the ridged top of the plug until the lock clicks open.
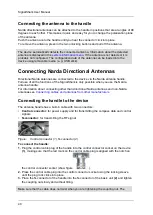
Connecting the antenna to the handle
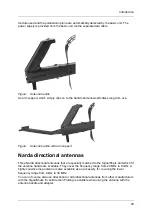
Narda directional antennas can be attached to the handle in positions that are at angles of 90
degrees to each other. This makes it quick and easy for you to change the polarization plane
of the antenna.
Push the antenna onto the handle until you hear the connector click into place.
To remove the antenna, press in the two unlocking buttons and pull off the antenna.
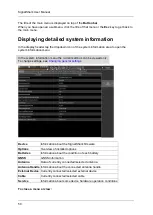
The device automatically detects the connected antenna. Information about the detected
antenna is displayed in the
. If the antenna is not detected, it is
probably not configured. The configuration data of the antenna can be loaded into the
device using removable media (e. g. USB stick).
Connecting non-directional Narda antennas
You can use other antennas from Narda instead of the directional antennas, for example if
you want to make omnidirectional measurements. These antennas can either be attached
directly to the instrument or connected to it using a Narda cable.
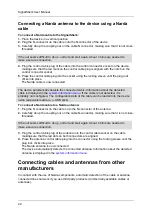
Connecting a Narda antenna directly to the device
1.
Place the Basic Unit in a vertical position.
2.
Plug the N-connector plug of the antenna onto the N-connector socket of the Basic Unit.
3.
Carefully do up the coupling nut on the antenna N-connector, making sure that it is not
cross-threaded.
If the nut seems difficult to do up, undo it and start again. About four turns are needed to
make a secure connection.
4.
Plug the control cable plug of the antenna cable into the control connector socket on the
device, making sure that the red mark on the control cable plug is aligned with the notch
on the control connector socket.
5.
Press the control cable plug into the control connector socket using the locking sleeve
until the plug lock clicks into place.
The Narda antenna is now connected.
The device automatically detects the connected antenna. Information about the detected
antenna is displayed in the
. If the antenna is not detected, it is
probably not configured. The configuration data of the antenna can be loaded into the
device using removable media (e. g. USB stick).
Summary of Contents for Narda SignalShark
Page 1: ...User Manual Version 2019 07 ...
Page 2: ......
Page 14: ......
Page 15: ...15 Online Help Version 2019 07 ...
Page 16: ......
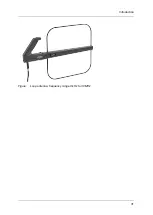
Page 31: ...Introduction 31 Figure Loop antenna frequency range 9 kHz to 30 MHz ...
Page 32: ......
Page 38: ......
Page 44: ......
Page 60: ......
Page 66: ......
Page 74: ......
Page 88: ......
Page 104: ......
Page 118: ......
Page 132: ......
Page 158: ......
Page 198: ......
Page 204: ......
Page 214: ......
Page 226: ......

