background image

99

 GENERATOR MAINTENANCE

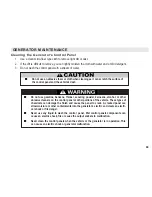
Cleaning the Generator’s Control Panel

1. Use a clean micro-fiber type cloth to remove light dirt or dust.
2. If the dirt is difficult to remove, you can lightly moisten the cloth with water and a mild detergent.
3. Do not wash the control panel with a stream of water.

Do not use gasoline, benzene, thinner, scouring powder, kerosene, alcohol, or other

abrasive cleaners on the control panel or other portions of the vehicle. These types of

chemicals can damage the finish and cause the panel to crack. A cracked panel can

allow moisture or other containments into the generator’s electric and create an electri-

cal shock or fire danger.

Never use any liquid to wash the control  panel. Wet control panels components can

cause an electric shock, fire or cause the output sockets to malfunction.

Never clean the control panels when the vehicle or the generator is in operation. This

can cause an electric shock or generator malfunction.

Do not use an abrasive foam or cloth when cleaning as it can scratch the surface of

the control panel and the vehicle’s dash.

Summary of Contents for UXV500iG

Page 1: ...Do not remove this Owner s Manual from the vehicle Read this manual carefully before operating the vehicle as it contains important safety information...

Page 2: ...in severe injury or death to the operator a passenger a bystander or a person inspecting or repairing the vehicle A CAUTION symbol indicates that special precautions must be taken to avoid damaging t...

Page 3: ...Belts 64 Head Cushions 64 Tailgate Cargo Bed 65 Hood 66 Ignition Switch 66 Light Switch 67 2WD 4WD Knob 67 Generator Emergency Button 68 Accessory Power Outlet 68 Multifunction Meter Speedometer 69 7...

Page 4: ...BE AFFECTED Failure to follow instructions associated with a WARNING symbol could result in severe injury or death to the operator a passenger a bystander or another person inspecting or repairing the...

Page 5: ...ed KYMCO dealers have the knowledge and resources to provide you with the best service possible THIS OWNER S MANUAL PROTECT YOUR SPORT Being able to use and enjoy your KYMCO Side by Side vehicle requi...

Page 6: ...ls be fore attempting larger hills Never operate this vehicle on a public road even a dirt or gravel road as you may not be able to avoid a collision with another vehicle Avoid paved surfaces with you...

Page 7: ...oards Remember that wet brakes may reduce stopping capability Test your brakes after leaving wa ter If necessary apply them lightly several times to let friction dry out the pads Always use the size a...

Page 8: ...and submit warranty claims Always provide your vehicle s year model VIN and ESN when contacting an authorized KYMCO dealer for assistance Warranty repairs will be declined by KYMCO if the VIN or ESN...

Page 9: ...LS 1 3 6 Right Tail Brake Light 7 Bumper 8 Battery 9 Canopy AT Grab Handles AK Steering Wheel AL Seat Belts AM Cargo Bed AN Generator AO Headlights 1 1 1 1 1 2 2 2 2 2 3 3 3 3 3 4 4 4 4 4 5 5 5 5 5 6...

Page 10: ...differ slightly in appearance from the images in this manual AP AP AP AP AP AQ AQ AQ AQ AQ AR AR AR AR AR AS AS AS AS AS BT BT BT BT BT BK BK BK BK BK BL BL BL BL BL BM BM BM BM BM BN BN BN BN BN BO...

Page 11: ...ND CONTROLS 3 3 BL BL BL BL BL BM BM BM BM BM BN BN BN BN BN BO BO BO BO BO BP BP BP BP BP BQ BQ BQ BQ BQ BR BR BR BR BR BS BS BS BS BS CT CT CT CT CT BN Generator Emergency Stop Button BO Multifuncti...

Page 12: ...ortant safety informa tion Anyone who drives the vehicle should read and un derstand this information before operation The labels should be considered permanent parts of the vehicle If a label comes o...

Page 13: ...11 INDICATES A POTENTIAL HAZARD THAT COULD RESULT IN SERIOUS INJURY OR DEATH WARNING LABELS On the vehicle s dash 2 2 3 3 3 3 3 4 4 4 4 4...

Page 14: ...12 INDICATES A POTENTIAL HAZARD THAT COULD RESULT IN SERIOUS INJURY OR DEATH WARNING LABELS On the vehicle s chassis 1 3 5 5 5 5 5 6 6 6 6 6 4 4 4 4 4 4 4 4 4 4 5 5 5 5 5 6 6 6 6 6...

Page 15: ...13 INDICATES A POTENTIAL HAZARD THAT COULD RESULT IN SERIOUS INJURY OR DEATH WARNING LABELS On the vehicle s chassis 2 3 7 7 7 7 7 7 7 7 7 7 8 8 8 8 8 9 9 9 9 9 8 8 8 8 8 9 9 9 9 9...

Page 16: ...DICATES A POTENTIAL HAZARD THAT COULD RESULT IN SERIOUS INJURY OR DEATH WARNING LABELS On the vehicle s chassis 3 3 AT AT AT AT AT AK AK AK AK AK AT AT AT AT AT AK AK AK AK AK AL AL AL AL AL AL AL AL...

Page 17: ...15 INDICATES A POTENTIAL HAZARD THAT COULD RESULT IN SERIOUS INJURY OR DEATH 2 EPA HANGTAG 1 EPA LABEL EPA LABEL HANGTAG...

Page 18: ...ual POTENTIAL HAZARD Allowing anyone under 16 years of age to operate this vehicle WHAT CAN HAPPEN Use of a Side by Side vehicle by children can lead to severe injury or death Children under 16 years...

Page 19: ...ENTIAL HAZARD Operating your UTV on public streets roads or highways WHAT CAN HAPPEN You can collide with another vehicle HOW TO AVOID THIS HAZARD Never operate your UXV500iG on a public street road h...

Page 20: ...under the influence of alcohol or drugs POTENTIAL HAZARD Operating your UTV at excessive speeds WHAT CAN HAPPEN Operating your UXV500iG at excessive speeds increases your chances of losing control of...

Page 21: ...EN Driving your UXV500iG on rough slippery or loose terrain can cause loss of traction or control which could result in an accident including a rollover HOW TO AVOID THIS HAZARD Do not drive your UXV5...

Page 22: ...HAZARD Operating your UTV on steep hills WHAT CAN HAPPEN This type of vehicle can overturn more easily on steep hills than on level surfaces or small hills HOW TO AVOID THE HAZARD Never operate your U...

Page 23: ...erate suddenly as the vehicle might flip over backwards Never go over the top of any hill at high speed as an obstacle a sharp drop or another vehicle or person might be on the other side of the hill...

Page 24: ...scribed in this Owner s Manual Avoid hills with slippery or loose surfaces WARNINGS POTENTIAL HAZARD Stalling rolling backwards or improperly exiting the vehicle while climbing a hill with your UTV WH...

Page 25: ...iving your UTV over obstacles WHAT CAN HAPPEN Improperly driving over obstacles may cause you to lose control of your UXV500iG or cause a collision Aloss of control or a collision may cause the vehicl...

Page 26: ...UTV with improper tires or with tires that have improper or uneven tire pressure WHAT CAN HAPPEN Using the wrong tires on your UXV500iG or driving your vehicle with improper or uneven tire inflation m...

Page 27: ...he installation instructions Never alter the hand and foot controls of this vehicle If you have questions about personalizing your UXV500iG consult an authorized KYMCO dealer POTENTIAL HAZARD Overload...

Page 28: ...le and may prevent the pain of injury and the inconvenience of dam age to your UTV It is also important to take into account specific climate and weather conditions where you will be riding Wear a lin...

Page 29: ...perly maintained so you can avoid equipment failure or a hazardous situ ation You need to check the following items on your UXV500iG before every ride 1 Brakes 2 Throttle accelerator pedal 3 Tires and...

Page 30: ...pedal 2 Parking brake Check 1 Free smooth range of motion 2 The pedal returns after it is released B B B B B Acceler Acceler Acceler Acceler Accelera a a a ator tor tor tor tor Your UXV500iG s accele...

Page 31: ...leaks around the vehicle Watch the engine temperature indicator on the dash to ensure the engine coolant level is adequate Check 1 Gas 2 Oil 3 Fluid leaks CHASSIS CHASSIS CHASSIS CHASSIS CHASSIS Gras...

Page 32: ...on Put your I D in your pocket before you ride Without it you are anonymous MAPS GPS MAPS GPS MAPS GPS MAPS GPS MAPS GPS Global Positioning System Maps may be unnecessary when you are familiar with th...

Page 33: ...e are your basic maneuvers Entering the Vehicle Starting the Engine Starting a Cold Engine Braking Stopping Shifting Parking ENTERING THE VEHICLE Use care when entering your UXV500iG While your UXV500...

Page 34: ...activate the starter motor Do not hold the switch in the START position for more than eight seconds Allow 30 seconds between starting attempts to allow the starting motor to cool Continuous starting a...

Page 35: ...and premature brake pad wear which can cause unexpected loss of braking ability Use only KYMCO approved brake fluid Never substitute or mix different types or grades of brake fluid as unex pectedloss...

Page 36: ...safely drive your UXV500iG 1 Sit in the driver s seat and fasten the seat belt 2 Start the engine and allow it to warm up NOTE Vehicle speed is controlled by the amount of throttle applied to the eng...

Page 37: ...n 2 Slowly rotate the steering wheel into the direction of the turn 3 Gradually increase your speed as you come out of the turn If your UTV s tires are coming off the ground during a turn you are driv...

Page 38: ...on into neutral 2 Shut off the vehicle s engine 3 Exit the vehicle on the uphill side 4 If you are to the left of the vehicle rotate the steer ing wheel all the way to the left 5 Release the parking b...

Page 39: ...e obstacle avoidance swerve is complete and you have regained full control of your vehicle RIDING DOWNHILL Success in driving downhill depends on how familiar and skilled you are with using your vehic...

Page 40: ...ater Follow these suggestions on controlling a skid or slide 1 Turn your steering wheel into the direction of the slide 2 Avoid using the brakes until you are out of the skid STALLING ON A HILL CROSSI...

Page 41: ...d be avoided However if you must cross a road follow these guidelines 1 Before crossing stop completely on the shoulder of the road 2 Check both directions for oncoming traffic 3 Do not cross near a b...

Page 42: ...tention to how your UTV responds to steering and braking on the type of terrain you will encounter on your trail ride NOTE After riding through water mud snow or slush it is important to dry the brake...

Page 43: ...it has a major problem with the brakes tires or engine 1 Never 2 Sometimes 3 Often 1 Never 2 Sometimes 3 Often 7 Do you thrive on the adrenaline rush you get from speeding and dangerous situations 8...

Page 44: ...an be constructed and excavations dug in a short period of time Weather climate and development take their toll as well as erosion and other changes that can affect your UTV s ability to drive smoothl...

Page 45: ...self your passenger your UTV and the environment Outsloped trails trails that slant to allow rain to run off make driving on trails more challenging To drive on outsloped trails keep the UTV steered t...

Page 46: ...s motorcycles bicycles or large motor vehicles on roads and trails Respect the presence of automobiles and other vehicles if you re crossing roads or riding in public areas Take steps with your riding...

Page 47: ...gs identified in the chart on the following page So if you your passen ger and your load weighs over 771 lb 350 kg leave some of that extra cargo at home The combined weight limit including you your p...

Page 48: ...go or pulling a trailer and allow greater distances for braking Always follow the instructions and recommendations in this Owner s Manual for carrying cargo or pulling a trailer NOTE Use extra caution...

Page 49: ...need to take medications before you plan to drive your UTV Illegal drugs not only inhibit your judgment and ability to drive your UTV but there can be severe legal consequences if you are con fronted...

Page 50: ...u can legally drive in the proposed area Be a good off road citizen Illegal or irresponsible driving will cause authorities and landowners to close the area GROUP BEHAVIOR It is a proven psychological...

Page 51: ...a formal training course that would have educated them about safe UTV operation As the vehicle owner it is your respon sibility to keep uneducated guests especially children or those who lack an auto...

Page 52: ...ard generator so it can produce electricity KYMCO has engineered a special control system to switch between these functions Because of the electrical output of the generator and its control system you...

Page 53: ...o wash or clean the generator control panel or its electrical output sockets outlets This could result in fire or an electrical shock Never disassemble modify or attempt to repair the vehicle or its g...

Page 54: ...ngine or generator components could in jure you or others 8 Stop the engine and generator immediately if the generator or its electrical system is operating abnor mally or malfunctions The electrical...

Page 55: ...s 7 During operation the generator can create electronic interference Keep the vehicle several meters away from radio transmitters video facilities or other telecommunication equipment An operating ge...

Page 56: ...produce accu rate and safe outputs 3 Always connect the ground wire to a good ground conducting fixture Double check the connection be fore starting the generator A poor ground connection can cause a...

Page 57: ...generator again 9 If a storm occurs where there is thunder and lighting present stop using the generator immediately 13 During operation the generator produces a strong magnetic field Long term use o...

Page 58: ...use a cord that has damage to its outer sheath inner insulation or wires If the male or female plugs at the ends of the cord are loose or damaged replace the cord immediately 5 If the male plug of the...

Page 59: ...derstand the entire Owner s Manual before operating your KYMCO UTV to ensure safe and proper use Always operate your UTV within your level of skill and current terrain conditions At the time of public...

Page 60: ...1296 Ib 588 kg Suspension Travel 190 mm 7 5 in Wheelbase 1910 mm 75 2in Tire Size Front 25 x 8 12 Tire Size Rear 25 x 10 12 Tire Inflation Pressure F 10 0 psi 0 7 kg cm2 R 14 0 psi 0 98 kg cm2 FLUIDS...

Page 61: ...rol fuse 10A Spare fuses 30A 15A 10A EXCLUDES GENERATOR SYSTEM Specif Specif Specif Specif Specifica ica ica ica ications subject to c tions subject to c tions subject to c tions subject to c tions su...

Page 62: ...to its original position when foot pressure is released NOTE Always check to make sure the accelerator pedal returns normally before starting the engine Make sure there is adequate accelerator pedal...

Page 63: ...engage the parking brake pull the handle 3 outward until resis tance is felt indicating that locking pressure is being applied to the brakes Use the following procedure to verify that the parking bra...

Page 64: ...to the UTV s wheels When the dif ferential lock is engaged steering effort will be increased To lock the differential in the 4WD mode press in and rotate the 2WD 4WD Differential Lock Knob to the 4WD...

Page 65: ...d gasoline to the vehicle if the engine is running Stop the engine and turn off the ignition before fueling Gasoline is highly flammable and should be kept away from sparks flame and other ignition so...

Page 66: ...icle is in motion The shoulder portion of the seat belt is designed to cross diagonally on the driver s or passenger s torso Failure to use the seat belt or to use it properly may cause the driver or...

Page 67: ...nged on its bottom edge To close the tailgate lift it back up and secure both of the latches Tilting the Cargo Bed Your UXV500iG s cargo bed can tilt to aid in the removal of loose cargo such as grave...

Page 68: ...fender extensions Set the fastener by pressing the center pin down so it is flush with the fastener s button head 4 4 4 4 4 3 3 3 3 3 SWITCHES Ignition Switch The UXV500iG ignition switch is a three p...

Page 69: ...igh beam of the headlights are ON 4WD 6 6 6 6 6 In the position the differen tial will select 4WD mode all wheels are driven The icon 4WD will display on the LCD speedometer 7 2WD 4WD Knob The UXV500i...

Page 70: ...of this circuit is 15A 180 W It would be ac ceptable to power items such as a winch control relay however a winch motor would exceed the circuit s capac ity Follow accessory wiring instructions expli...

Page 71: ...r Buttons The Liquid Crystal Display LCD portion of the multifunction meter provides the driver with information such as vehicle speed total miles operated trip mileage fuel level time and drive mode...

Page 72: ...ometer MPH or Km H Display To toggle the multifunction meter s speed display between MPH and Km H press down the MODE button 1 for two seconds This will shift the display 2 between MPH or Km H Tripmet...

Page 73: ...nge the HOURS setting Press the SET button to change the MINUTES setting FEATURES CONTROLS Setting the Clock To set the clock s time cycle the odometer tripmeter until the odom eter mileage is display...

Page 74: ...tus Light 7 Circuit Breaker 110V 8 Circuit Breaker 220V 9 Output Socket 220V AT Main Generator Status Light AK Generator Warning Light AL Main Generator Switch keyed AM GFCI Ground Fault Main Switch A...

Page 75: ...enerator Rating Label AL Generator Use Warning Label 1 1 1 1 1 2 2 2 2 2 3 3 3 3 3 4 4 4 4 4 5 5 5 5 5 6 6 6 6 6 7 7 7 7 7 8 8 8 8 8 9 9 9 9 9 AT AT AT AT AT KWANG YANG MOTOR CO LTD 35 WAN HSING ST SA...

Page 76: ...5 Press the green button labeled with the letter G to engage the generator NOTE The generator will not engage until the engine has reached the proper operating temperature The Generator Systems Alarm...

Page 77: ...this procedure IF THE FOLLOWING SITUATIONS OCCUR RESTART THE GENERATOR Sudden engine stall Erratic engine speed The safety switch cannot be reset IN AN EMERGENCY SITUATION 1 Press the Emergency Button...

Page 78: ...tion Select the proper voltage via the Voltage Monitor Switch and then verify the output voltage via the digital Voltage Meter before connecting the electrical device Flip the GFCI Switch to the ON po...

Page 79: ...wner s guide of the electrical device you intended to use A damaged or corroded plug inserted into a output socket could result in a poor connection A poor connection could create heat that can damage...

Page 80: ...gine shuts off in G MODE To reset Turn the Generator and the Main Ignition keyed switches to OFF Turn the Main Ignition Switch ON and restart the engine Use the Generator Switch and re engage the G MO...

Page 81: ...seeking assistance from your KYMCO dealer please prepare answers to the following questions You should prepare notes so you do not forget to share something valuable with your dealer s service depart...

Page 82: ...or the generator clutch mechanism are faulty Engine coolanttemperature istoo high YES 0x0198 During G mode operation the engine temperature is higher than during V mode operation The engine hasa probl...

Page 83: ...81 PERIODIC MAINTENANCE SCHEDULE Continued on following page SERVICE EVERY 100 HOURS REGARDLESS OF MILEAGE OR TIME SERVICE EVERY 100 HOURS REGARDLESS OF MILEAGE OR TIME...

Page 84: ...82 PERIODIC MAINTENANCE SCHEDULE Continued on following page...

Page 85: ...n components to mate together so they will operate smoothly in the future Applying some higher engine RPM s and other loads during the break in period is not detrimental when done in moderation Do not...

Page 86: ...elerate to 30 mph then depress the brake pedal to decelerate to 0 5 mph Repeat procedure five times After the completion of the break in period your UTV s engine oil and oil filter should be changed O...

Page 87: ...recommended fuel to use in your UTV is regular unleaded gasoline with a 87 minimum octane rating In many areas oxygen ates either ethanol or MTBE are added to the gasoline Oxygen ated fuels containin...

Page 88: ...be above the L mark but not higher than the H mark Add oil through the filler cap 2 as required 1 1 1 1 1 2 2 2 2 2 Engine Oil Oil Filter Replacement To replace the engine oil and oil filter and clean...

Page 89: ...n it securely 9 Add the appropriate amount of engine oil 5 5 5 5 5 OIL QUANTITY Without oil filter 3 18 US qt 3 0 L With oil filter change 3 82 US qt 3 6 L NOTE The UTV should be parked on level groun...

Page 90: ...tank is filled with cold gasoline and the UTV is then moved to a warm area Do not overfill the fuel tank Front Differential and Rear Drive Gear Lubricant Inspecting Changing Inspect and change the gea...

Page 91: ...lling the spark plug measure the elec trode gap with a feeler gauge and adjust to specification When installing the spark plug always clean the gasket surface and use a new spark plug if the sealing g...

Page 92: ...he spark arrestor s screen of carbon by following this procedure 1 Remove the three retaining screws 6 and pull the spark arrestor from the muffler body 2 Use a wire brush to clean the carbon from the...

Page 93: ...soon as pos sible to determine if it is in good condition NOTE Dirt and debris must be cleaned from the radiator s fins regularly to ensure proper engine oil cooling Operating your UTV with high engin...

Page 94: ...void brake fluid contact with skin or eyes In case of con tact flush the affected area thoroughly with water and call a doctor if your eyes were affected SHOCK ABSORBERS Each shock absorber on your UT...

Page 95: ...2 2 WRONG OK 3 Tighten the wheel nuts in a crisis cross pattern 3 4 Torque the nuts to the specified torque Wheel Nut torque 40 lb ft 55 N m 4 4 4 4 4 NOTE The arrow mark 4 4 4 4 4 on the tire must p...

Page 96: ...aler The use of worn out tires on your UTV can be dangerous and can increase the risk of an accident When breaking the tire bead loose from the wheel be ex tremely careful not to damage the inner whee...

Page 97: ...he ignition switch and open the hood 2 Remove the battery compartment cover 3 Disconnect the battery cables Disconnect the negative cable 1 first then disconnect the positive cable 2 4 Remove the batt...

Page 98: ...s 11 Connect the battery cables positive cable first reattach the battery compartment cover and close the hood Before installing the battery make sure the UTV s igni tion switch is in the OFF position...

Page 99: ...p 4 Pull the old fuse from the fuse holder 5 Push the new fuse into the fuse holder 6 Reinstall the fuse box cap 7 Reinstall the battery compartment cover and close the hood To prevent an accidental s...

Page 100: ...witch 1 1 1 1 1 Start the generator normally Do not connect any electrical devices to the power output sockets Press the yellow button and the 30A switch will automatically turn off Turn off the gener...

Page 101: ...hicle These types of chemicals can damage the finish and cause the panel to crack A cracked panel can allow moisture or other containments into the generator s electric and create an electri cal shock...

Page 102: ...cushions cover and base with a damp cloth and allow to the surfaces to dry 2 Clean your UTV thoroughly by washing dirt oil grass and other debris from the entire vehicle Allow the UTV to dry thor oug...

Page 103: ...UR UTV FOR DRIVING AFTER STORAGE 6 Inspect the brake system Verify the good condition of the brake fluid pads and the controls 7 Verify the proper operation and adjustment of all controls head lights...

Page 104: ...l laws and regulations prohibit the following acts or related actions 1 The removal or rendering inoperative by any person other than for purposes of maintenance repair or replacement of any device or...

Page 105: ...103 KYMCO USA LIMITED WARRANTY...

Page 106: ...104 EPA EMISSION WARRANTY...

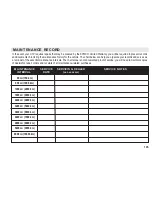
Page 107: ...serves as a reminder of the essential maintenance intervals The chart alone is not documented proof of service you will need to maintain copies of dealership repair orders and receipts of all mainten...

Page 108: ...106 OTHER MAINTENANCE RECORD DATE MILEAGE SERVICE PERFORMED NOTES...

Page 109: ...107 DATE MILEAGE SERVICE PERFORMED NOTES REPAIR OTHER SERVICE RECORD...

Page 110: ...AFETY 50 56 Generator Troubleshooting 78 80 GFCI Switch Testing 98 HANG TAGS WARNING LABELS 10 14 Head Cushions 64 Hood 66 How to Handle the UTV 35 IDENTIFICATION NUMBERS RECORD inside of back cover I...

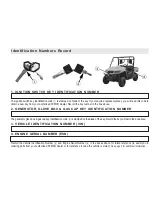
Page 111: ...above for future reference to assist you in ordering parts from your authorized KYMCO dealer or for reference in case the vehicle is stolen See page 5 for additional information Identification Numbers...

Page 112: ...5 Stan Perkins Road Spartanburg SC 29307 Telephone 864 327 4744 FAX 864 327 4745 Prepared July 2014 T200 UCA0AA A7...

Reviews: