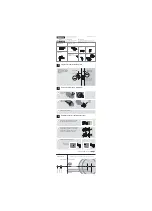
2-3/8" (60 mm)
2-3/4" (70 mm)
Backset
•
Centerline
1-
3/
8" (
3
5 mm)
1-
3/
4" (
44 mm)
2-
1/
4" (
5
7 mm)
Face of the door
Edge of the door
Fold
Additional tools
(if needed)
wood block
Installation Guide
If drilling a new door, use
the supplied template and
the complete door drilling
instructions
Parts in the box
Required tools
*Call Kwikset to order
a service kit for 2-1/4"
(57 mm) thick doors.
Latch
Strike
Screws
Keys
Knobs
SmartKey® tool
(SmartKey locks only)
Not required for all applications
2-3/8" (60 mm)
2-3/4" (70 mm)
1-3/8"–2-1/4"*
35 mm–57 mm*
2-1/8"
54 mm
1"
25 mm
Do not remove
screws!
Hold the latch in front of the door hole, with
the latch face flush against the door edge.
If the latch holes are centered in the door hole,
no adjustment is required. Proceed to step 4.
If the latch holes are NOT centered, adjust
latch. See “Latch Adjustment” (step 3C).
Latch Adjustment (only if needed)
Drilling Template
Move the pin to
extend the latch.
Template is only needed if a new hole must be drilled in the door.
62541 / 01
not centered
centered
Instructions continue on reverse
A
E
C
D
G
J
H
F
B
A
A
B
C
Twist the side
with the holes.
counter-clockwise
Pull to
separate
knobs.
Set knobs aside until step 5.
A
B
C
Prepare door and check dimensions
1
Disconnect knobs (if pre-assembled)
2
Adjust the backset of the latch (if needed)
3
Do not use harsh chemicals or
solvents to clean your lock.
Mechanical lock
Use a damp cloth to wipe away
any excess dirt or debris.
Electronic lock
Use a damp cloth on the lock’s exterior to wipe
away any excess dirt or debris. Use a dry cloth to
clean interior components.
or


