- 1 -
RMD-17W-D2
Rack Mount Dual LCD Display Drawer
Page 1: ... 1 RMD 17W D2 Rack Mount Dual LCD Display Drawer ...
Page 2: ...his manual carefully install and operate the equipment according to the manual to avoid damage Product package includes following items 1 Dual screen LCD drawer 1 AC Power Cord 1 Rack installation bracket one pair 1 USER S manual CD Please check items above If any item is missing or damaged please contact your dealer promptly 2 1 8 Meter DVI cable 2 1 8 Meter Audio cable 1 ...
Page 3: ...3 Hardware Requirement 4 1 3 1 Host Requirement 4 1 3 2 Cables 4 1 4 Product Specifications 5 1 5 LCD Specifications 5 1 6 Front View 6 1 7 Rear View 7 2 Installation 8 2 1 Rack Installation 8 2 3 Standard Installation 10 2 4 LCD OSD Menu Setup 11 3 Certificates 12 2 2 Operation 9 ...
Page 4: ...nal software or hardware 1 3 Hardware Requirement 1 3 1 Hosts Requirement 1 DVI VGA graphic card Note the max resolution of the integrated LCD display is 1920x1200 Make sure the resolution of any connected computer does note exceed this resolution 1 3 2 Cables 1 2x DB 15 VGA cable male to male 3 1x Audio Cable 2 2x DVI D Cable male to male With a graphic card screen can be cloned or extended to ea...
Page 5: ... female connector Local Control Terminal Power supply Housing Metal housing Weight 12 5Kg Dimension W x H x D 100 240V AC 50 60Hz via IEC Type power cord 24 pin DVI D female connector Video resolution native 1920 x 1080 support up to 1920 x 1200 Master DVI D VGA HD 15 female connector Local Control Terminal 24 pin DVI D female connector Slave Audio 3 5mm stereo jack ...
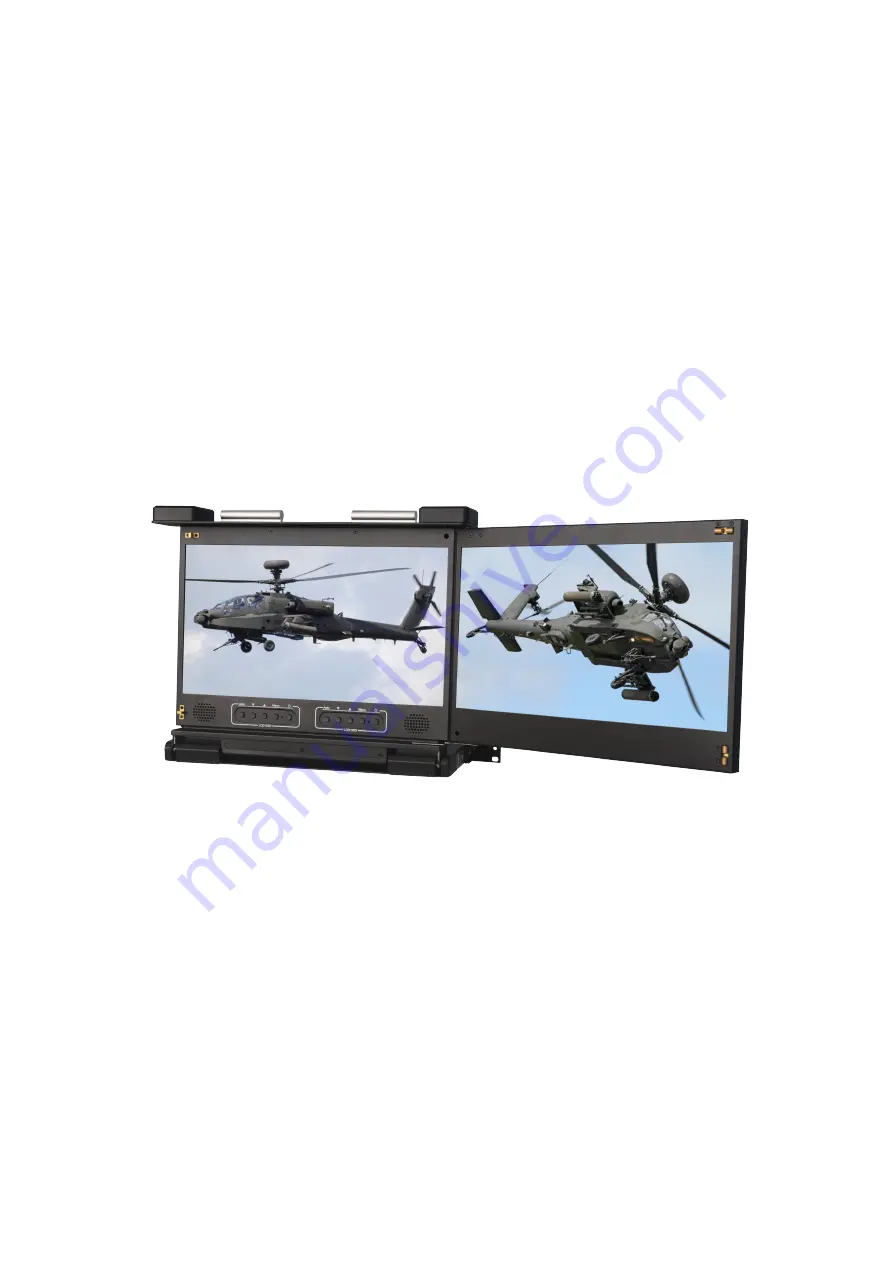
Page 6: ... Function Description 2 LCD display 2 4 3 1 4 LCD OSD button 3 Mounting bracket Install into rack cabinet LCD button to control Screen Display position and image setting 1 Handle to adjust screen tilt lock release rail sliding ...
Page 7: ... AC Power port Standard IEC Type AC Inlet 2 Power Switch Rock switch turn on off equipment main power 3 Audio port For audio function 4 VGA port Connect to server or KVM 5 DVI port Connect to server or KVM 1 2 3 4 5 4 No Component Function Description 5 ...
Page 8: ...et L R Rear mounting bracket screw M6 4pcs Step 1 Back View Step 2 Front View Insert the left and right front mounting brackets into rear mounting bracket screw M6 4pcs Slide KVM into mounting bracket Step 3 Front View Screw M4 2pcs at Point B Step 4 Front View Screw M4 4pcs at Point A ...
Page 9: ... out Use locker D to stable the rail Step 2 Lift up LCD panels Step 3 Hold Point F to open the right panel Step 4 9 Retractable tray could be pulled out when needed Step 3 Step 5 Based on step 4 3 2 to put away LCD panels Unlock locker D Use handle C to lock into cabinet ...
Page 10: ... standard installation Please Shutdown the Power of Equipment Needs to be Connected Please Pay Attention to Earthing of Equipment The standard installation is completed and LCD drawer can be powered on Then power on connected hosts Independent Extend Clone Demonstration of Different Display Mode ...
Page 11: ...unctions POWER Turn on or off the LCD Display MENU Activate OSD menu select a menu and press MENU key to confirm the selection and enter the submenu Press this key to increase setting or scroll up the menu bar Press this key to Decrease setting or scroll down the menu bar AUTO OSD Control Operation Main Menu press the auto key to select video source ...
Page 12: ...ertification Please observe following two conditions in operation that 1 The equipment will not generate any harmful interruption 2 If the equipment is interrupted it may cause unnecessary operations CE This equipment complies with regulations of EN55022 CLASS B RoHS The whole package including products packaging materials and documents meet RoHS equipments ...