


50 | kvm-tec
kvm-tec | 51
4. Network SettiNgS
4. Network SettiNgS
4.1 ACCESS ThE NETWoRK SETTINGS MENU (MASTER VIEW
AND NETWoRK MoDE)
the
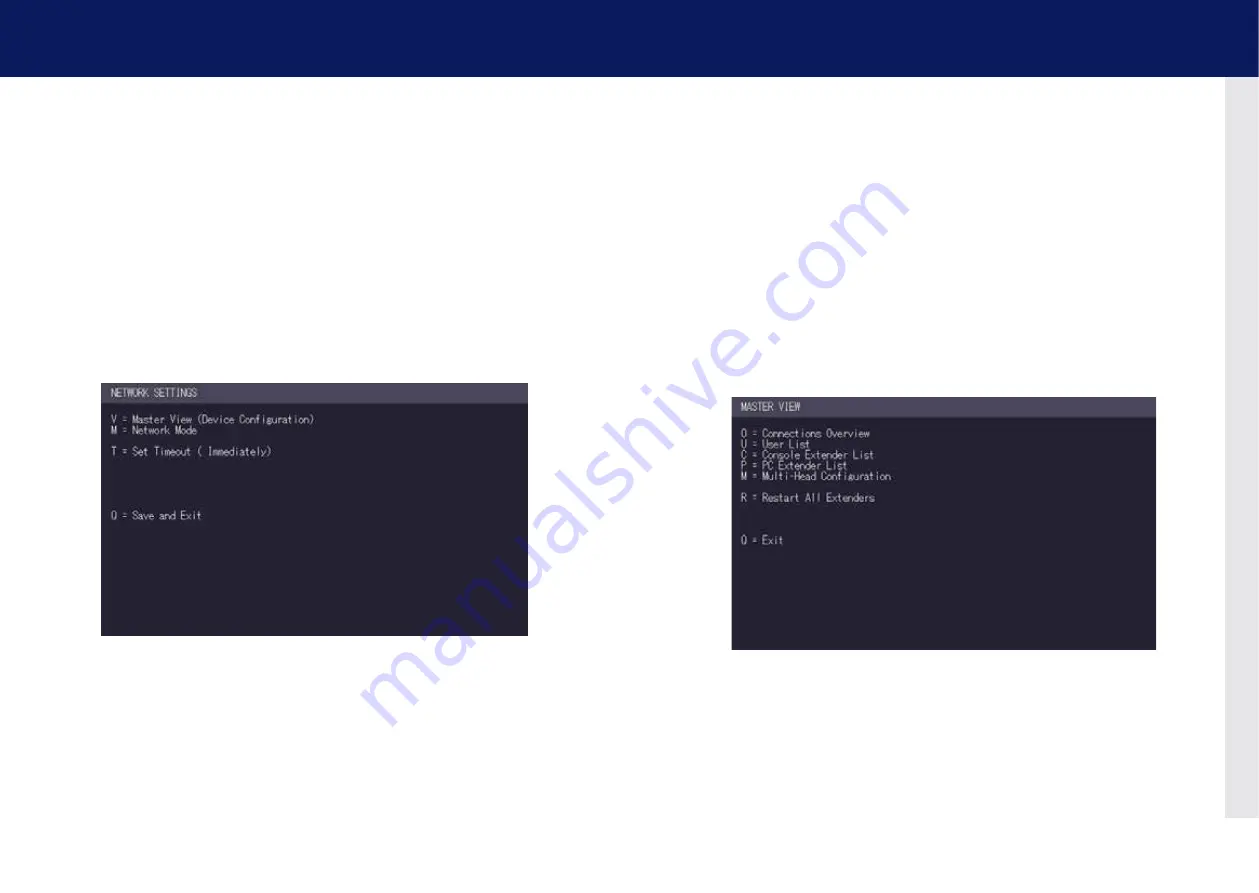
Network Settings
menu includes the preferences and settings for the Switching Option.
Note: this menu is only available when the Switching Option has been unlocked (see chapter
„How to unlock an Option“).
To access the Network Settings menu (Master View and Network Mode):
1. Make sure the
main menu
is open (see chapter „How to access the main menu“)
2. Press the
W
key. the
Enter User/Password
window opens.
kvm-tec | 50
4. NETWORK SETTINGS
3. Log in with your user name and password. The
Network Setting
menu opens. note: in
order to prevent unauthorised access to the Network Settings, this option is protected
by a user/password combination. Access is only allowed for users with administrator rights.
The factory settings provide an administrator user with User: admin and Password: admin.
The Master View option allows the administrator to view, add, edit or remove user,
console and computer information.
Press the
V
key to access the Master View menu.
• The Network Mode allows to define how you want the network system to operate.
each of the modes available may individually be activated or deactivated by pressing
the appropriate key. You may have more than one selected depending on their
function. Some modes require others, and others are incompatible with each other,
but the system will automatically recognise this for you. Press the
M
key to access the
Network Mode menu.
Summary of Contents for Masterline MVX2
Page 40: ...78 kvm tec 10 Notes...