


6 | Function description
Working with the HR 600/2 unit
6.5.2.4.6 Entering information into the [Image and document] tab
You can store further information for your profile such as working instructions,
documents or pictures. All information can be saved in the profile.
ü
To enter information:
a) Enable the [Profiles] tab in the [Image and document] window.
ð
The [Image and document] window is displayed.
Show process instructions
Library
Soldering
Placement
Profile library
Archive
Save target position
Actual parameters
Data table
System settings
System info
X-Axis
Y-Axis
Z-Axis
Angle of rotation
Profile parameters
Value
Parameters
Profile
Document name
Tracking ID
Profile ID
Recording date
User
Profile printout
Bottom left
Board
Profile
Component
Sensor
Automation
Head position
Profile library
Actual parameters
Search for profiles
Show template profiles
Add
Delete
Search for duplicates
Overwrite
Reset calibration value
Activate
Profile parameters
Search term
Desoldering parameters
Administrator
Pin 1
Online-HR 600
Profiles
Image comment
Search term
Profile documents
Add/change document
Common
settings
Profile settings
Configuration
Placemen
t
Image and
document
Show actual document
Add/change image
Snapshot
Profile name
Board
Component Automation Sensor
Adaptor (head)
Adaptor (head)
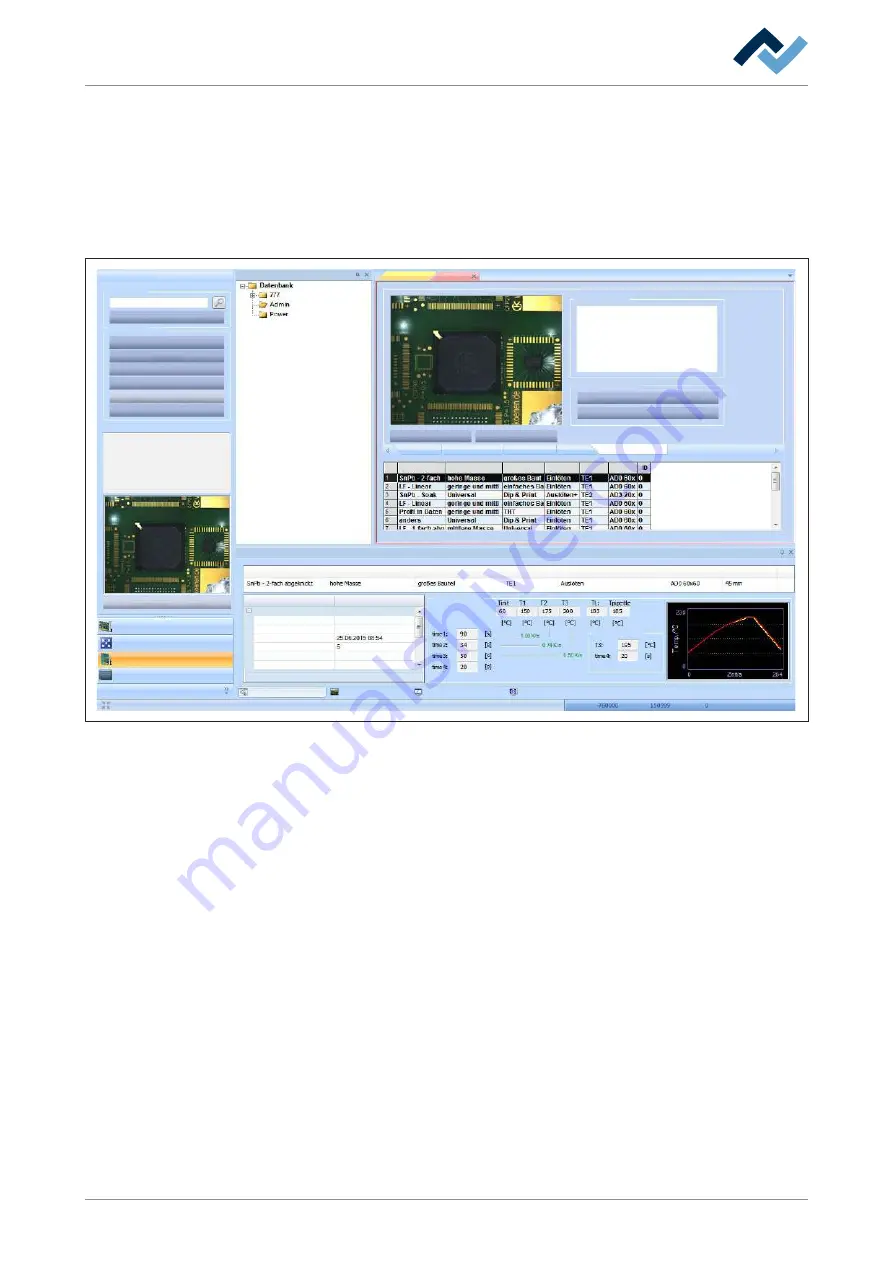
Fig. 49:
The [Image and document] window
To insert a picture from your file system:
a) Click on the [Add/change image] button.
ð
A window is opened.
b) Select a picture from your file system. Supported formats are [.jpg] and [.bmp].
c) Click on the [Profile parameters] button in the [Overwrite] frame.
ð
The picture will be shown in the [Profile library] window as soon as you select
the profile.
To take and insert a picture:
a) Activate the tab [Camera and light] in the menu bar.
b) Select a camera in the menu area [Live video].
c) Move the camera to the position from which you want to capture the image.
Now go back to the profile and enable the [Image and document] tab.
d) Click on the [Snapshot] button.
e) Click on the [Profile parameters] button in the [Overwrite] frame.
ð
The picture is now stored in the profile.
Ersa GmbH
3BA00207_01 Operating Instructions HR 600_2 | Rev. 3
120 / 169


