VP-733
–
Configuring the VP-733 via the OSD MENU Screens
29
7.3.1
Selecting the Correct Aspect Ratio
You can configure
the aspect ratio of any output image to fit your application. The
VP-733
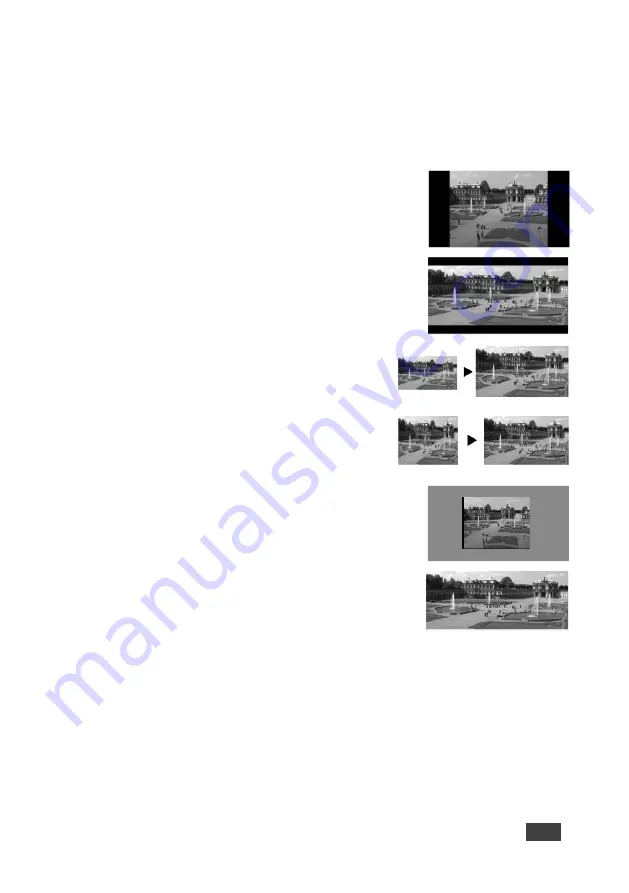
offers six different aspect ratio settings: Best Fit, Letterbox, Follow Output,
Virtual Wide, Follow Input, and Custom. Here is how each of these settings works.
BEST FIT
– This setting re-sizes the video or graphics
input signal to “best fit” the output resolution while
maintaining the aspect ratio of the input signal. For
example, a composite video signal (4:3 aspect ratio) will
“best fit” to the top and bottom of a widescreen output
image, resulting in black pillars on either side.
LETTERBOX
– This setting compresses the top and
bottom edges of the input signal, but fills the width of
the screen. For example, to preserve a widescreen
film image on a 4:3 display.
FOLLOW OUTPUT
– The aspect ratio and resolution
of the input signal is re-sized to precisely match the
aspect ratio and resolution of the
VP-733
output
signal. This may result in some distortion to the input
signal images
VIRTUAL WIDE
– The input signal is stretched
horizontally to fit the width of a widescreen output
image from the
VP-733
. This setting is used to
expand anamorphic (horizontally compressed) video
images from DVDs
FOLLOW INPUT
– The aspect ratio and resolution of
the input video or graphics signal are both preserved.
For example, a composite video image with a 4:3
aspect ratio will appear with the same aspect ratio on
a 1080p (16:9) output image, surrounded by black
bars
CUSTOM
– Use this menu to define a custom aspect
ratio by adjusting the output image horizontal size
(width) and vertical size (height)


