Basic Guide
29
Introduction
Front and rear panel
Connections
Playing
Editing
2
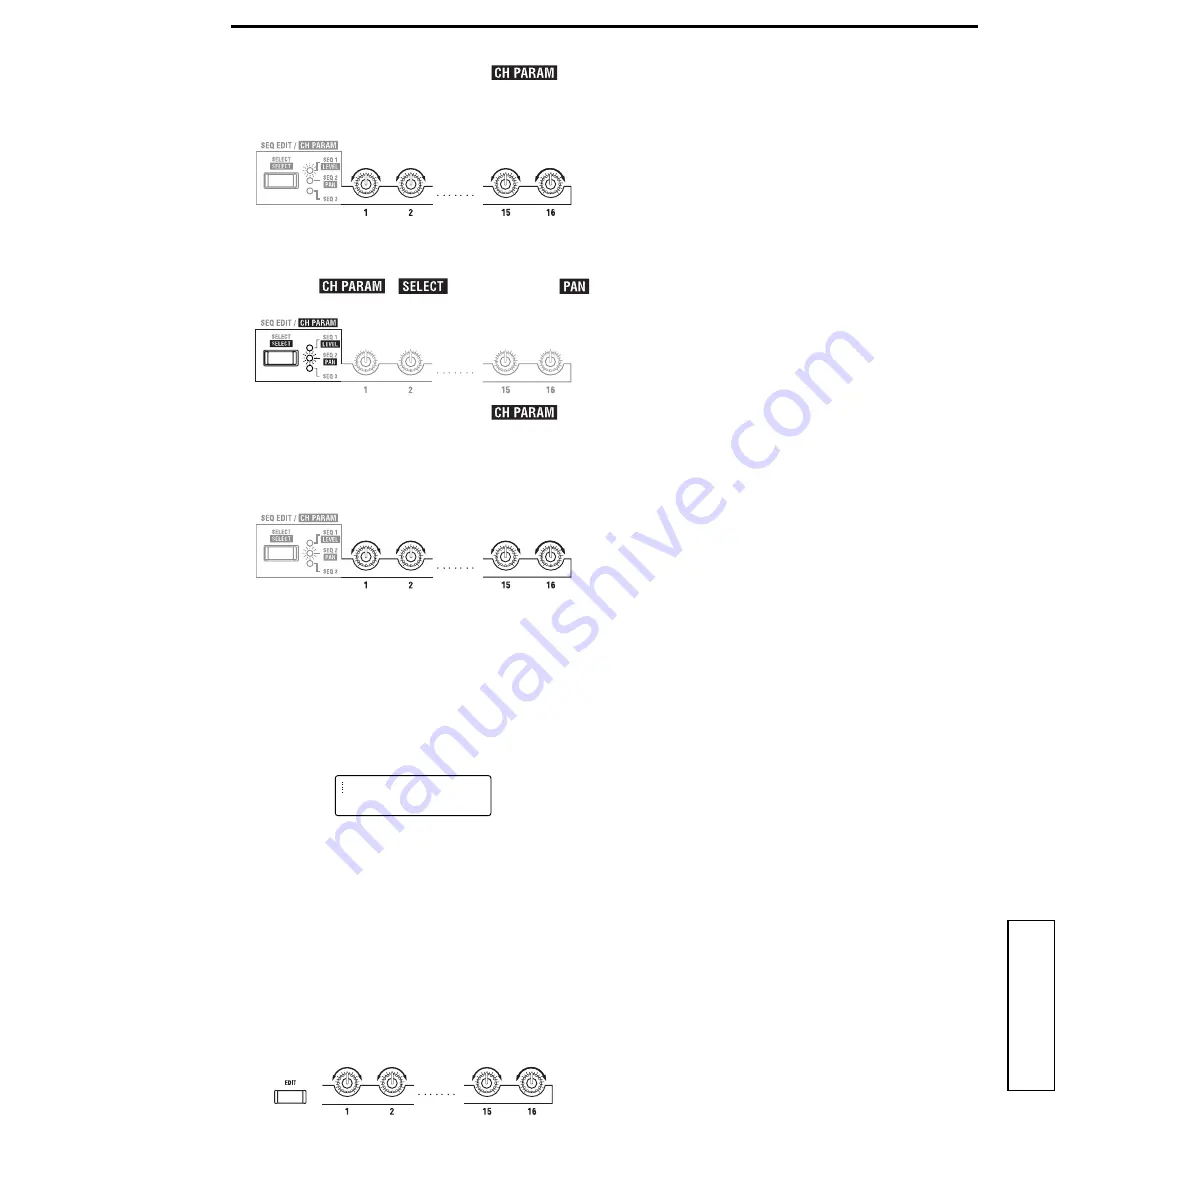
Use the sixteen knobs located beside
to
adjust the output level of each filter.
Rotating the knob far left is a setting of 0, and rotating it
far right is a setting of 127 (max).
f. Adjust the panpot (stereo location) of the carrier fil-
ters
1
Press the
[
] key to make the
LED light.
2
Use the sixteen knobs located beside
to
adjust the panpot of each filter.
When the knob is in the center (CNT), the output will be
in the center. When rotated far left, the output will be
only in the L channel. When rotated far right, the output
will be only in the R channel.
Changing the program name
a. Using the CURSOR [
√
] [
®
] keys and the [+/YES]
[–/NO] keys
1
Press the SELECT [1] key, and then press the PAGE [+]
key.
The LCD screen will show Page 02A: NAME.
2
Use the CURSOR[
√
][
®
] keys to move the cursor to
the character that you wish to change.
3
Use the [+/YES] [–/NO] keys to select the desired char-
acter.
4
Repeat steps
2
and
3
to specify the desired program
name.
You can specify a program name of up to 12 characters.
b. Using the [EDIT] key and the sixteen knobs
When the LCD screen shows Page 02A: NAME, you can
use the [EDIT] key and the sixteen knobs (used for
sequence and vocoder settings) to change the program
name as explained below.
●
While pressing the [EDIT] key, rotate knobs 1–12.
The corresponding character (1–12) of the name will
change.
●
While pressing the [EDIT] key, rotate knob 13.
Uppercase alphabetical characters can be selected for the
character at the cursor location.
●
While pressing the [EDIT] key, rotate knob 14.
Lowercase alphabetical characters can be selected for the
character at the cursor location.
●
While pressing the [EDIT] key, rotate knob 15.
Numerals can be selected for the character at the cursor
location.
●
While pressing the [EDIT] key, rotate knob 16.
Symbols (including a space) can be selected for the char-
acter at the cursor location.
c. Deleting a character
1
Use the CURSOR[
√
][
®
] keys to move the cursor to
the character that you wish to delete.
2
Hold down the [EDIT] key, and press the CURSOR
[
√
] key.
The character at the cursor will be deleted.
d. Inserting a character
A character can be inserted if no more than eleven charac-
ters have already been specified, and if there is a space at
the end of the character string.
1
Use the CURSOR[
√
][
®
] keys to move the cursor to
the location where you wish to insert a character.
2
Hold down the [EDIT] key, and press the CURSOR
[
®
].
A character will be inserted at the cursor location. The
inserted character will be the last-deleted character. If
you are inserting a character for the first time, it will be a
space.
02A NAME
MS2000/R
Summary of Contents for MS2000
Page 1: ...2 E ...


