


JetWave 2111/2411 Series User Manual
Page 120
5.3 Korenix View Utility
The Korenix View Utility (rename from the JetView V1.5.7) provides you convenient tool to scan the
network and configure the AP. Please connect your PC to port Eth 2 (LAN) and start below steps to
scan and configure.
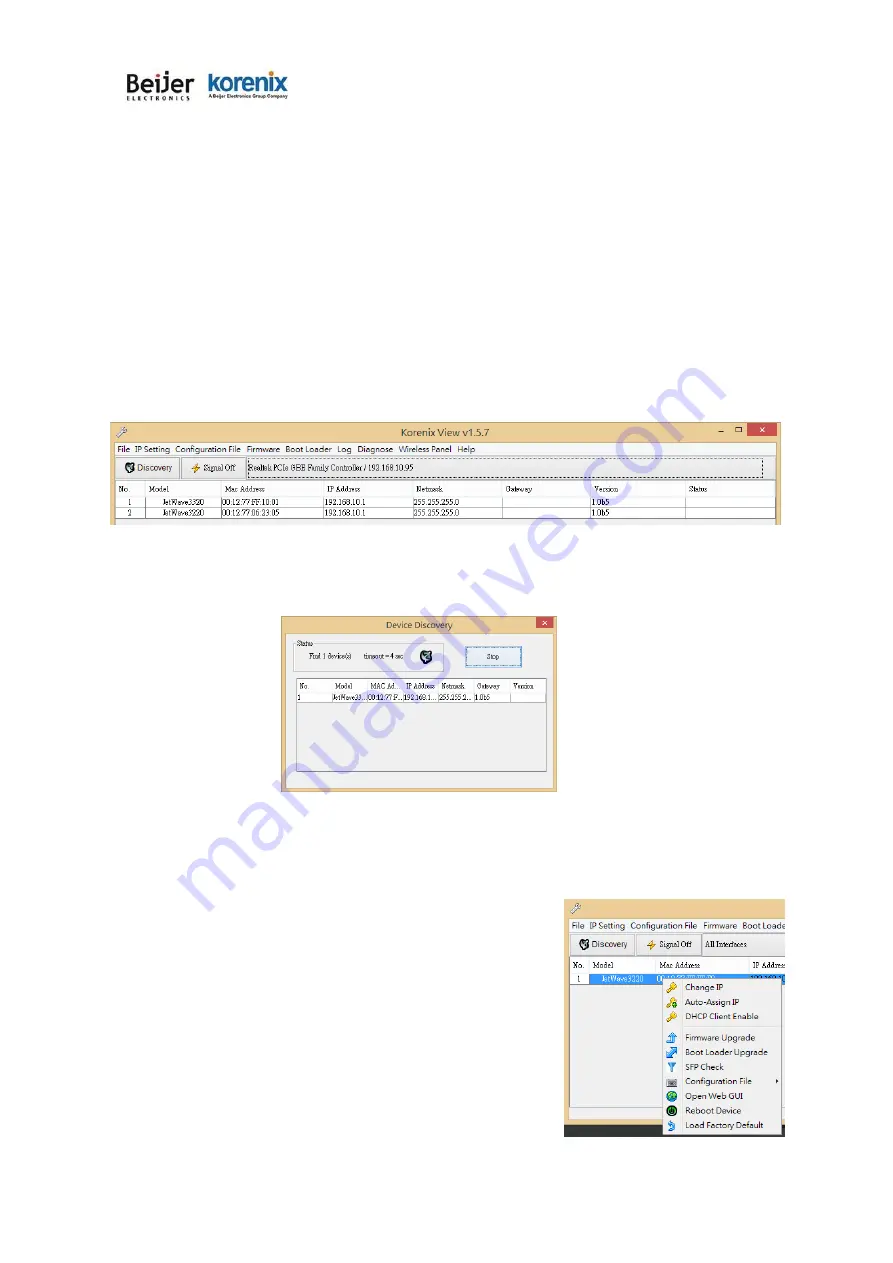
5.3.1 Device Discovery:
Step 1: Open the Korenix View Utility. (Must later than V1.5.7)
Step 2: Select the correct NIC (Network Interface Card) from the NIC list or remains the “All Interfaces”.
Step 3: Click
“Discovery”
, and then the Nodes and its IP address can be found and listed in Node list.
Figure: The main screen of the Korenix View Utility
Figure: The Device Discovery Screen, please wait couple seconds.
5.3.2 Basic Tools Shortcut:
After you scan the network, select the Gateway and click Right key of mouse, you can see some tools.
a. You can modify the IP address/Netmask directly on the field and
then click “
Change IP“
to change the IP settings.
b.
Select multiple devices and click “
Auto-Assign IP
”, the popup
screen will ask you type the IP Address range. You can assign
new IP address for the selected devices.
Summary of Contents for JetWave 2111 Series
Page 1: ...JetWave 2111 2411 Series Wireless LTE Gateway User Manual V1 0 Mar 18 2019...
Page 7: ...JetWave 2111 2411 Series User Manual Chapter 1 Introduction...
Page 12: ...JetWave 2111 2411 Series User Manual Chapter 2 Hardware Installation...
Page 22: ...JetWave 2111 2411 Series User Manual Page 19 Chapter 3 Prepare for Management...
Page 29: ...JetWave 2111 2411 Series User Manual Page 26 Chapter 4 Web GUI Configuration...
Page 73: ...JetWave 2111 2411 Series User Manual Page 70...
Page 74: ...JetWave 2111 2411 Series User Manual Page 71 Chapter 5 Configuration SNMP CLI View Utility...
Page 78: ...JetWave 2111 2411 Series User Manual Page 111 Example wlanSetting wlanSettingEntry...
Page 90: ...JetWave 2111 2411 Series User Manual Page 123 Chapter 6 Troubleshooting...
Page 98: ...JetWave 2111 2411 Series User Manual Page 132...


