background image

CP6006-SA – User Guide, Rev. 0.5 Preliminary 


www.kontron.com 


// 14 


1/


Introduction 

1.1.


Board Overview 


CP6006-SA is a 6U server class CPU platform, based on the 14 nm Intel® Xeon® D-1500 processor with 2–16 cores 
options, with excellent performance-per-watt values.  
Its scalable power budget allows users to tailor the power dissipation to their requirements. CP6006-SA provides 
cooling mechanics for standard air cooled systems. 

CP6006 is well suited for advanced Multi-CPU server applications, built as virtual machines. By using virtualization, 
any CP6006 based platform becomes a future proof investment. The well-established CompactPCI eco system, 
combined with a long availability of the XEON D-1500 processor family and 10 years Intel reliability, make it a safe 
choice. 

The outstanding Xeon® server capabilities can be combined with a high storage capacity of 32 GB DDR4 with ECC or 
on request even 64 GB, to allow for excellent virtualization support. This makes CP6006-SA and CP6006X-SA the 
ideal choice for servers and computing nodes, when ordinary 19” Rackmount systems do not meet the required 
robustness and longevity. 

The Xeon D system on a chip (SoC) has an integrated platform controller hub (PCH), two integrated 10 Gigabit 
Ethernet ports, and integrated I/O such as USB and Serial ATA channels. Different Serial ATA storage devices can be 
used with CP6006: an onboard M.2 flash device, or others such as a 2.5" HDD/SSD by using the additional onboard 
cable connection or one of the rear transition modules. The highly integrated CP6006-SA also features an XMC site 
supporting x8 PCI Express® and alternatively a PMC site for various market available extensions. Based on the 
Kontron rear I/O concept, existing rear I/O transition modules are fully functional on the CP6006-SA, where the 
CP6006X-SA provides additional 10GbE and PCI-Express on the backplane for communication between CompactPCI® 
slots. 

CP6006-SA is ready to be used with Kontron APPROTECT. Kontron APPROTECT is a complementary product and may 
be purchased separately as option. The related security chip is soldered onto the PCB which is important for many 
field deployments. It provides copy protection, IP protection, license model enforcement, license 
handling,


 implementation of license models, assignment of privileges respectively access levels. In addition, 

CP6006-SA is equipped with a Trusted Platform Module (TPM 2.0) for enhanced hardware and software based data 
and system security, such as secure boot and trusted boot. TPM access is disabled by default. 

PCI Express®


and 10 Gigabit Ethernet is enabled via a high speed backplane connector at J4 position and the 

signalling according to PICMG2.20. The function is provided as additional option beyond PICMG2.16 by the product 
variant CP6006X-SA. The PICMG2.20 based products are the right choice whenever highest data throughput and 
maximum bandwidth within the system is required. Further PICMG2.20 based boards are the PMC/XMC carrier 
CP6105X, the GPU carrier CP6108X, the GPU card CP6-GPU8860, backplanes, card cages, and a sample system CP-
RAPID. 

The board is offered with various board support packages including Windows, VxWorks and Linux operating systems. 
For further information concerning the operating systems available for the CP6006(X)-SA, please contact Kontron. 


Summary of Contents for CP6006-SA

Page 1: ... USER GUIDE www kontron com 1 CP6006 SA User Guide Rev 0 5 Preliminary Doc ID To be Determined ...

Page 2: ...CP6006 SA User Guide Rev 0 5 Preliminary www kontron com 2 This page has been intentionally left blank ...

Page 3: ...n will be suitable for the specified use without further testing or modification Kontron expressly informs the user that this user guide only contains a general description of processes and instructions which may not be applicable in every individual case In cases of doubt please contact Kontron This user guide is protected by copyright All rights are reserved by Kontron No part of this document m...

Page 4: ...ications is entirely at your risk To minimize the risks associated with your products and applications you should provide adequate design and operating safeguards You are solely responsible for compliance with all legal regulatory safety and security related requirements concerning your products You are responsible to ensure that your systems and any Kontron hardware or software components incorpo...

Page 5: ...formation on the last page of this user guide or visit our website CONTACT US Customer Support Find Kontron contacts by visiting http www kontron com support Customer Service As a trusted technology innovator and global solutions provider Kontron extends its embedded market strengths into a services portfolio allowing companies to break the barriers of traditional product lifecycles Proven product...

Page 6: ...or prescribed by the law may endanger your life health and or result in damage to your material ESD Sensitive Device This symbol and title inform that the electronic boards and their components are sensitive to static electricity Care must therefore be taken during all handling operations and inspections of this product in order to ensure product integrity at all times HOT Surface Do NOT touch All...

Page 7: ...oltages before performing any work on this product Earth ground connection to vehicle s chassis or a central grounding point shall remain connected The earth ground cable shall be the last cable to be disconnected or the first cable to be connected when performing installation or removal procedures on this product Special Handling and Unpacking Instruction ESD Sensitive Device Electronic boards an...

Page 8: ... the product then re pack it in the same manner as it was delivered Special care is necessary when handling or unpacking the product See Special Handling and Unpacking Instruction Quality and Environmental Management Kontron aims to deliver reliable high end products designed and built for quality and aims to complying with environmental laws regulations and other environmentally oriented requirem...

Page 9: ...15 1 3 Board Diagrams 16 1 3 1 Functional Block Diagram 16 1 3 2 Front Panel 17 1 3 3 Board Layout 18 1 4 Technical Specification 21 1 5 Standards preliminary to be verified 26 1 6 Related Publications 27 2 Functional Description 28 2 1 Processor 28 2 1 1 Graphics Controller 29 2 2 Memory 29 2 3 Watchdog Timer 29 2 4 Battery 29 2 5 Flash Memory 30 2 5 1 SPI Boot Flash for uEFI BIOS 30 2 6 Security...

Page 10: ... 59 4 1 2 Power Up Sequence 59 4 1 3 Regulation 60 4 2 Power Consumption 60 4 2 1 Power Consumption of the CP6006 X SA Accessories 62 4 2 2 Power Consumption per Gigabit Ethernet Port 62 4 2 3 Power Consumption per 10 Gigabit Ethernet Port CP6006X SA 62 4 2 4 Power Consumption of PMC Modules 63 4 2 5 Power Consumption of XMC Modules 63 5 Thermal Considerations 64 5 1 Operational Limits for the CP6...

Page 11: ...Selection uEFI BIOS Failover Control 79 8 5 2 uEFI BIOS Boot Order Selection 79 8 5 3 Set Control State SPI Boot Flash Selection Boot Order Selection 80 8 5 4 Get Control State SPI Boot Flash Selection Boot Order Selection 81 8 6 Sensors Implemented on the Board 81 8 6 1 Sensor List 82 8 7 Sensor Thresholds 85 8 8 OEM Event Reading Types 86 8 9 IPMI Firmware Code 87 8 9 1 Firmware Upgrade 87 8 9 2...

Page 12: ...J5 Pinout 46 Table 24 CompactPCI Rear I O Connector J5 Signals 46 Table 25 High Speed Serial Rear I O Connector J41 Pinout 47 Table 26 High Speed Serial Rear I O Connector J4 Pinout 48 Table 27 High Speed Serial Rear I O Connectors J41 and J4 Signal Description 48 Table 28 High Speed Serial Rear I O Interconnection Port Mapping 49 Table 29 DIP Switch SW1 Functionality 50 Table 30 DIP Switch SW2 Fu...

Page 13: ...cronyms 88 List of Figures Figure 1 CP6006 X SA Functional Block Diagram 16 Figure 2 4 HP CP6006 X SA Front Panel 17 Figure 3 4 HP CP6006 SA Front Panel Top View 18 Figure 4 4 HP CP6006X SA Front Panel Top View 19 Figure 5 4 HP CP6006 X SA Front Panel Bottom View 20 Figure 6 Serial Port Connect or J8 35 Figure 7 Compact PCI Connectors 39 Figure 8 CP6006 X SA with XEON D 1539 1 66 GHz 65 Figure 9 C...

Page 14: ...features an XMC site supporting x8 PCI Express and alternatively a PMC site for various market available extensions Based on the Kontron rear I O concept existing rear I O transition modules are fully functional on the CP6006 SA where the CP6006X SA provides additional 10GbE and PCI Express on the backplane for communication between CompactPCI slots CP6006 SA is ready to be used with Kontron APPRO...

Page 15: ...ments For information on the PMC interface refer to Chapter 2 7 7 PMC Interface 1 2 2 XMC Module The CP6006 X SA has one XMC mezzanine interface for support of x1 x4 and x8 PCI Express 2 0 XMC modules providing an easy and flexible way to configure the CP6006 X SA for various application requirements For information on the XMC interface refer to Chapter 2 7 8 XMC Interface 1 2 3 Rear I O Module Th...

Page 16: ...reliminary www kontron com 16 1 3 Board Diagrams The following diagrams provide additional information concerning board functionality and component layout 1 3 1 Functional Block Diagram Figure 1 CP6006 X SA Functional Block Diagram ...

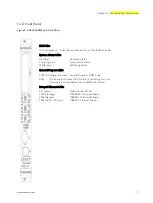
Page 17: ...p Status TH red green Temperature Status WD green Watchdog Status General Purpose LEDs LED3 0 red green amber General Purpose POST Code Note If the General Purpose LEDs 3 0 are lit red during boot up a failure is indicated before the uEFI BIOS has started Integral Ethernet LEDs ACT green Ethernet Link Activity SPEED orange 1000BASE T Ethernet Speed SPEED green 100BASE TX Ethernet Speed SPEED off A...

Page 18: ...CP6006 SA User Guide Rev 0 5 Preliminary www kontron com 18 1 3 3 Board Layout Figure 3 4 HP CP6006 SA Front Panel Top View ...

Page 19: ...CP6006 SA User Guide Rev 0 5 Preliminary www kontron com 19 Figure 4 4 HP CP6006X SA Front Panel Top View ...

Page 20: ...CP6006 SA User Guide Rev 0 5 Preliminary www kontron com 20 Figure 5 4 HP CP6006 X SA Front Panel Bottom View ...

Page 21: ...I or PCI X master interface with dedicated PCIe to PCI X bridge 3 3V or 5V signaling levels universal signaling support Compliant with the Packet Switching Specification PICMG 2 16 The CP6006 X SA supports System Master hot swap functionality and application dependent hot swap functionality when used in a peripheral slot When used as a System Master the CP6006 X SA supports individual clocks for e...

Page 22: ...I210 IT Gigabit Ethernet controller and one Intel I350 quad port Gigabit Ethernet controller Three RJ 45 connectors on the front panel Two ports on the rear I O PICMG 2 16 USB Six USB ports supporting UHCI USB 1 1 and EHCI USB 2 0 Two type A USB 3 0 connectors on the front panel Four USB 2 0 ports on the rear I O interface Serial Two 16C550 compatible UARTs One RS 232 port on the front panel and r...

Page 23: ...emperature status HS blue Hot swap status General Purpose LEDs LED3 0 red green amber General purpose POST code Ethernet LEDs ACT green Network link activity SPEED green orange Network speed Switches DIP Switches Two onboard DIP switches SW1 and SW2 for board configuration on the rear side of the board Reset Switch One hardware reset switch on the front panel Hot Swap Switch One switch for hot swa...

Page 24: ... processor core One temperature sensor for monitoring the package die temperature One onboard temperature sensor for monitoring the board temperature Specially designed heat sink Security TPM Trusted Platform Module TPM 2 0 for enhanced hardware and software based data and system security APPROTECT WiBu CodeMeter Software uEFI BIOS AMI Aptio V BIOS firmware based on the uEFI Specification and the ...

Page 25: ...firmware or payload activities Two flash banks with rollback capability manual rollback or automatic in case of upgrade failure Operating Systems There are various operating systems available for the CP6006 X SA For further information please contact Kontron General Power Consumption See Chapter 4 for details Temperature Range Operational 0 C to 60 C TBD Standard 40 C to 70 C TBD Extended Storage ...

Page 26: ...t parameters 10 300 Hz frequency range 2 g acceleration 1 oct min sweep rate 10 cycles axis 3 axes Single Shock IEC60068 2 27 Ruggedized version test parameters 30 g acceleration 9 ms shock duration half sine 3 number of shocks per direction total 18 6 directions 5 s recovery time Permanent Shock IEC60068 2 29 Ruggedized version test parameters 15 g acceleration 11 ms shock duration half sine 500 ...

Page 27: ...ecification PICMG 2 9 Rev 1 0 CompactPCI System Management Specification PICMG 2 1 Rev 2 0 CompactPCI Hot Swap Specification IPMI Intelligent Platform Management Interface Specification v2 0 Kontron CompactPCI Backplane Manual ID 24229 XMC Module ANSI VITA 42 0 200x XMC Switched Mezzanine Card Auxiliary Standard ANSI VITA 42 3 2006 XMC PCI Express Protocol Layer Standard IEEE 1386 2001 IEEE Standa...

Page 28: ...urbo Frequency 2 2 GHz 2 6 GHz Hyper Threading supported supported SpeedStep supported supported L1 cache per core 32 kB 32 kB L2 cache per core 256 kB 256 kB L3 cache 1 5 MB core 1 5 MB core On package cache up to 128 MB DDR4 Memory up to 128 GB 2133 MHz up to 128 GB 2400 MHz Configurable Thermal Design Power Power Limit Reduction Thermal Design Power 35 W 45 W For further information about the p...

Page 29: ...em memory The maximum memory size per slot is 16 GB The available memory module configuration can be either 16 GB 32 GB optional 64GB Only qualified DDR4 ECC SODIMM modules from Kontron are authorized for use with the CP6006 X SA Replacement of the SODIMM modules by the customer without authorization from Kontron will void the warranty 2 3 Watchdog Timer The CP6006 X SA provides a Watchdog timer t...

Page 30: ...cannot be written to The uEFI BIOS code and settings are stored in the SPI boot flashes Changes made to the uEFI BIOS settings are available only in the currently selected SPI boot flash Thus switching over to the other SPI boot flash may result in operation with different uEFI BIOS code and settings 2 6 Security Options 2 6 1 Trusted Platform Module 2 0 The CP6006 X SA supports the Trusted Platfo...

Page 31: ...rature Status LEDs Functions LED COLOR STATE FUNCTION TH LED red green Off Power failure Green Board in normal operation Red CPU has reached maximum allowable operating temperature and the performance has been reduced Red blinks CPU temperature above 125 C CPU has been shut off In this event all General Purpose LEDs LED3 0 are blinking red as well WD LED red green OFF Watchdog inactive Green Watch...

Page 32: ...tected Pulsing KCS interface active Blinking IPMI controller running showing its heart beat HS LED blue Off Board in normal operation Do not extract the board Blinking Board hot swap in progress Board is not ready for extraction Do not actuate the hot swap handle Blinking pattern a Long on short off the IPMI controller starts the payload b Long off short on the IPMI controller shuts down the paylo...

Page 33: ...P FUNCTION DURING uEFI BIOS POST if POST code config is enabled FUNCTION AFTER BOOT UP LED3 red Power failure green uEFI BIOS POST bit 3 and bit 7 amber LED2 red CPU catastrophic error CPU catastrophic error green uEFI BIOS POST bit 2 and bit 6 SATA channels active amber LED1 red Hardware reset green uEFI BIOS POST bit 1 and bit 5 10 Gigabit Ethernet link signal status of the high speed serial rea...

Page 34: ... 0 on 1 off 0 off 0 0x4 LOW NIBBLE off 0 off 0 off 0 on 1 0x1 POST CODE 0x41 Under normal operating conditions the General Purpose LEDs should not remain lit during boot up They are intended to be used only for debugging purposes In the event that a General Purpose LED lights up during boot up and the CP6006 X SA does not boot please contact Kontron for further assistance 2 7 2 USB Interfaces The ...

Page 35: ...4 GND Signal Ground 5 GND Signal Ground 6 RXD Receive Data I 7 DSR Data Send Request I 8 CTS Clear To Send I 2 7 5 Gigabit Ethernet The CP6006 X SA board provides five 10Base T 100Base TX 1000Base T Ethernet interfaces They are based on one Intel I350 quad port Gigabit Ethernet controller and one Intel I210 IT Gigabit Ethernet controller The Intel I350 quad port Gigabit Ethernet controller provide...

Page 36: ...ar I O SATA 3 Gb s ports are available as SATA 6 Gb s ports on the high speed serial rear I O interconnection CP6006X SA In case a RTM Module is present by default uEFI Bios will limit SATA Speed from 6 0 Gb s to 1 5Gb s for all SATA ports including on board SATA ports This behavior can be modified inside Bios Setup IntelRCSetup PCH SATA Configuration SATA controller Speed Please note that data pa...

Page 37: ...l signals on J1 PCIXCAP pin B16 and M66EN pin D21 The following configurations are supported by the CompactPCI interface Table 16 CompactPCI PCI PCI X Configuration FREQUENCY MODE M66EN J1 PIN D21 PCIXCAP J1 PIN B16 DIP SWITCH SW2 SWITCH 2 DIP SWITCH SW2 SWITCH 1 33 MHz PCI Low Low OFF OFF 33 MHz PCI Low OFF ON 66 MHz PCI High Low OFF OFF 66 MHz PCI High ON OFF 66 MHz PCI X Pull down resistor OFF ...

Page 38: ... the 3 3V 5V 12V and 12V power supplies from the hot swap system When the power supply is stable the hot swap controller generates an onboard reset to put the board into a definite state 2 7 9 6 Precharge Precharge is provided on the CP6006 X SA by a resistor on each signal line PCI bus connected to a 1V reference voltage 2 7 9 7 Handle Switch A microswitch is situated in the extractor handle The ...

Page 39: ...h speed serial rear I O interconnection The CP6006 X SA is designed for a CompactPCI bus architecture The CompactPCI standard is electrically identical to the PCI local bus However these systems are enhanced to operate in rugged industrial environments and to support multiple slots 2 7 10 1 Connector Keying The CompactPCI connector J1 supports guide lugs to ensure a correct polarized mating The CP...

Page 40: ...N C BE 0 GND 20 NC AD 12 GND V I O AD 11 AD 10 GND 19 NC 3 3V AD 15 AD 14 GND AD 13 GND 18 NC SERR GND 3 3V PAR C BE 1 GND 17 NC 3 3V IPMB SCL IPMB SDA GND PERR GND 16 NC DEVSEL PCIXCAP V I O STOP LOCK GND 15 NC 3 3V FRAME IRDY BDSEL TRDY GND 14 12 Key Area 11 NC AD 18 AD 17 AD 16 GND C BE 2 GND 10 NC AD 21 GND 3 3V AD 20 AD 19 GND 9 NC C BE 3 NC AD 23 GND AD 22 GND 8 NC AD 26 GND V I O AD 25 AD 2...

Page 41: ...D 15 NC 3 3V BDSEL GND 14 12 Key Area 11 NC GND GND 10 NC GND 3 3V GND 9 NC NC GND GND 8 NC GND V I O GND 7 NC GND GND 6 NC CPCI_Present 3 3V GND 5 NC RSV RSV RST GND GND 4 NC IPMB PWR Healthy V I O RSV RSV GND 3 NC 5V GND 2 NC TCK 5V TMS NC TDI GND 1 NC 5V 12V TRST 12V 5V GND A indicates that the signal normally present at this pin is disconnected from the CompactPCI bus when the CP6006 X SA is i...

Page 42: ...DEG GND RSV GND 15 NC RSV GND FAL REQ5 GNT5 GND 14 NC AD 35 AD 34 AD 33 GND AD 32 GND 13 NC AD 38 GND V I O AD 37 AD 36 GND 12 NC AD 42 AD 41 AD 40 GND AD 39 GND 11 NC AD 45 GND V I O AD 44 AD 43 GND 10 NC AD 49 AD 48 AD 47 GND AD 46 GND 9 NC AD 52 GND V I O AD 51 AD 50 GND 8 NC AD 56 AD 55 AD 54 GND AD 53 GND 7 NC AD 59 GND V I O AD 58 AD 57 GND 6 NC AD 63 AD 62 AD 61 GND AD 60 GND 5 NC C BE 5 NC...

Page 43: ...in is disconnected from the CompactPCI bus when the CP6006 X SA is inserted in a peripheral slot 2 7 10 3 CompactPCI Rear I O Connectors J3 and J5 Pinout The CP6006 X SA board provides rear I O connectivity for peripherals Standard PC interfaces are implemented and assigned to the front panel and to the rear I O connectors J3 and J5 When the rear I O module is used the signals of some of the main ...

Page 44: ...C USB1 VCC USB0 VCC GND USB3 VCC USB2 VCC GND 9 NC USB1 D USB1 D GND USB3 D USB3 D GND 8 NC USB0 D USB0 D GND USB2 D USB2 D GND 7 NC RIO_3 3V GPI0 GPI1 GPI2 SPEAKER GND 6 NC VGA RED VGA GREEN VGA SDA DEBUG CLK DEBUG DAT GND 5 NC VGA BLUE VGA HSYNC VGA VSYNC VGA SCL RSV GND 4 NC RSV RSV SPB CTS SPB TXD RSV GND 3 NC SPB RTS SPB RXD RSV RSV RSV GND 2 NC SPA RI SPA DTR SPA CTS SPA TXD RSV GND 1 NC SPA...

Page 45: ...r FAN Fan speed sensoring DEBUG Debug output LPa Rear I O LAN Port A LPb Rear I O LAN Port B GPIO General purpose digital input output 3 3 V only The VGA interface can be used both on the front panel and on the rear I O However the VGA signals are switched to front I O or rear I O depending on the uEFI BIOS setting COMA can be used either on the front panel or on the rear I O It is not possible to...

Page 46: ... RSV HDMI1 HPDET GND HDMI1 SDA HDMI1 SDC GND 10 NC HDMI1 CLK HDMI1 CLK GND RSV RSV GND 9 NC GND GND GND GND GND GND 8 NC SATA3 TX SATA3 TX GND SATA3 RX SATA3 RX GND 7 NC GND GND GND GND GND GND 6 NC SATA2 TX SATA2 TX GND SATA2 RX SATA2 RX GND 5 NC GND GND GND GND GND GND 4 NC SATA1 TX SATA1 TX GND SATA1 RX SATA1 RX GND 3 NC GND GND GND GND GND GND 2 NC SATA0 TX SATA0 TX GND SATA0 RX SATA0 RX GND 1...

Page 47: ...G 2 20 specification Table 25 High Speed Serial Rear I O Connector J41 Pinout POS A B C D SIGNAL DRIVEN BY SIGNAL DRIVEN BY SIGNAL DRIVEN BY SIGNAL DRIVEN BY 1 PE1_RST Board Tristate PE2_RST Board Tristate PE_END_ROOT BCKPL PE_1x8_2x4 BCKPL 2 40GBE1_TX0 Board 40GBE1_TX0 Board 40GBE1_RX0 BCKPL 40GBE1_RX0 BCKPL 3 NC 40GBE1_TX1 NC 40GBE1_TX1 NC 40GBE1_RX1 NC 40GBE1_RX1 4 NC 40GBE1_TX2 NC 40GBE1_TX2 N...

Page 48: ...lex configuration the signals are driven by the board If the board is plugged in a backplane slot with PCI Express endpoint configuration the signals are in Tristate mode Table 27 High Speed Serial Rear I O Connectors J41 and J4 Signal Description SIGNAL DESCRIPTION 40GBE1_TX RX 10GBASE KR 40GBASE KR4 port 1 transmit receive signals 10GBASE KR only 40GBE2_TX RX 10GBASE KR 40GBASE KR4 port 2 transm...

Page 49: ...BASE KR4 one x8 PCI Express 3 0 port operating at 8 GT s and two SATA 6 Gb s ports The PICMG 2 20 configuration allows coexistence with PICMG 2 16 fabrics Table 28 High Speed Serial Rear I O Interconnection Port Mapping CON POS PICMG 2 20 PORT DEFINITION CP6006X SA J41 1 AUX PCIe Control PCIe Control 2 PORT 1 10GBASE KR 40GBASE KR4 Port 1 10GBE1 3 PORT 2 4 PORT 3 5 PORT 4 6 PORT 5 10GBASE KR 40GBA...

Page 50: ...ault values The default setting is indicated by using italic bold To clear the uEFI BIOS settings and the passwords proceed as follows 1 Set DIP switch SW1 switch 4 to the ON position 2 Apply power to the system 3 Wait 30 seconds and then remove power from the system During this time period no messages are displayed 4 Set DIP switch SW1 switch 4 to the OFF position 3 1 2 DIP Switch SW2 The DIP swi...

Page 51: ...ormation before using these functions 3 3 CP6006 X SA Specific Registers Table 31 CP6006 X SA Specific Registers ADDRESS DEVICE 0x284 Write Protection Register WPROT 0x285 Reset Status Register RSTAT 0x288 Board ID High Byte Register BIDH 0x28A Geographic Addressing Register GEOAD 0x28C Watchdog Timer Control Register WTIM 0x28D Board ID Low Byte Register BIDL 0x290 LED Configuration Register LCFG...

Page 52: ... devices not write protected 1 Onboard non volatile memory devices write protected 3 SFWP Reserved 2 DSWP This bit reflects the state of the system write protection via DIP switch SW1 switch 3 0 System not write protected via DIP switch 1 System write protected 1 BSWP This bit reflects the state of the system write protection via backplane SYS_WP 0 System not write protected via backplane 1 System...

Page 53: ...ware sets this bit to inform the IPMI controller that the next reset should not be logged 3 IPRS IPMI controller reset status 0 System reset not generated by IPMI 1 System reset generated by IPMI Writing a 1 to this bit clears the bit 2 FPRS Front panel push button reset status 0 System reset not generated by front panel reset 1 System reset generated by front panel reset Writing a 1 to this bit c...

Page 54: ...eographic Addressing Register GEOAD The Geographic Addressing Register holds the CompactPCI geographic address site number used to assign the Intelligent Platform Management Bus IPMB address to the CP6006 X SA Table 35 Geographic Addressing Register GEOAD ADDRESS 0x28A BIT 7 6 5 4 3 2 1 0 NAME Reserved GA ACCESS R R RESET 000 N A BITFIELD DESCRIPTION 7 5 Res Reserved 4 0 GA Geographic address The ...

Page 55: ...scaded mode dual stage mode 4 WEN WT R Watchdog enable Watchdog trigger control bit 0 Watchdog timer not enabled Prior to the Watchdog being enabled this bit is known as WEN After the Watchdog is enabled it is known as WTR Once the Watchdog timer has been enabled this bit cannot be reset to 0 As long as the Watchdog timer is enabled it will indicate a 1 1 Watchdog timer enabled Writing a 1 to this...

Page 56: ...ESS 0x290 BIT 7 6 5 4 3 2 1 0 NAME Reserved LCON ACCESS R R W RESET 0000 0000 BITFIELD DESCRIPTION 3 0 LCON LED3 0 configuration 0000 POST Mode LEDs build a binary vector to display Port 80 signals 0001 General Purpose Mode LEDs are controlled via the LCTRL register 0010 LEDs are dedicated to functions LED0 10 Gigabit Ethernet controller port 1 link status LED1 10 Gigabit Ethernet controller port ...

Page 57: ...ved 1100 1111 Reserved 3 0 LCOL LED color 0000 Off 0001 Green 0010 Red 0011 Red Green 0100 1111 Reserved The LED Control Register can only be used if the General Purpose LEDs indicated in the LED Configuration Register see Table 38 are configured in General Purpose Mode 3 3 9 General Purpose Output Register GPOUT The General Purpose Output Register holds the general purpose output signals of the r...

Page 58: ...put Register holds the general purpose input signals of the rear I O CompactPCI connectors Table 41 General Purpose Input Register GPIN ADDRESS 0x293 BIT 7 6 5 4 3 2 1 0 NAME Reserved GPI3 GPI2 GPI1 GPI0 ACCESS R R R R R RESET 0000 1 1 1 1 BITFIELD DESCRIPTION 3 0 GPI3 0 General purpose input signals 0 Input low 1 Input high ...

Page 59: ... to comply with the instructions above may result in damage to the board or improper operation 4 1 1 Start Up Requirement Power supplies must comply with the following guidelines in order to be used with the CP6006 X SA Beginning at 10 of the nominal output voltage the voltage must rise within 0 1 ms to 20 ms to the specified regulation range of the voltage Typically 5 ms to 15 ms There must be a ...

Page 60: ... a latch up state where even a hard RESET will not help any more The system must be switched off for at least 10 seconds before it may be switched on again If problems still occur turn off the main power for 30 seconds before turning it on again 4 2 Power Consumption The goal of this description is to provide a method to calculate the power consumption for the CP6006 X SA baseboard and for additio...

Page 61: ...m These values represent the maximum power dissipation achieved through the use of specific tools to heat up the processor cores For this measurement Intel Turbo Boost Technology was enabled These values are unlikely to be reached in real applications To support the extended temperature range 70 C the maximum power consumption of the processors must be reduced The maximum power consumption of the ...

Page 62: ...ies POWER CONSUMPTION POWER 5 V POWER 3 3 V DDR4 SDRAM update from 16 GB to 32 GB approx 1 8 W DDR4 SDRAM update from 32 GB to 64 GB approx 2 0 W SATA M 2 module approx 1 0 2 0 W 4 2 2 Power Consumption per Gigabit Ethernet Port The following table indicates the power consumption per Gigabit Ethernet port Table 48 Power Consumption per Gigabit Ethernet Port POWER CONSUMPTION POWER 5 V POWER 3 3 V ...

Page 63: ... A maximum power of 20 W is available on the XMC slot and it can be arbitrarily divided on the 3 3 V and 5 V VPWR voltage lines XMC modules are based on 3 3 V power along with variable power VPWR defined as either 5 V or 12 V in the ANSI VITA 42 0 200x XMC Switched Mezzanine Card Auxiliary Standard specification On the CP6006 X SA the VPWR is configured to 5 V The following table indicates the cur...

Page 64: ...ow will differ The maximum ambient operating temperature must be determined for such environments How to read the diagram Select a specific CPU and choose a specific working point For a given flow rate there is a maximum airflow input temperature ambient temperature provided Below this operating point thermal supervision will not be activated Above this operating point thermal supervision will bec...

Page 65: ...CP6006 SA User Guide Rev 0 5 Preliminary www kontron com 65 5 1 Operational Limits for the CP6006 X SA Figure 8 CP6006 X SA with XEON D 1539 1 66 GHz Figure 9 CP6006 X SA with XEON D 1548 2 0 GHz ...

Page 66: ...n It may very well be necessary to revise system requirements to comply with operational environment conditions In most cases this will lead to a reduction in the maximum allowable ambient operating temperature or even require active cooling of the operating environment As Kontron assumes no responsibility for any damage to the CP6006 X SA or other equipment resulting from overheating of the CPU i...

Page 67: ...ifications to the device which are not explicitly approved by Kontron and described in this manual or received from Kontron s Technical Support as a special handling instruction will void your warranty This device should only be installed in or connected to systems that fulfill all necessary technical and specific environmental requirements This applies also to the operational temperature range of...

Page 68: ...a running system proceed as follows 1 Unlock the board ejection handles by pressing their release buttons The blue HS LED starts blinking indicating that the shutdown process has begun 2 After approximately 1 to 15 seconds the HS LED turns on steady indicating that the CP6006 X SA may be removed from the system 3 Disconnect any interfacing cables that may be connected to the board 4 Unscrew the fr...

Page 69: ...eral devices such as M 2 SATA PMC XMC and rear I O devices Prior to installation of a peripheral device ensure that the safety requirements are met Special attention must be paid to avoid touching any components that may be hot such as heat sink etc Figure 10 Connecting a Peripheral Device to the CP6006X SA 1 M 2 Device 2 Heat Sink 3 PMC XMC Device 1 3 2 2 ...

Page 70: ...wer supply or SATA device The SATA connector on the CP6006 X SA provides only a data connection The power for this device must be supplied by a separate connector For further information refer to the respective documentation of the device SATA device fail message at boot up may be a bad cable or lack of power going to the drive 6 4 3 PMC Module Installation The CP6006 X SA supports the installatio...

Page 71: ... in the external flash is replaced by the newly downloaded image Then the boot block activates the new image by copying it to the internal flash If the newly downloaded image was successfully activated its copy in the external flash is now the active image The copy of the old active image becomes the previously good image Manual rollback is also possible via the kIpmi hpm rollback uEFI Shell comma...

Page 72: ...CP6006 SA User Guide Rev 0 5 Preliminary www kontron com 72 7 uEFI BIOS t b d ...

Page 73: ...ity IPMI Watchdog functionality power cycle reset Board monitoring and control extensions Graceful shutdown support uEFI BIOS fail over control selection of the SPI boot flash standard recovery Field upgradeable IPMI firmware via the KCS IPMB or IOL interfaces Download of firmware does not break the currently running firmware or payload activities Two flash banks with rollback capability manual ro...

Page 74: ... Yes BMC WATCHDOG TIMER COMMANDS O Reset Watchdog Timer 27 5 App 22h O Yes Set Watchdog Timer 27 6 App 24h O Yes Get Watchdog Timer 27 7 App 25h O Yes BMC DEVICE AND MESSAGING COMMANDS O Set BMC Global Enables 22 1 App 2Eh O Yes Get BMC Global Enables 22 2 App 2Fh O Yes Clear Message Flags 22 3 App 30h O Yes Get Message Flags 22 4 App 31h O Yes Enable Message Channel Receive 22 5 App 32h O Yes Get...

Page 75: ...ent Message 29 3 S E 02h M Yes PEF AND ALERTING COMMANDS 30 1 to 30 8 S E 10h to 17h O No SENSOR DEVICE COMMANDS M Get Device SDR Info 35 2 S E 20h M Yes Get Device SDR 35 3 S E 21h M Yes Reserve Device SDR Repository 35 4 S E 22h M Yes Get Sensor Reading Factors 35 5 S E 23h O No Set Sensor Hysteresis 35 6 S E 24h O Yes Get Sensor Hysteresis 35 7 S E 25h O Yes Set Sensor Threshold 35 8 S E 26h O ...

Page 76: ...ge 43h O Yes Add SEL Entry 40 6 Storage 44h O Yes Partial Add SEL Entry 40 7 Storage 45h O No Delete SEL Entry 40 8 Storage 46h O Yes Clear SEL 40 9 Storage 47h O Yes Get SEL Time 40 10 Storage 48h O Yes Set SEL Time 40 11 Storage 49h O Yes Get Auxiliary Log Status 40 12 Storage 5Ah O No Set Auxiliary Log Status 40 13 Storage 5Bh O No LAN DEVICE COMMANDS O Set LAN Configuration Parameters 23 1 Tra...

Page 77: ...ed table cells indicate commands not supported by the IPMI firmware M mandatory Table 53 Standard IPMI Commands COMMAND IPMI 2 0 SPEC SECTION NETFN CMD KONTRON SUPPORT ON IPMI CONTROLLER AdvancedTCA M Get PICMG Properties 3 9 PICMG 00h M Yes FRU Control 3 22 PICMG 04h N A Get FRU LED Properties 3 29 PICMG 05h M Yes Get LED Color Capabilities 3 25 PICMG 06h M Yes Set FRU LED State 3 26 PICMG 07h M ...

Page 78: ...e Support SMC or BMC mode 8 10 98h 3Ah 00h Manufacturer ID LSB first 03A98h 15000 Kontron 11 12 40h B4h Product ID LSB first B440h Identifies the board family firmware 13 Release number of the IPMI firmware varies depending on firmware revision 10h for R10 11h for R11 14 Board Geographical Address slot number 1 Board in chassis slot 1 15 16 Reserved Bytes 13 through 16 are optional and defined by ...

Page 79: ... BIOS reports its operational status to the IPMI controller within a given time If the status is failed or not reported within the given time the IPMI controller selects the recovery SPI boot flash resets the board s processor and waits for the status report from the uEFI BIOS again In the event the recovery boot operation fails the IPMI controller reports it but takes no further action of its own...

Page 80: ...h is selected default 01h Recovery SPI boot flash is selected Note The DIP switch SW1 switch 2 may overwrite the above selection Control state for uEFI BIOS boot order configuration 9Dh 00h Boot order is according to uEFI BIOS setup default 01h Next boot device is Floppy 02h Next boot device is HDD 03h Next boot device is CD 04h Next boot device is Network 05h Next boot device is USB Floppy 06h Ne...

Page 81: ...or s behavior Some fields of the sensor SDR are configurable using IPMI commands others are always set to built in default values The IPMI controller supports sensor device commands and uses the static sensor population feature of IPMI All Sensor Data Records can be queried using Device SDR commands The sensor name ID string has a name prefix which is NNN in the lists below When reading the sensor...

Page 82: ...ower supply 08h OEM 73h 009Fh 009Fh 009Fh Power fail events for all power lines Y 009Fh 06h NNN Board 3 3V Voltage 02h Threshold 01h 2204h 2204h 1212h Board 3 3V supply Y 0F3Ch 07h NNN Board 5VIPMI Voltage 02h Threshold 01h 2204h 2204h 1212h Management Power MP 5V Y 0F3Ch 08h NNN Board 5 0V Voltage 02h Threshold 01h 2204h 2204h 1212h Board 5V supply Y 0F3Ch 09h NNN Board 12V Voltage 02h Threshold ...

Page 83: ...Eh Sensor specific 6Fh 0008h 0008h 0008h Boot error on recovery SPI boot flash Y 0008h 19h NNN XMC present Entity Presence 25h Sensor specific 6Fh 0000h 0000h 0003h Presence of XMC board N 1Ah NNN FRU Agent OEM FRU Agent C5h Discrete 0Ah 0140h 0000h 0147h FRU initialization agent state Y 0140h 1Bh NNN IPMC Storage Management Subsystem Health 28h Sensor specific 6Fh 0002h 0000h 0003h IPMI controlle...

Page 84: ...03h LAN link status of the front GbE A N 25h NNN Link GbE B LAN 27h Sensor specific 6Fh 0000h 0000h 0003h LAN link status of the front GbE B N 28h NNN Link LPa LAN 27h Sensor specific 6Fh 0000h 0000h 0003h LAN link status of the rear I 0 port PICMG 2 16 LPa N 29h NNN Link LPb LAN 27h Sensor specific 6Fh 0000h 0000h 0003h LAN link status of the rear I 0 port PICMG 2 16 LPb N 2Ch NNN Link 10GBE1 LAN...

Page 85: ...0 C 0 C Lower non critical 1 C n a 1 C 40 C Lower critical n a n a 2 C 42 C Lower non recoverable n a n a 5 C 45 C Table 59 Voltage Sensor Thresholds Sensor Number ID String 06h NNN Board 3 3V 07h NNN Board 5VIPMI 08h NNN Board 5 0V 09h NNN Board 12V 0Ah NNN IPMB 5V Upper non recoverable n a n a n a n a n a Upper critical 3 50 V 5 29 V 5 29 V 12 9 V 5 29 V Upper non critical n a n a n a n a n a No...

Page 86: ...cted if the POST code is 0 and doesn t change for a defined amount of time In case of no error Bits 7 0 POST code payload Port 80h In case of error Bits 15 0 4000h Data2 POST code low nibble Data3 POST code high nibble Firmware Upgrade Manager C7h 6Fh sensor type specific Offsets events 0 First Boot after upgrade 1 First Boot after rollback error 2 First Boot after errors watchdog 3 First Boot aft...

Page 87: ...9 2 IPMI Firmware and FRU Data Write Protection If the board is plugged in a write protected CompactPCI slot neither the IPMI firmware or the FRU data can be updated or reprogrammed The IPMI firmware stores the write protect state in it s local NV RAM The write protection mode is still active when the payload is off even if the IPMI firmware reboots To disable the write protection mode plug the bo...

Page 88: ...igabit Ethernet GPI General Purpose Input GPIO General Purpose Input Output GPO General Purpose Output GPU Graphics Processing Unit HBR2 High Bitrate 2 HDA High Definition Audio HD Audio HD HDD Hard Disk Drive HDMI High Definition Multimedia Interface HPM PICMG Hardware Platform Management specification family I2C Inter integrated Circuit Communications IOL IPMI Over LAN IOT Internet of Things IPM...

Page 89: ...Outline Dual in line Memory Module SOIC Small Outline Integrated Circuit SOL Serial Over LAN SPI Serial Peripheral Interface SSH Secure Shell TPM Trusted Platform Module UART Universal Asynchronous Receiver Transmitter UEFI Unified Extensible Firmware Interface UHD Ultra High Definition USB Universal Serial Bus VGA Video Graphics Adapter VLP Very Low Profile WDT Watch Dog Timer WEEE Waste Electric...

Page 90: ...t embedded technologies Kontron provides secure and innovative applications for a variety of industries As a result customers benefit from accelerated time to market reduced total cost of ownership product longevity and the best fully integrated applications overall Kontron is a listed company Its shares are traded in the Prime Standard segment of the Frankfurt Stock Exchange and on other exchange...

Reviews: