


bizhub PRESS 1250/1052
8-18
8.4
Using Finisher FS-532
8
%
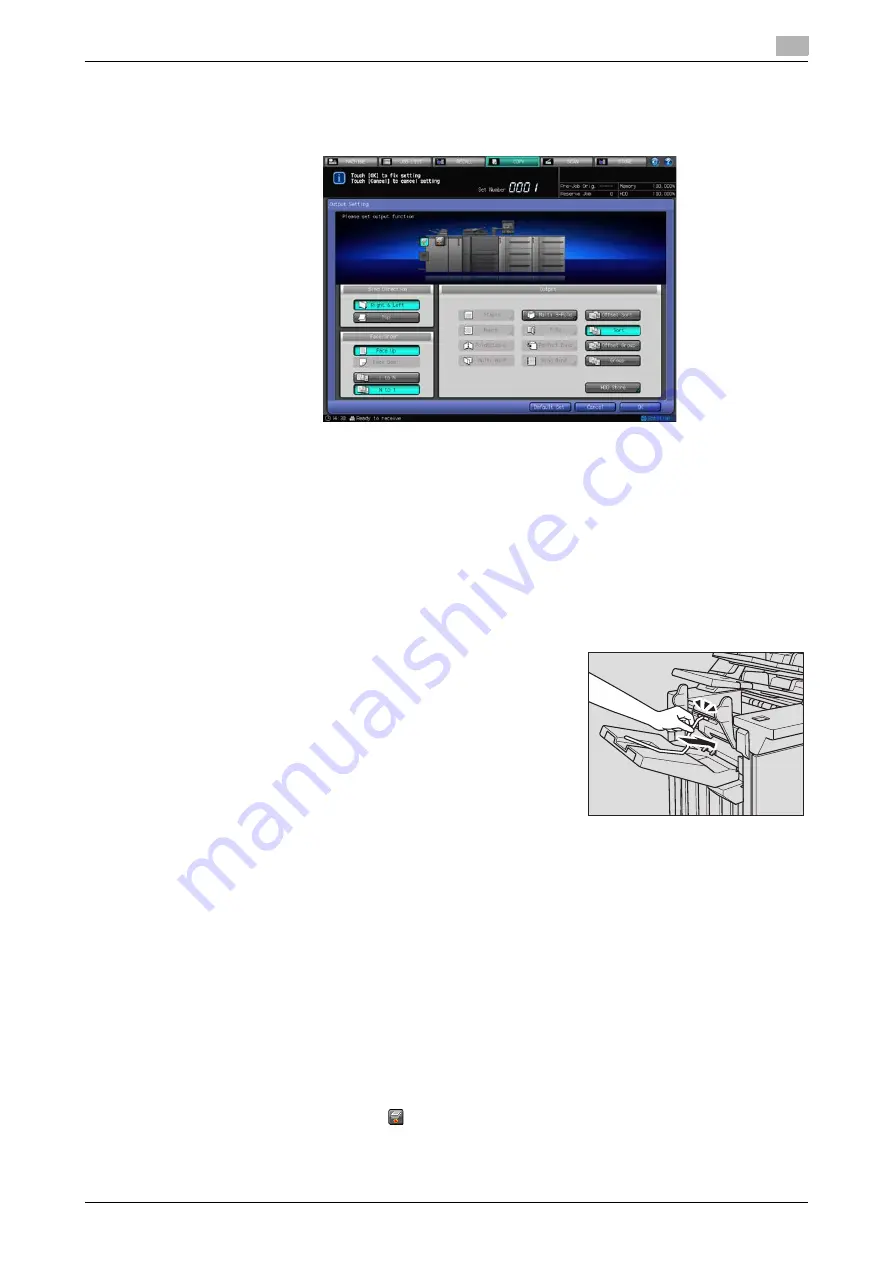
Select either [Face Up] or [Face Down], and either [1 to N] or [N to 1] provided under [Face/Order],
as needed.
%
Selecting [N to 1] automatically sets and limits the Face mode to [Face Up].
5
Press [OK] on the Output Setting Screen to return to the Copy Screen.
An icon representing specified output mode will be displayed under [Output Setting] on the Copy
Screen.
NOTICE
The primary (main) tray gradually goes down while printed materials are output. DO NOT allow any ob-
ject to interfere with the operation of the primary (main) tray on the left side of the finisher, as any inter-
ference may cause damage to the finisher.
NOTICE
The primary (main) tray of
Finisher FS-532
has a limit in capacity. Be careful not to exceed the limit,
otherwise unexpected trouble may be caused.
6
Mount the paper holder on the primary (main) tray.
%
It is recommended to mount the paper holder on the primary
(main) tray before using thin paper or paper that curls easily
for output. It is no problem to keep the holder mounted for
normal printing.
d
Reference
The
suspend/restart button
provided on the top surface of
Finisher
FS-532
allows you to temporarily stop printing, so that printed sheets
can be taken out from the primary (main) tray, secondary (sub) tray,
or folder tray. See page 8-31 for details.
8.4.2
Sorting Copies Output to Secondary (Sub) Tray: Sort/Group
A machine installed with
Finisher FS-532
is initially set to output sorted sets to the primary (main) tray, re-
gardless of whether or not to be equipped with other options. When the secondary (sub) tray is desired for
output, follow the procedure below to change the output tray and select the desired output mode.
1
Position the original.
2
Press [COPY] tab to display the Copy Screen.
3
Press [Output Setting].
The Output Setting Screen will be displayed.
4
Select the secondary (sub) tray as output tray.
%
Press the tray position key "
" of the secondary (sub) tray to highlight it.
Summary of Contents for bizhub PRESS 1052
Page 1: ......
Page 9: ...1 Introduction...
Page 15: ...2 Preparation for Use...
Page 18: ...bizhub PRESS 1250 1052 2 4 2 1 Machine Configuration 2 2 1 2 Internal Machine Items...
Page 31: ...bizhub PRESS 1250 1052 2 17 2 1 Machine Configuration 2 2 1 6 Paper Feeder Unit PF 703...
Page 33: ...bizhub PRESS 1250 1052 2 19 2 1 Machine Configuration 2 2 1 7 Paper Feeder Unit PF 706...
Page 40: ...bizhub PRESS 1250 1052 2 26 2 1 Machine Configuration 2 2 1 11 Folding Unit FD 503...
Page 44: ...bizhub PRESS 1250 1052 2 30 2 1 Machine Configuration 2 2 1 13 Perfect Binder PB 503...
Page 48: ...bizhub PRESS 1250 1052 2 34 2 1 Machine Configuration 2 2 1 14 Large Capacity Stacker LS 505...
Page 52: ...bizhub PRESS 1250 1052 2 38 2 1 Machine Configuration 2...
Page 59: ...bizhub PRESS 1250 1052 2 45 2 1 Machine Configuration 2 2 1 19 Auto Ring Binder GP 502...
Page 61: ...bizhub PRESS 1250 1052 2 47 2 1 Machine Configuration 2...
Page 86: ...3 Paper and Original Information...
Page 102: ...4 Before Making Copies...
Page 124: ...bizhub PRESS 1250 1052 4 23 4 7 To Stop Scanning Printing 4...
Page 125: ...5 Supplies and Disposals...
Page 179: ...6 Basic Setting...
Page 238: ...7 Application Functions...
Page 326: ...8 Output Setting...
Page 335: ...bizhub PRESS 1250 1052 8 10 8 2 Setting Binding Direction for Duplex Copies 8...
Page 404: ...9 Job Management...
Page 439: ...10 Advanced Information...
Page 459: ...bizhub PRESS 1250 1052 10 21 10 8 Controlling and Monitoring Machine from Browser 10...
Page 460: ...11 Troubleshooting...
Page 494: ...12 Maintenance...
Page 503: ...13 Specifications...
Page 536: ...14 Index...
Page 540: ...http konicaminolta com...


