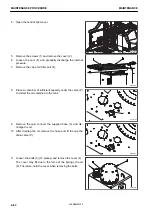
3.
By using the filter wrench, loosen cover (7) of KCCV (1).
At this time, tube (5) and hose (6) rotate together with cov-
er (7).
4.
After removing cover (7) from ventilator body (8), remove
element (9).
Oil may be accumulated in or sticking to the cover (7) and
element (9). Take care not to spill the oil when replacing
the element.
REMARK
When the ambient temperature is low, water or emulsified
matter may stick to the inside of KCCV because of con-
densation of water vapor in the blowby gas. However, if
the coolant level is normal, it is not a problem.
5.
Apply engine oil to O-rings (11) (2 pieces) fitted to the top
and bottom of the new element and insert the element into
the body.
REMARK
You can install the element with either side up.
6.
Replace O-ring (10) of ventilator body (8) with new one
and apply engine oil to it, and then install cover (7) to the
body.
Tighten the cover firmly with the hand until you cannot
tighten any more.
MAINTENANCE PROCEDURE
MAINTENANCE
4-74
WENAM00130
Summary of Contents for PW118MR-11
Page 2: ......
Page 9: ...Do not repeatedly handle and lift loads FOREWORD VIBRATION LEVEL 1 7 WENAM00130...
Page 22: ...WENAM00130...
Page 25: ...LOCATION OF SAFETY LABELS RKA64590 SAFETY SAFETY LABELS 2 3 WENAM00130...
Page 72: ...WENAM00130...
Page 74: ...GENERAL VIEW MACHINE EQUIPMENT NAME RKA61930 GENERAL VIEW OPERATION 3 2 WENAM00130...
Page 77: ...CONTROLS AND GAUGES NAMES RKA62690 OPERATION GENERAL VIEW 3 5 WENAM00130...
Page 168: ...SWITCHES RKA63060 EXPLANATION OF COMPONENTS OPERATION 3 96 WENAM00130...
Page 328: ...WENAM00130...
Page 412: ...WENAM00130...
Page 413: ...SPECIFICATIONS 5 1 WENAM00130...
Page 445: ...REPLACEMENT PARTS 7 1 WENAM00130...
Page 461: ......
Page 462: ......


