background image

-1-

UPLIFT

INSTALLATION INSTRUCTIONS

MIRRORED CABINET

K-98850T

IMPORTANT INFORMATION

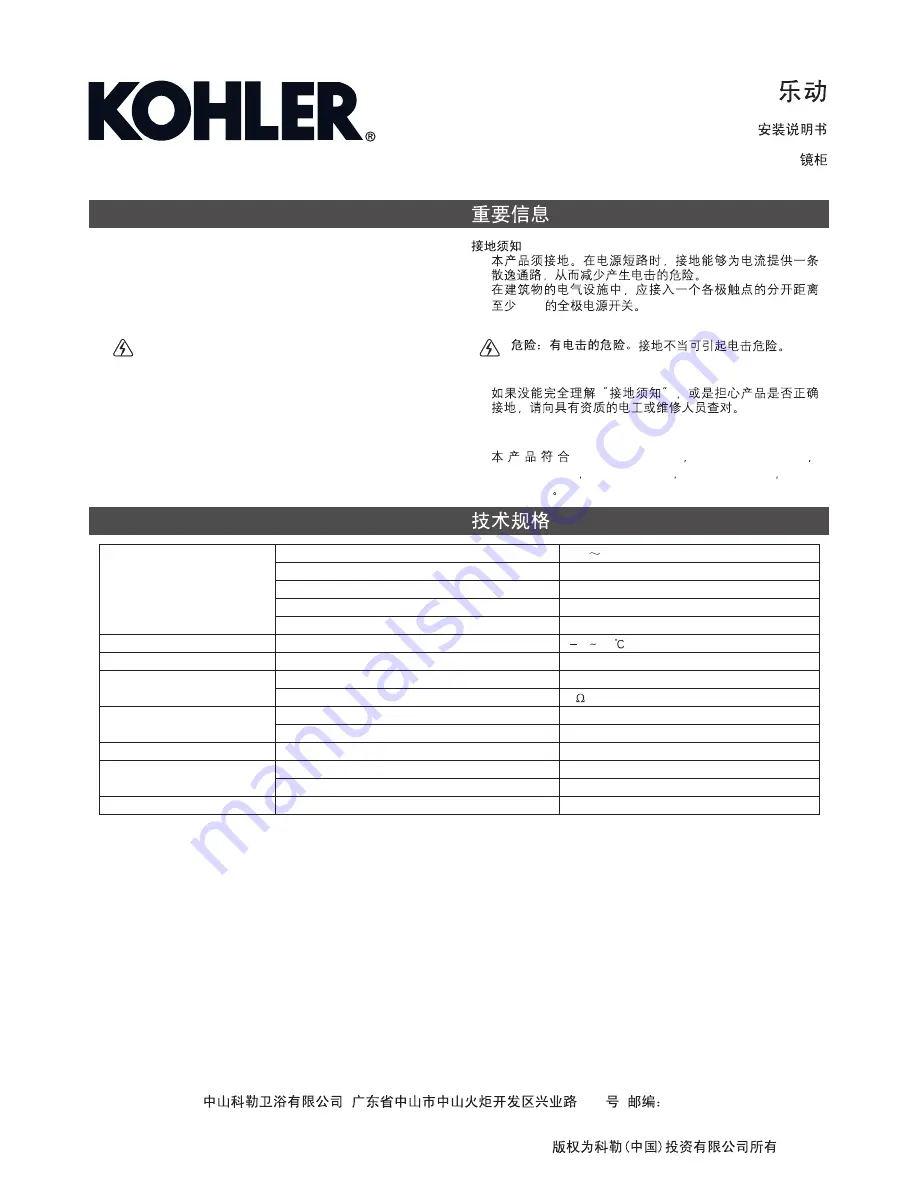
Grounding Instructions

WARNING: Risk of electric shock.

!

!

!

This product should be grounded. In the event of an
electrical short circuit, grounding reduces the risk of
electric shock by providing an escape wire for the electric
current.

Improper use of

the grounding plug can result in a risk of electric shock.

Check with a qualified electrician or service personnel if
the grounding instructions are not completely understood,
or if in doubt as to whether the product is properly
grounded.
The product complies with GB/T10357.4-2013,
GB/T10357.5-2013, GB24977-2010, GB8898-2011,
GB13837-2012, GB/T 9374-2012.

!

!

!

3mm

GB/T10357.4-2013

GB/T10357.5-2013

GB24977-2010

GB8898-2011

GB13837-2012

GB/T

9374-2012

Unit Specification

Rated voltage

100

240V 50/60Hz

Rated power

<50W

Boundary dimension

900 X 650mm

Ambient temperature

0-40 C

o

Using height above sea level

Below 5000 metres

Temperature Display

Temperature display range

5

55

Clock Display

Display format

24-hour format

Horn

Rated power

6W

Resistance

8

Anti-fog

Rated voltage

DC12V

Rated power

Port type

<19W

AUX IN 3.5mm

Audio Interface

Lamps and Lanterns

Radio

Rated power

Color temperature of lamps and lanterns

Frequency Modulation

<6W

3000K

Comply With GB/T 9374-2012

TECHNICAL SPECIFICATION

©

©

Copyright Kohler China Investment Co., Ltd. 2016

2016

ZHONGSHAN KOHLER SHOWER CO., LTD.

NO13-1, XINYE ROAD, ZHONGSHAN TORCH

DEVELOPMENT ZONE, ZHONGSHAN, GUANGDONG, CHINA

POST CODE: 528437

13-1

528437

1242001-T01-B

Summary of Contents for K-98850T

Page 1: ...7 2012 GB T 9374 2012 3mm GB T10357 4 2013 GB T10357 5 2013 GB24977 2010 GB8898 2011 GB13837 2012 GB T 9374 2012 Unit Specification Rated voltage 100 240V 50 60Hz Rated power 50W Boundary dimension 900 X 650mm Ambient temperature 0 40 C o Using height above sea level Below 5000 metres Temperature Display Temperature display range 5 55 Clock Display Display format 24 hour format Horn Rated power 6W...

Page 2: ...rror X2 Glass Shelves X4 1144255 Accessoris List Screw ST3 5X35 X8 Hole Plugs X18 Snap in Pins X18 Wedge X4 Screw M4X12 X6 Wall Anchors X8 Caps of Screw X4 Kohler com Consult the online users guide at kohler com for more information Kohler Co reserves the right to make revisions in the design of products without notice 100 240V 50 60Hz 50W 900 X 650mm 0 40 C o 5000 5 55 24 6W 8 DC12V 19W AUX IN 3 ...

Page 3: ...s without prior notice Reference Value INSTALLATION 900 1080 Max 300 148 167 630 Step 1 Note Drill installation holes at desired position Make sure there is enough space between the cabinet and the faucet or its handle In order to make wave induction function to work properly the distance at least is 200mm between infrared sensors and the faucet or avoid facing below metal faucet 30mm 200mm 200mm ...

Page 4: ...wall bracket Step 3 1 Put the cabinet onto wall bracket 2 Slide top clips to align with the drilled holes and fix with screws 1 2 Step 4 Install side mirror Screw M4X12 Screw Caps Top Clip Cabinet Wall Bracket 1242001 T01 B ...

Page 5: ...t is installed correctly Note Outer mirror is already assembled in factory It can be removed and re assembled according to these steps if necessary Step 6 Install blocks 1 Lift the door to reveal block slot 2 Put the two blocks black iron blocks into the slot 3 Place the blocks level to ensure that they slide smoothly 1 2 1 2 2 3 Door Block Slot Block 1242001 T01 B ...

Page 6: ...en insert into the other end Adjust the mirror leftwards and rightwards 2 Insert the seal into the gaps at two sides of the back mirror to make it stable 3 After installation remove the handle and protective film on the mirror Step 8 Install glass shelf 1 2 3 Back Mirror Handle Seal 1 2 3 Aluminium Plate Speaker Cover Door Back Mirror Slot 1242001 T01 B ...

Page 7: ... 7 Step 9 Connect power line 220V 50Hz 1242001 T01 B ...

Reviews: