7
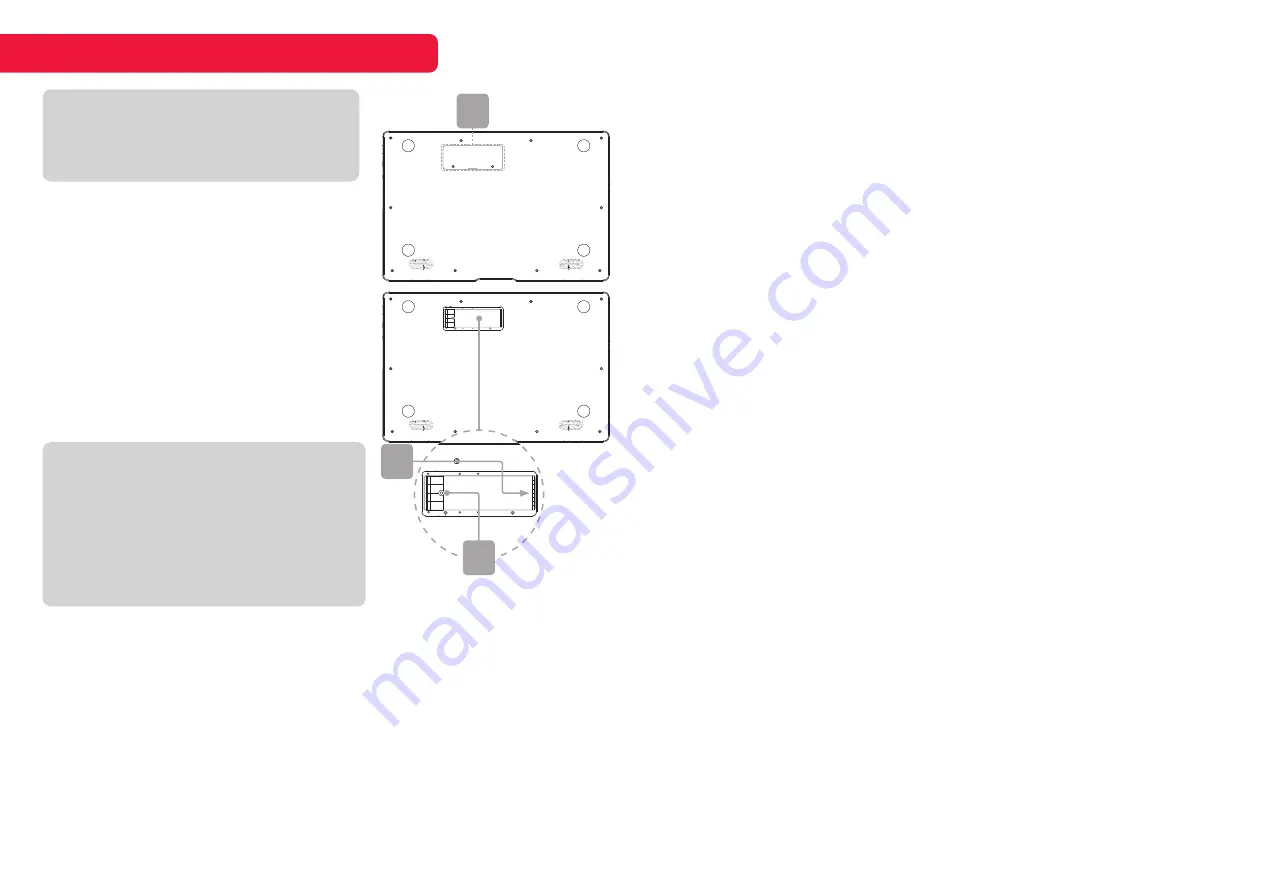
3a.
Flip the unit over and remove the two
screws holding the SSD (M.2 2280)
cover in place.
3b.
Remove the cover and place your SSD
with the contacts facing the right as this
is where the contacts in the notebook
are located. Slide it to the right to install.
3c.
Use the existing threading to screw
the SSD into place. Once inserted and
secured into position, place the cover
back into position, and screw down with
the screws removed in step 1.
INSTALLING SSD EXPANSION
NOTE
Your SSD may be able to be inserted with
either side facing up, however, only one
orientation will work with the unit. If you
are not able to detect your SSD with one
orientation, try to change the orientation of
the SSD to show the other side. Be careful
not to damage any contacts.
NOTE
This notebook fits an M.2 2280 SSD
(22mm x 80mm) and is not compatible
with other sizes.
3a
3c
3b
This unit may arrive in S Mode, meaning that no external .exe files can be
directly installed onto the unit. You may still install apps downloaded from the
Microsoft Store.
This is intended for higher security and performance of the unit.
If you want to install an app that isn’t available on the Microsoft Store, you’ll
need to switch out of S Mode.
You can easily switch out of S Mode, however, keep in mind that you cannot go
back to S Mode once switched.
Switching out of S Mode
1.
On your notebook running Windows 10 in S Mode, open
Settings >
Update & Security > Activation
.
2.
In the
Switch to Windows 10 Home
or
Switch to Windows 10 Pro
section,
select
Go to the Store
. (If you also see an “Upgrade your edition of
Windows” option, be careful
not
to click the “Go to the Store” link that
appears there).
3.
On the
Switch out of S Mode
(or similar) page that appears in the
Microsoft Store, select the
Get
button. After you see a confirmation
message on the page, you’ll be able to install apps from outside of the
Microsoft Store.
USING WINDOWS 10 S MODE


