background image

52

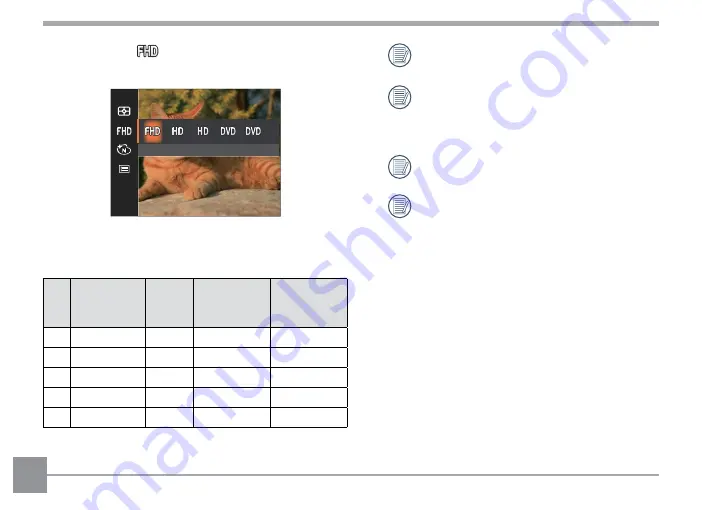
Video Quality 

Set the image resolution used during video recording.

Size: 1080p 30fps

The speed requirements for reading and writing high 

resolution image pixel images to an SD card are as 

follows:

No.

Image 

Pixels

Frames Recommen-

dation

Recording 

Time (4GB) 

About

1

1920x1080*

30

Class 10

13 Minutes

2

1280x720

60

Class 10

14 Minutes

3

1280x720

30

Class 10

29 Minutes

4

640x480

30

Class 10

84 Minutes

5

640x480

120

Class 10

22 Minutes

* The longest recording time is 29 minutes 

at one time.

When recording in higher pixel resolutions 

for extended periods of time, this can 

cause the camera to generate heat. This is 

not a camera malfunction.

Sound recording is disabled when 

640x480 120fps is chosen.

When the video format is set as 640x480 

(120fps), the shooting time is 30 seconds 

and the playback time is 2 minutes.

Summary of Contents for PIXPRO FZ55

Page 1: ...i User Manual DIGITAL CAMERA KODAK PIXPRO FZ55...

Page 2: ...mera operation For Customers in Europe CE mark indicates that this product complies with the European requirements for safety health environment and customer protection CE marked cameras are intended...

Page 3: ...ual are used for identification purposes only and are properties of their respective owners This manual provides you with instructions on how to use your new KODAK PIXPRO Digital Camera Every effort h...

Page 4: ...comes in contact with the camera turn the camera off immediately remove the battery and the memory card and dry it completely within 24 hours When you take the camera from a cold environment to a war...

Page 5: ...ns to avoid short circuiting discharging excessive heat or possible leakage Do not attempt to disassemble the battery Do not expose the battery to water Always keep the battery contacts dry Do not hea...

Page 6: ...he memory card Copy the data to your computer before you edit files When the camera is stored for long periods of time be sure to download your photos and remove the memory card Store the memory card...

Page 7: ...LCD may have a few dead or bright pixels These pixels do no effect the quality or performance of the camera photos or video Do not expose the camera s LCD to water In a humid environment only wipe it...

Page 8: ...sed in accordance with the instructions may cause harmful interference to radio communications However there is no guarantee that interference will not occur in a particular installation If this camer...

Page 9: ...t your Language Date Time after the First Power On 18 Resetting your Language 19 Resetting Date Time 20 MODE OVERVIEW 21 Display Setting 21 LCD Screen Display 22 Overview of the Screen Icons in Photo...

Page 10: ...ding 36 PLAYBACK 37 Viewing Photos and Videos 37 Thumbnail View 38 Using Zoom Playback for still pictures only 39 Slideshow 40 Photos and Video Deletion 41 USING THE MENUS 42 Photo Menu 42 Expo Meteri...

Page 11: ...Movie Shooting Settings Menu 53 AF Assist Beam 54 Digital Zoom 54 Playback Menu 56 Display Mode 56 HDR 57 Touch up 57 Rotate 58 Resize 58 Color 59 Playback Settings Menu 59 Protect 60 Delete 60 DPOF D...

Page 12: ...Compatible Printers 66 Using the PICTBRIDGE Menu 68 File Settings 71 Format 72 Copy to Card 72 File Numbering 73 Reset 73 Firmware FW Version 73 APPENDICES 74 Specifications 74 Prompts and Warning Mes...

Page 13: ...ease contact your retailer first or our customer service center The battery chargers may be a little different in shape due to the difference of countries or regions this type of camera is sold to and...

Page 14: ...tton Arrow Button Up 10 Quick Video Recording Button 18 Flash Button Arrow Button Right 3 Lens 11 Shutter Button 19 Delete Button Self timer Button Arrow Button Down 4 Tripod Socket 12 Zoom Button 20...

Page 15: ...14 Installing Battery and Memory Card 1 Open the battery cover door 2 Insert the battery into the battery slot in the correct direction as shown in the following diagram...

Page 16: ...C is optional and not included in all camera packaging It needs to be purchased separately Please use an original memory card which is Class 10 or higher and has a capacity of 4GB to 512GB To remove y...

Page 17: ...charge the battery Indicator Lamp The charger is for indoor use only After the battery is stored for long periods of time use the supplied power charger to fully charge the battery prior to use Charg...

Page 18: ...he battery Please charge the battery indoors between 0 C and 40 C 32 F and 104 F Turning Camera On and Off Press the Power button to turn the camera on To turn the camera off press the Power button ag...

Page 19: ...ay down to completely to take the picture Set your Language Date Time Set your Language Date Time after the First Power On 1 When you turn the camera on for the first time the language selection scree...

Page 20: ...ttons to select and press the button to enter the menu 3 Press the buttons to select Language and press the button to enter the menu 4 Press the buttons to select your desired language and press the b...

Page 21: ...buttons to select Date Time and press the button to enter the menu Sound Settings Power Saver Auto Language English World Time Home Date Time 2022 03 01 15 14 Date Time 03 01 15 14 Back H M 2022 4 Pre...

Page 22: ...Full Off Classic Displays the camera parameters on screen Full Camera parameters with Grid and Histogram F2 9 x3 5 0 3 EV 15 F2 9 400 ISO 1234 00 56 00 SD SD x3 5 0 3 EV 15 F2 9 400 ISO 1234 00 56 00...

Page 23: ...lf timer 9 Histogram 17 Focus Frame 2 Flash Mode 10 Aperture 18 Image Size 3 Macro Mode 11 Shutter Speed 19 Number of Remaining Shots 4 Shooting Mode 12 Zoom Display 20 Video Quality 5 AF Mode 13 Memo...

Page 24: ...ard Built In Memory 10 Remaining Recording Time 3 Expo Metering 7 Battery Status 11 Video Quality 4 Macro Mode 8 Color Effect 12 Exposure Compensation EV Value For optimal video recording it is recomm...

Page 25: ...SD 1 File Protection 7 Memory Card Built in Memory 2 DPOF File 8 Battery Status 3 HDR 9 Zoom Magnification Area 4 Touch up 10 Image Zone 5 Display Mode 11 Image Zoom Ratios 6 Memory space indicating...

Page 26: ...is the most common and easiest mode to take photos While operating in this mode the camera automatically optimizes numerous camera settings to optimally adjust settings for your photos and videos for...

Page 27: ...figures the most appropriate settings for the best possible photos Auto Scene Sunset ASCN The camera can intelligently detect different environments and automatically select the best scene and photo s...

Page 28: ...us on their faces Night Portrait When you take portraits at night or in low light conditions this mode automatically adjusts the exposure for people and night scenes Night Landscape For night scenes U...

Page 29: ...or taking photos of children Landscape For landscapes and outdoor shots Vivid reproduction of greens and blues Sunset For sunsets Captures subjects in strong sunlight Fireworks For fireworks at night...

Page 30: ...right sides Move the camera to the right until the round target icon is directly positioned over the square box The box will turn green when they overlap and the camera will automatically take the nex...

Page 31: ...lease keep moving horizontally and keep unnecessary shaking to a minimum During Panorama Mode shooting press the button to interrupt shooting and save the current pictures Press the button to cancel s...

Page 32: ...ress the Zoom button of the camera to zoom in or out on the subject while taking pictures x3 5 0 3 EV 15 F2 9 400 ISO 1234 00 56 00 SD Zoom Indicator When the optical zoom reaches the threshold as dig...

Page 33: ...on subjects very close to the camera 1 Press the button to enter the Macro Menu Macro Off 2 Press the buttons to select the following 2 modes Macro Off Select this option to disable Macro Macro On Se...

Page 34: ...elf timer 10sec A single picture is shot 10 seconds after the Shutter Button is pressed Self timer Smile Press the Shutter Button and a picture will be taken immediately after a smile is detected 3 Pr...

Page 35: ...off automatically based on lighting conditions Force Flash The flash will engage with each shot even if there is enough available light to take the photo without flash Slow Sync This allows you to ta...

Page 36: ...e Compensation to adjust the picture brightness If there is very high contrast between the photographed object and the background the brightness of the picture can be adjusted as necessary The adjusta...

Page 37: ...vement of objects Aperture Adjustment You can adjust the aperture size value Selecting a large aperture opening will emphasize the point of focus and show a blurry background and foreground A small ap...

Page 38: ...ory or on the Memory Card in the camera 3 To play a selected video clip press the button to enter the Movie Playback Mode An operation guide appears on the screen when playing back a video Press the a...

Page 39: ...ails 2 When a 3 x 3 or 4 x 4 thumbnail is displayed press the arrow buttons to select the picture or video clip to view 3 Press the arrow buttons to select a picture or video clip to view and press th...

Page 40: ...een will display the amount zoomed in as well as the area of the photo shown x4 4 Press the arrow buttons to navigate and select the desired portion of the photo to be zoomed in on 5 Press the button...

Page 41: ...n to enter playback screen 2 Press the button to enter slide option 3 Press the buttons to select slideshow playing or Cancel to return to the playback screen Play Slide Show Effect 2 Play Slide Show...

Page 42: ...to Playback Mode 2 Press the buttons to select the photos and videos to be deleted 3 Press the button and the deletion screen is displayed Exit Delete One 4 Press the buttons to select Delete One or E...

Page 43: ...irm SR 0HWHULQJ L Expo Metering Exposure Metering Use this setting to select the target size of the camera s field of view to be metered SR 0HWHULQJ L AiAE Artificial Intelligence AE Automatically sel...

Page 44: ...2 12M 4608x2592 16 9 10M 3648x2736 5M 2592x1944 3M 2048x1536 2M 1920x1080 16 9 VGA 640x480 The bigger the number of recorded pixels is the better the image quality becomes As the number of recorded pi...

Page 45: ...30 sec 30 sec 30 sec Single Continuous Shot 3 Shots Time Lapse 30sec 1min 5min 10min The flash is disabled in Continuous Shot Mode in order to achieve quick succession of shots Press the shutter butt...

Page 46: ...ct Tracking Smart tracking of the object in motion under the focusing shooting When is enabled Object Tracking function is not available HDR Use this setting to control wide dynamic image range when t...

Page 47: ...scenes to ensure the most accurate color reproduction AWB AWB Press SET To Enter AWB Incandescent Daylight Manual WB Fully press the Shutter Button to detect the white balance value Cloudy Fluorescent...

Page 48: ...ng allows you to select different color effects Normal Normal Press SET To Enter Normal Normal Dreamy Vivid Vignetting Black and White Salon Sepia When HDR or Continuous Shot function is enabled Dream...

Page 49: ...ity Normal AF Assist Beam On Digital Zoom On Date Imprint Off Quick Review Off Scene Select a scene under Scene Mode Refer to the Scene Mode section on page 26 Pet Mode Press SET To Select Scene In mo...

Page 50: ...4 0MB Fine 16M Average File Size 2 5MB Normal 16M Average File Size 2 0MB AF Assist Beam In a darker environment the AF assist beam setting can be turned on for better focus AF Assist Beam Off On Dig...

Page 51: ...ayed on the LCD screen based on the selected time Quick Review Off 1 sec 2 sec 3 sec Face Detection Detects and focuses on faces to make all faces as clear as possible in Photo Mode Face Detection Off...

Page 52: ...m Expo Metering Exposure Metering Use this setting to select the target size of the camera s field of view to be metered Expo Metering AiAE AiAE Artificial Intelligence AE Automatically selects the ce...

Page 53: ...0x720 60 Class 10 14 Minutes 3 1280x720 30 Class 10 29 Minutes 4 640x480 30 Class 10 84 Minutes 5 640x480 120 Class 10 22 Minutes The longest recording time is 29 minutes at one time When recording in...

Page 54: ...lor Setting allows you to select different color effects Normal Normal Normal Vivid Black and White Sepia Movie Shooting Settings Menu Menu Press SET To Enter Press the button to enter the menu AF Ass...

Page 55: ...t the AF assist beam setting can be turned on for better focus AF Assist Beam Normal On On Off Off Off On Digital Zoom This setting is for adjusting digital zoom If this function is disabled only opti...

Page 56: ...odes Others O O O O O O O O O O X O O O O X O O O O O O X O X X X O X X X X X X X X O O O X X X O X X X X O O O O X X X O X X O X X X X X X X X X X X X X O O O O X X X X X X X X X O O O X X O O X O X...

Page 57: ...firm 2 Press the buttons to select the playback desired and press the button to enter 3 Press the or buttons to select an option and press the button to confirm Display Mode Normal Mode Display all im...

Page 58: ...epresent the actual scene HDR HDR Cancel After using the HDR function the image will be saved as a new file and the original file is still stored on the memory card Touch up The playback beauty featur...

Page 59: ...ted picture file will replace the original photo Resize This setting allows you to resize a picture to a particular resolution and saves it as a new picture Resize to 1024x768 Resize to 1024x768 Resiz...

Page 60: ...The file is saved as a new photo and stored in memory together with the original photo Cancel Cancel Vivid Sepia Black and White Grainy Dreamy Vignetting Salon Playback Settings Menu Menu Press SET T...

Page 61: ...hotos in the Date Folder All Lock all photos or videos Reset Cancel all locked photos or videos Delete You can delete one or all photo video files Delete One Date folder All One Delete one photo or vi...

Page 62: ...Reset A printer that supports DPOF is needed for photo printing Trim The Trim setting allows you to crop photos and save them as new pictures 1 Select Yes to confirm trim Select a section of the photo...

Page 63: ...e Home Date Time 2022 03 01 15 14 3 Press the buttons to select the item to be set and press the button to enter the menu 4 Press the or buttons to select an option and press the button to confirm Sou...

Page 64: ...broad 1 Press the buttons to select the departure place and destination fields 2 Press the buttons to select a city located in the same time zone as that of the field Press the button to confirm setti...

Page 65: ...elect Press the button to enter the menu 2 Press the buttons to select and press the button to enter the menu 3 Select USB and press the button to enter the menu TV System NTSC USB PC USB PC PC Printe...

Page 66: ...top to locate the removable drive and to copy folders and files in the drive to a directory on your computer as you would copy any typical folder or file Follow the steps below to connect the camera t...

Page 67: ...owner s manual for specifications With the PICTBRIDGE function on your camera you can print the captured photos directly to a PICTBRIDGE compatible printer using the supplied USB cable without the ne...

Page 68: ...the USB port on the printer If the camera is not connected to a PICTBRIDGE compatible printer the following error message will appear on the LCD The error message above will also appear if the USB Mo...

Page 69: ...elect a menu item and press the button to enter the item Print with Date Print without Date If you have set the date and time on your camera the date and time will be recorded and saved with each phot...

Page 70: ...s the buttons to select the number of copies for the currently displayed photo 4 Press the button and the following screen will appear Print With Date Cancel Yes Print Without Date Cancel Yes 5 Select...

Page 71: ...printing you must select your photos for printing using the DPOF settings before hand See DPOF section on page 61 Print DPOF Images Cancel Yes Exit Select Exit to exit the PICTBRIDGE menu At this time...

Page 72: ...the menu 2 Press the buttons to select and press the button to enter the menu Format Copy to Card File Numbering Reset FW Version V010320 3 Press the buttons to select the item to be set and press th...

Page 73: ...If there is no memory card in the camera the built in memory will be formatted if there is a memory card only the memory card will be formatted Copy to Card Use this setting to copy the files stored...

Page 74: ...New Ver VX XX Update Firmware Cancel Yes File Numbering After you take a picture or video clip the camera will automatically save it with a sequential number You can use this to reset the file numberi...

Page 75: ...s 16 76 Megapixels Lens Focal Length 5 1mm Wide 25 5mm Tele 35mm Film Equivalent 28mm Wide 140mm Tele F Number F3 9 Wide F6 3 Tele Lens Construction 8 groups 8 elements Optical Zoom 5x Focusing Range...

Page 76: ...ormal DCF DPOF Ver1 1 Support Yes File Format Still Image Exif 2 3 JPEG Movie Movie Format MOV Motion JPEG Audio Linear PCM Monaural Shooting Modes Auto Mode Program AE Manual Mode Movie Mode Scene Mo...

Page 77: ...E Center Weighted Average Spot Fixed to Center of Frame Face AE Exposure Control Method Program AE AE Lock Available Exposure Compensation 3EV in 1 3 Step Increments Shutter Speed 1 2000 4 Seconds Man...

Page 78: ...rd not supported PICTBRIDGE ExifPrint Support Yes Multi Language Support 27 Languages Jacks USB 2 0 Micro 5 pin USB Power Rechargeable Li ion Battery LB 012 3 7V 700mAh In Camera Charging Battery Char...

Page 79: ...lens Suggest using tripod When continuous exposure is enabled this prompt message is displayed when the photo shooting screen is displayed for the first time This message will disappear after 2 secon...

Page 80: ...connection Please update firmware after the battery is fully charged The firmware cannot be updated when power is insufficient A message appears to prompt updating after full charging and returning to...

Page 81: ...l data on the card Copy the data from the memory card to another storage such as a computer Otherwise all data will be erased after the format Slow access When a memory card lower than Class 10 is use...

Page 82: ...is not possible to play by date The message disappears after 2 seconds and the camera returns to normal playback mode Unable to recognize files The format of the file to be viewed is not supported or...

Page 83: ...shake mode Images and video files cannot be saved The memory card is full The memory card is locked Use another memory card or delete unnecessary files Unlock the memory card Images will not print fro...

Page 84: ...performance Cannot write to the memory card The memory card has been locked Release the write lock of the memory card or replace with another card Too many movies to process The number of pictures or...

Page 85: ...tibility X X X It indicates that the writing speed class will be displayed on the memory card Use a memory card with the appropriate writing speed for the video recording mode to be recorded O Recomme...

Page 86: ...ucts or company names that are referred to in this document are trade names trademarks or registered trademarks of their holders The holders are not affiliated with JK Imaging Ltd our products or our...

Reviews: