


www.kodak.com/go/hdtvdocksupport
1
ENG
LISH
See your user’s guide
– for more information about using your dock, visit
www.kodak.com/go/hdtvdocksupport
.
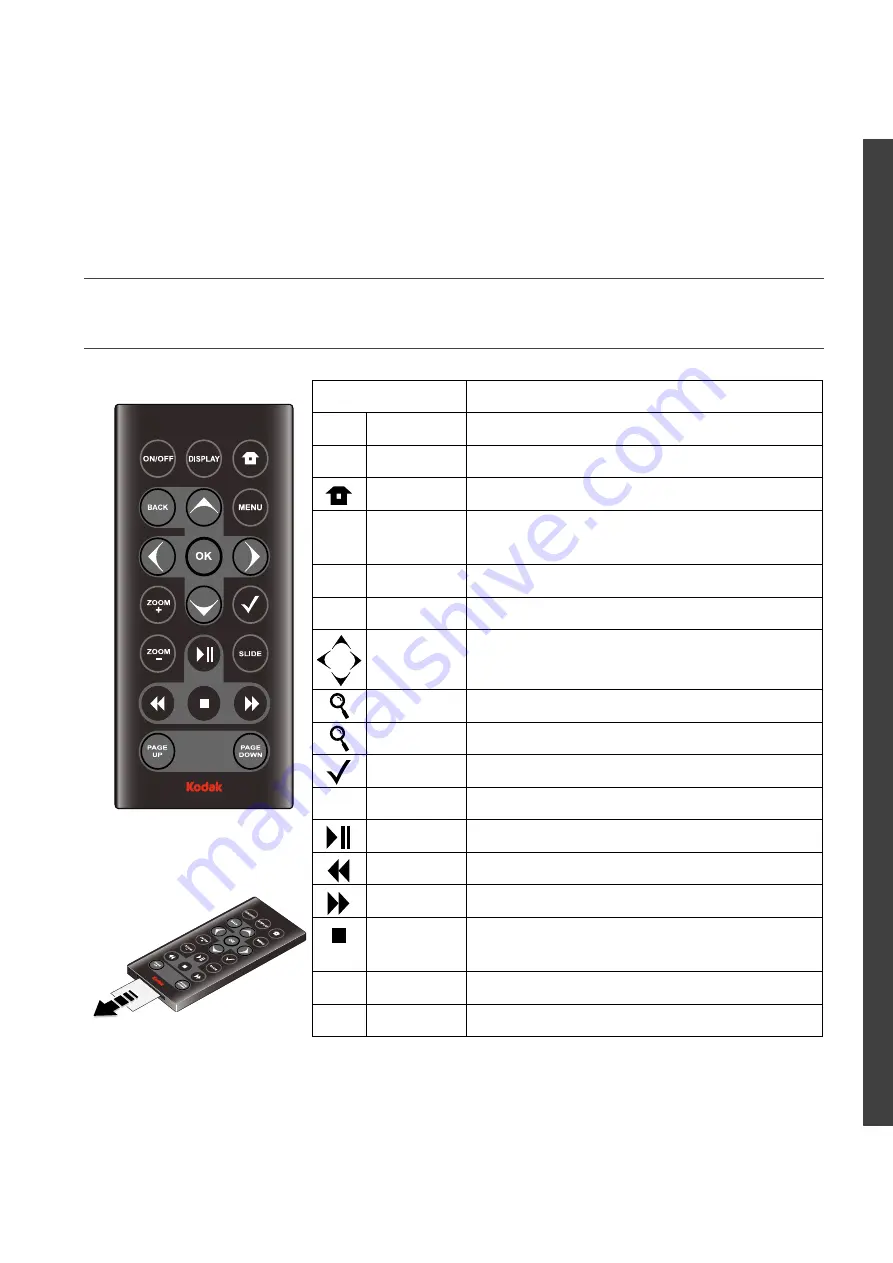
Remote control
Button
Press to
ON/OFF
turn on/off the HDTV dock.
DISPLAY
turn on/off picture/video status information bar.
Home
return to the home screen.
BACK
return to the previous screen.
stop a slide show, display thumbnails.
MENU
display menu choices.
OK
accept the current selection.
4-way
navigate through pictures or menus.
ZOOM +
increase picture magnification.
ZOOM -
decrease picture magnification.
select
mark pictures for an operation.
SLIDE
play a slide show.
play/pause
play/pause a video or slide show.
rewind
fast rewind a video.
fast forward fast forward a video.
stop
stop a video, display the first frame.
stop a slide show, display thumbnails.
PAGE UP
display the previous page of images.
PAGE DOWN display the next page of images.
Remove the tab to start
using the remote.
All manuals and user guides at all-guides.com
all-guides.com


