KMO32X
Microwave
INSTRUCTION MANUAL
Klugmann Hausgeraete GmbH.
Gropiusstraße 7,
48163 Münster, Deutschland+49 (0)2501 - 963 5732
+49 (0)2501 - 963 1834
[email protected]
www.klugmann-hausgeraete.de
Page 1: ...MO32X Microwave INSTRUCTION MANUAL Klugmann Hausgeraete GmbH Gropiusstra e 7 48163 M nster Deutschland 49 0 2501 963 5732 49 0 2501 963 1834 service klugmann hausgeraete de www klugmann hausgeraete de...
Page 2: ......
Page 3: ...not be operated until it has been repaired by a competent person ADDENDUM If the apparatus is not maintained in a good state of cleanliness its surface could be degraded and affect the lifespan of the...
Page 4: ...h reduced physical sensory or mental capabilities or lack of experience and knowledge if they have been given supervision or instruction concerning use of the appliance in a safe way and understand th...
Page 5: ...heating has ended 15 This appliance is intended to be used in household and similar applications such as staff kitchen areas in shops offices and other working environments by clients in hotels motels...
Page 6: ...n with reduced physical sensory or mental capabilities or lack of experience and knowledge unless they have been given supervision or instruction concerning use of the appliance by a person responsibl...
Page 7: ...microwave oven must be operated with the decorative door open for ovens with a decorative door 33 Surface of a storage can get hot READ CAREFULLY AND KEEP FOR FUTURE REFERENCE 3 The microwave oven is...
Page 8: ...plugged into an outlet that is properly installed and grounded Consult a qualified electrician or serviceman if the grounding instructions are not completely understood or if doubt exists as to wheth...
Page 9: ...or 10 minutes Wipe the oven clean using a soft dry cloth UTENSILS CAUTION Personal Injury Hazard It is hazardous for anyone other than a compentent personto carry out any service or repair operation t...
Page 10: ...plattering or a wrap for steaming Microwave safe only Follow the manufacturer s instructions Should be labeled Microwave Safe Some plastic containers soften as the food inside gets hot Boiling bags an...
Page 11: ...1 Instruction Manual 1 Hub underside Glass tray Turntable ring assembly a Never place the glass tray upside down The glass tray should never be restricted b Both glass tray and turntable ring assembl...
Page 12: ...a plug and must only be connected to a properly installed earthed socket 6 The mains voltage must correspond to the voltage specified on the rating plate 7 The socket must be installed and connecting...
Page 13: ...ly installed earthed socket In accordance with the appropriate regulations the socket must only be installed and the connecting cable must only be replaced by a qualified electrician If the plug is no...
Page 14: ...in furniture The built in cabinet shall not have a rear wall behind the appliance Minimum installation height is 85cm Do not cover ventilation slots and air intake points 600 560 8 45 45 min 380 5 0 3...
Page 15: ...e that the oven is installed in the center of the cabinet 2 Open the door fix the oven to the cabinet with SCREW at the INSTALLATION HOLE of TRIM KIT Then fix the TRIM KIT PLASTIC COVER to the INSTALL...
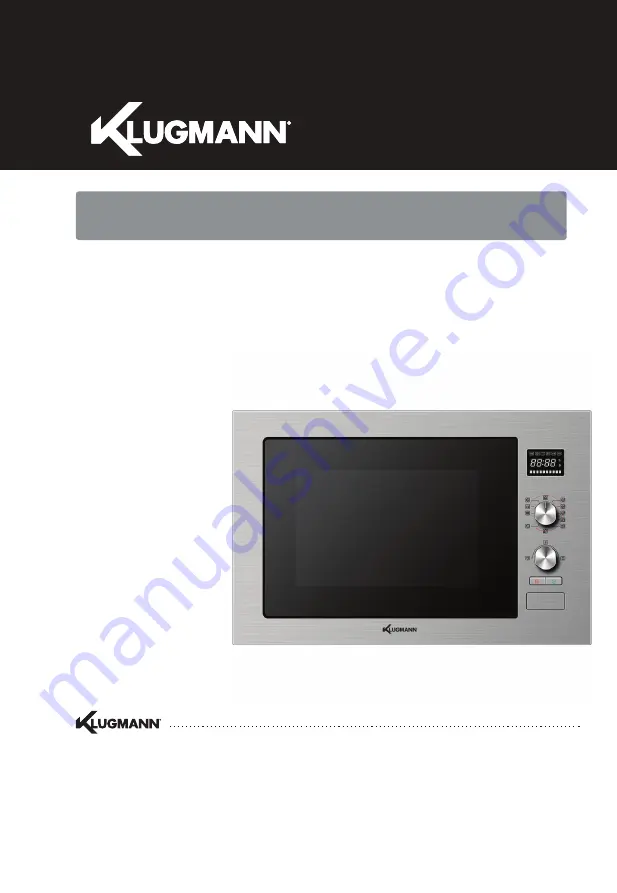
Page 16: ...Control pannel Auto menu clock kitchen timer time defrost weight defrost C 4 grill convection C 1 C 2 C 3 Microwave function knob selection knob Start 30Sec Confirm Stop Clear EN 15...
Page 17: ...4 Turn to adjust the cooking time The time setting should be 0 05 95 00 5 Press 3 Microwave Cooking 1 Press 2 3 Press to confirm setting 4 When the timer time arrives the buzzer will ring 5 times If t...
Page 18: ...95 minutes 4 Press to start cooking NOTE the step quantities for the adjustment time of the coding switch are as follow 0 1 min 5 seconds 1 5 min 10 seconds 5 10 min 30 seconds 10 30 min 1 minute 30 9...
Page 19: ...d the screen displays C 2 95 minutes to start cooking 2 Turn to adjust the cooking time the maximum time that can be set is 3 Press 95 minutes to start cooking 2 Turn to adjust the cooking time the ma...
Page 20: ...n the function knob to dEF1 will be displayed 1 Turn the function knob to dEF2 will be displayed 1 3 Turn to choose the food weight or portion 2 Press to confirm the menu you need 4 Press to start coo...
Page 21: ...350g 500g 150g 250g 350g 450g 650g 50g with water 450g 100g with water 800g 150g with water 1200g 200ml 400ml 600ml 475g 200g 300g 400g 500g 750g 1000g 1200 A8 Cake A9 Pizza A10 Chicken 150 250 350 45...
Page 22: ...separately collected and treated If at any time in future you need to dispose of this product please do NOT dispose of this product with household waste Please send this product to WEEE collecting po...