Replacing the Fixed Tail Cone Assembly
4-5
4.
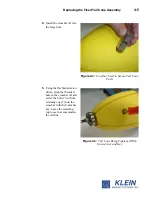
Install the crossbar (4) into
the large hole.
5.
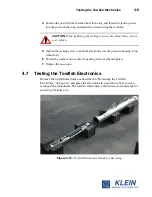
Using the flat bladed screw
driver, align the threaded
hole in the crossbar (4) and
screw the bolt (7) with the
retaining cup (5) into the
crossbar with the 8-mm hex
key. Leave the retaining
cup loose to accommodate
the tail fins.
Figure 4-4:
Crossbar Used to Secure Tail Cone
Parts
Figure 4-5:
Tail Cone Being Tightened With
Screwdriver and Key
Summary of Contents for 5000 V2 Series
Page 24: ......
Page 48: ......
Page 62: ......
Page 73: ...A 3 Figure A 1 Cable Length vs Towfish Depth Graph 1...
Page 75: ...A 5 Figure A 3 Cable Length vs Towfish Depth Graph 3...
Page 77: ...A 7 Figure A 5 Cable Length vs Towfish Depth Graph 5...
Page 78: ......
Page 82: ......
Page 88: ......
Page 92: ......
Page 95: ...E 3...
Page 97: ...E 5...
Page 99: ...E 7...
Page 101: ...E 9...
Page 103: ...E 11...
Page 105: ...E 13...
Page 107: ...E 15...
Page 109: ...E 17...
Page 111: ...E 19...


