1. Select a dry, level site and clear
the ground of any sharp objects.
Remove the tent, pegs and
pump from the carry bag. Untie
fabric ties and unroll tent with
the floor facing down.
2. Spread out the tent and peg out
the four main corners ensuring
the tent is pulled taut and
square. Peg out the remaining
pegging points on the floor.
To make sure the tent stays
in place, insert the pegs into
the ground at a 45° angle. It is
recommended to pitch the tent
so it is in line with wind, never
side on.
3. Unzip and open the doors to
make erecting the tent easier.
4. There is an external valve
located on each air tube. Before
inflating, the valves need to be
screwed into the air tube.
Unscrew the valve cap on top
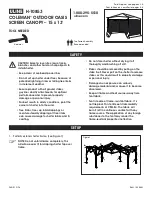
Falcon 9 Air Tent
Model No. KC072-702
Your tent includes:
57 x steel pegs
12 x ropes
1 x hand pump
1 x BLACK roof air beam (2160mm x 100mm)
2 x RED roof air beams (1360mm x 100mm)
4 x steel PORCH poles (1900mm x 16mm)
PITCHING INSTRUCTIONS
of the valve. Insert the pump hose into
the valve and inflate middle air tube first
and then the front and back air tubes.
You may need to help the tube stand up
so it inflates evenly and in the correct
shape. Make sure you only inflate to
the recommended pressure (6-8psi) as
over-inflation can lead to tube damage.
Replace top cap of the valve after
inflating each air tube.
5. It is recommended in hot weather that 6psi is used to allow
for the air to expand inside the air tubes. In cooler/windier
conditions 8psi is recommended. Please adjust the pressure
in the air tubes as the ambient temperature changes. Only use
the pump provided as it has a pressure gauge which shows the
recommended pressure (psi).
6. Inflate the three roof air beams. The
BLACK beam is for the centre room.
The RED beams are for the front and
end rooms. Unzip the roof lining and
insert the roof poles, lining up the hook
and loop tabs on both the air tube and
roof air beam. This will stabilise the
tent.
7. Making sure the tent is sitting evenly. You may need to adjust
the base of each air pole so it sits flat with the ground.
8. Carefully pull the fly over the inner making sure the windows and
doors line up. Secure the fly to the inner using the hook and loop
tabs. Proceed to peg out the pegging points on the fly ensuring
there is an adequate gap between the inner and the fly.
9. Finally, rope out the guy ropes and fine tune the tent so it
remains taut and positioned correctly.
10. When pegging out the steel PORCH poles, make sure the
ropes are at a 45° angle to pull even tension on the flap. In
light rain you can remove the middle section to allow any water
build-up to run off. In heavy rain you may have to pull the door/
porch flaps down to keep your tent dry.
11. Please read the care instructions for more product information
about your tent.
Filename: 4957_KC072-702_Falcon 9 Air_Instr
Dimensions: 400mm W x 200mm H
Colour: Black
PACKING INSTRUCTIONS
REVERSE THE PROCEDURE TO LOWER THE TENT
Take down the porch poles, unzip any doors & windows and remove
the fly. Evenly lay out the dry fly inside the tent inner (this is best done
when the inner is still pitched) leaving all doors and windows open.
Deflate roof air beams and re-zip up inner roof. Unscrew the valve
caps releasing the air in the side air tubes. Make sure all the air
escapes and the doors are unzipped. Once the tent is deflated,
remove all pegs. Fold the tent as per below. Ensure that the air valves
are not obstructed to allow the remaining air to escape. To reduce the
chance of valve malfunction, the valves should be fully unscrewed
when the product is in storage.
Ensure the tent is completely dry and clean before storing away and
store it in a dry environment
Lay flat
Fold once
Valves
this side
Fold twice
Roll
Fold again
RED
RED
BLACK