background image

22

11/14

KITCHENAID

®

 MAJOR 

APPLIANCE LIMITED 

WARRANTY

ATTACH YOUR RECEIPT HERE. PROOF OF PURCHASE IS REQUIRED 
TO OBTAIN WARRANTY SERVICE.
Please have the following information available when you call the 
Customer eXperience Center:

Name, address and telephone number

Model number and serial number

A clear, detailed description of the problem

Proof of purchase including dealer or retailer name and address

IF YOU NEED SERVICE:

1.

Before contacting us to arrange service, please determine whether your product requires repair. Some 
questions can be addressed without service. Please take a few minutes to review the Troubleshooting or 
Problem Solver section of the Use and Care Guide, scan the QR code on the right to access additional 
resources, or visit http://kitchenaid.custhelp.com.

2.

All warranty service is provided exclusively by our authorized KitchenAid Service Providers

. In the U.S. and 

Canada, direct all requests for warranty service to: 

KitchenAid Customer eXperience Center

In the U.S.A., call 1-800-422-1230. In Canada, call 1-800-807-6777.

If outside the 50 United States or Canada, contact your authorized KitchenAid dealer to determine whether another warranty applies.

http://kitchenaid.custhelp.com

ONE YEAR LIMITED WARRANTY

WHAT IS COVERED

WHAT IS NOT COVERED

For one year from the date of purchase, when this 
major appliance is installed, operated and maintained 
according to instructions attached to or furnished 
with the product, KitchenAid brand of Whirlpool 
Corporation or Whirlpool Canada LP (hereafter 
“KitchenAid”) will pay for Factory Specified 
Replacement Parts and repair labor to correct 
defects in materials or workmanship that existed 
when this major appliance was purchased, or at its 
sole discretion replace the product. In the event of 
product replacement, your appliance will be 
warranted for the remaining term of the original unit's 
warranty period.

YOUR SOLE AND EXCLUSIVE REMEDY UNDER 
THIS LIMITED WARRANTY SHALL BE PRODUCT 
REPAIR AS PROVIDED HEREIN. Service must be 
provided by a KitchenAid designated service 
company. This limited warranty is valid only in the 
United States or Canada and applies only when the 
major appliance is used in the country in which it was 
purchased. This limited warranty is effective from the 
date of original consumer purchase. Proof of original 
purchase date is required to obtain service under this 
limited warranty.

1.

Commercial, non-residential, multiple-family use, or use inconsistent with published 
user, operator or installation instructions. 

2.

In-home instruction on how to use your product.

3.

Service to correct improper product maintenance or installation, installation not in 
accordance with electrical or plumbing codes or correction of household electrical or 
plumbing (i.e. house wiring, fuses or water inlet hoses).

4.

Consumable parts (i.e. light bulbs, batteries, air or water filters, preservation solutions, 
etc.).

5.

Defects or damage caused by the use of non-genuine KitchenAid parts or accessories.

6.

Conversion of products from natural gas or L.P. gas.

7.

Damage from accident, misuse, abuse, fire, floods, acts of God or use with products 
not approved by KitchenAid.

8.

Repairs to parts or systems to correct product damage or defects caused by 
unauthorized service, alteration or modification of the appliance.

9.

Cosmetic damage including scratches, dents, chips, and other damage to the 
appliance finishes unless such damage results from defects in materials and 
workmanship and is reported to KitchenAid within 30 days. 

10. Discoloration, rust or oxidation of surfaces resulting from caustic or corrosive 

environments including but not limited to high salt concentrations, high moisture or 
humidity or exposure to chemicals.

11. Food or medicine loss due to product failure.
12. Pick-up or delivery. This product is intended for in-home repair.
13. Travel or transportation expenses for service in remote locations where an authorized 

KitchenAid servicer is not available.

14. Removal or reinstallation of inaccessible appliances or built-in fixtures (i.e. trim, 

decorative panels, flooring, cabinetry, islands, countertops, drywall, etc.) that interfere 
with servicing, removal or replacement of the product.

15. Service or parts for appliances with original model/serial numbers removed, altered or 

not easily determined.

The cost of repair or replacement under these excluded circumstances shall be 
borne by the customer. 

DISCLAIMER OF IMPLIED WARRANTIES

IMPLIED WARRANTIES, INCLUDING ANY IMPLIED WARRANTY OF MERCHANTABILITY OR IMPLIED WARRANTY OF FITNESS FOR A 
PARTICULAR PURPOSE, ARE LIMITED TO ONE YEAR OR THE SHORTEST PERIOD ALLOWED BY LAW. Some states and provinces do not allow 
limitations on the duration of implied warranties of merchantability or fitness, so this limitation may not apply to you. This warranty gives you 
specific legal rights, and you also may have other rights that vary from state to state or province to province.

DISCLAIMER OF REPRESENTATIONS OUTSIDE OF WARRANTY

KitchenAid makes no representations about the quality, durability, or need for service or repair of this major appliance other than the 
representations contained in this warranty. If you want a longer or more comprehensive warranty than the limited warranty that comes with this 
major appliance, you should ask KitchenAid or your retailer about buying an extended warranty.

LIMITATION OF REMEDIES; EXCLUSION OF INCIDENTAL AND CONSEQUENTIAL DAMAGES

YOUR SOLE AND EXCLUSIVE REMEDY UNDER THIS LIMITED WARRANTY SHALL BE PRODUCT REPAIR AS PROVIDED HEREIN. KITCHENAID 
SHALL NOT BE LIABLE FOR INCIDENTAL OR CONSEQUENTIAL DAMAGES. Some states and provinces do not allow the exclusion or limitation 
of incidental or consequential damages, so these limitations and exclusions may not apply to you. This warranty gives you specific legal rights, and 
you also may have other rights that vary from state to state or province to province.
Summary of Contents for KFDD500ESS

Page 1: ...er los números de modelo y serie que se pueden encontrar en las placas de serie detrás del panel de control Los puede ver al rotar hacia arriba las placas de serie DUAL FUEL DOUBLE OVEN RANGE USER INSTRUCTIONS Table of Contents RANGE SAFETY 2 The Anti Tip Bracket 3 FEATURE GUIDE 5 COOKTOP USE 8 Sealed Surface Burners 8 Grates 9 Burner Size 9 Griddle 9 Cookware 9 Home Canning 10 OVEN USE 11 Electro...

Page 2: ...y damage personal injury or death Do not store or use gasoline or other flammable vapors and liquids in the vicinity of this or any other appliance WHAT TO DO IF YOU SMELL GAS Do not try to light any appliance Do not touch any electrical switch Do not use any phone in your building Immediately call your gas supplier from a neighbor s phone Follow the gas supplier s instructions If you cannot reach...

Page 3: ...gaged per installation instructions Re engage anti tip bracket if range is moved Do not operate range without anti tip bracket installed and engaged Failure to follow these instructions can result in death or serious burns to children and adults To verify the anti tip bracket is installed and engaged Slide range forward Look for the anti tip bracket securely attached to floor or wall Slide range b...

Page 4: ...l Handles Should Be Turned Inward and Not Extend Over Adjacent Surface Units To reduce the risk of burns ignition of flammable materials and spillage due to unintentional contact with the utensil the handle of a utensil should be positioned so that it is turned inward and does not extend over adjacent surface units Clean Cooktop With Caution If a wet sponge or cloth is used to wipe spills on a hot...

Page 5: ...f enabled end of cycle tones will sound at the end of countdown The display will return to the time of day at the end of countdown 4 Press TIMER SET OFF to cancel the Timer and return to the time of day Do not press the Off keypads because the oven will turn off START Cooking start The Start keypad begins any oven function If Start is not pressed within 2 minutes after pressing a keypad the functi...

Page 6: ... in the range of the temperatures allowed the minimum or maximum allowed temperature will be displayed Enter a temperature in the allowable range 3 Press START 4 To change the temperature repeat Step 2 Press START for the change to take effect 5 Press OFF LOWER when finished EASY CONVECT Recipe conversion for convection cooking NOTE For best results preheat your oven to the required temperature pr...

Page 7: ...le range 3 Press START 4 To change the temperature repeat steps 2 and 3 5 Press OFF for the selected oven when finished DELAY START Delayed start The Delay Start keypad is used to enter the starting time for an oven function with a delayed start Delay Start should not be used for foods such as breads and cakes because they may not bake properly To set a Cook Time or Delayed Cook Time see the Cook ...

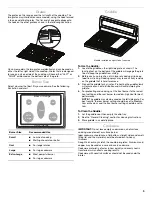
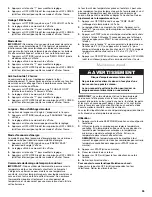
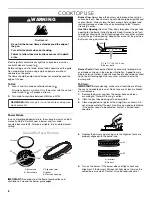
Page 8: ... gas tube opening Keep spillovers out of the gas tube by always using a burner cap Burner Ports Check burner flames occasionally for proper size and shape as shown in the previous illustration A good flame is blue in color not yellow Keep this area free of soil and do not allow spills food cleaning agents or any other material to enter the burner ports To Clean IMPORTANT Before cleaning make sure ...

Page 9: ...4 For preheating and cooking set the front burner to the lowest heat setting and the rear burner to medium high heat for best performance NOTE The griddle may also be used on the left side grate For best results the rear burner setting should be set to Medium Low or Medium and the front burner setting should be set to Low To Clean the Griddle 1 Let the griddle cool then empty the drip tray 2 See t...

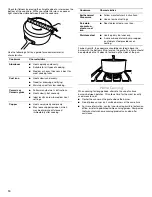
Page 10: ...er to published home canning guides Companies that manufacture home canning products can also offer assistance Cookware Characteristics Aluminum Heats quickly and evenly Suitable for all types of cooking Medium or heavy thickness is best for most cooking tasks Cast iron Heats slowly and evenly Good for browning and frying Maintains heat for slow cooking Ceramic or Ceramic glass Follow manufacturer...

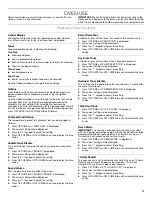
Page 11: ... either high or low 1 Press OPTIONS until SOUND VOLUME is displayed 2 The current setting will be displayed 3 Press the 1 keypad to adjust the setting 4 Press OFF UPPER or OFF LOWER to exit and display the time of day End of Cycle Tone Activates or turns off the tones that sound at the end of a cycle 1 Press OPTIONS until END TONE is displayed 2 The current setting will be displayed 3 Press the 1 ...

Page 12: ...ess START 4 Place food in the oven 5 Press OFF for the selected oven when finished 6 Remove food from the oven To Cancel Keep Warm Feature Press OFF for the selected oven Remove food from oven Sabbath Mode The Sabbath Mode sets the oven to remain on in a bake setting until turned off When the Sabbath Mode is set only the Bake cycle will operate All other cooking and cleaning cycles are disabled No...

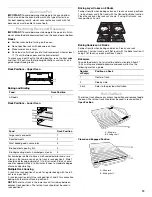
Page 13: ... rack in position 2 2 rack convection only Use rack positions 2 and 4 for convection baking with the roll out rack in position 2 NOTE The roll out rack in the lower oven sits midway between adjacent rack positions The roll out rack should not be used in rack position 5 Baking Layer Cakes on 2 Racks For best results when baking cakes on 2 racks use rack positions 1 roll out rack and 4 flat rack wit...

Page 14: ...at before the tone sounds Oven Temperature While in use the oven elements will cycle on and off as needed to maintain a consistent temperature but they may run slightly hot or cool at any point in time due to this cycling Opening the oven door while in use will release the hot air and cool the oven which could impact the cooking time and performance It is recommended to use the oven light to monit...

Page 15: ...an electric element around the convection fan to enhance the cooking performance Use the following Convect Options chart as a guide Convect Options EasyConvect Conversion Convection cooking temperatures and times can differ from those of standard cooking Depending upon the selected category EasyConvect Conversion automatically reduces the standard recipe temperature and or time you input for conve...

Page 16: ...s not in the range of the temperatures allowed the minimum or maximum allowed temperature will be displayed Enter a temperature in the allowable range 3 Press COOK TIME 4 Press the number keypads to enter the length of time to cook 5 Press START The display will count down the time When the time ends the oven will shut off automatically The temperature and or time setting can be changed at any tim...

Page 17: ... UPPER or OFF LOWER If the temperature is too high the oven doors will remain locked When LOCK shows in the display the doors of the oven cannot be opened To avoid damage to the doors do not force the doors open when LOCK is displayed Before self cleaning make sure the doors are completely closed or the doors will not lock and the Self Cleaning cycle will not begin NOTE Only one oven can use the S...

Page 18: ...ishwasher grates only not caps Use the most aggressive cycle Cooked on soils should be soaked or scrubbed before going into a dishwasher Gas Grate and Drip Pan Cleaner Part Number 31617A See Accessories section for more information SURFACE BURNERS See Sealed Surface Burners section COOKTOP CONTROLS To avoid damage to the cooktop controls do not use steel wool abrasive cleansers or oven cleaner To ...

Page 19: ...round cookware on cooktop Cookware and flame are not matched The cookware should be centered above the burner with the bottom sitting level on the grate The flame should be adjusted so that it does not extend up the sides of the pan Cooktop cooking results not what expected Improper cookware Ideal cookware should have a flat bottom straight sides and a well fitting lid and the material should be o...

Page 20: ...ull or dark bakeware Lower the oven temperature 25 F 15 C or move rack to a higher position in the oven Lighter browning of food caused by shiny or light colored bakeware Move rack to a lower position in the oven Incorrect length of cooking time was used Adjust cooking time Oven door was not closed Be sure that the bakeware does not keep the door from closing Oven door was opened during cooking Ov...

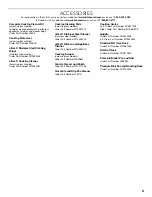
Page 21: ...W10355051 Cooktop Cleaning Pads ceramic glass models Order Part Number W10391473 affresh Stainless Steel Cleaner stainless steel models Order Part Number W10355016 affresh Kitchen and Appliance Cleaner Order Part Number W10355010 Cooktop Scraper ceramic glass models Order Part Number WA906B Granite Cleaner and Polish Order Part Number W10275756 Gas Grate and Drip Pan Cleaner Order Part Number 3161...

Page 22: ... air or water filters preservation solutions etc 5 Defects or damage caused by the use of non genuine KitchenAid parts or accessories 6 Conversion of products from natural gas or L P gas 7 Damage from accident misuse abuse fire floods acts of God or use with products not approved by KitchenAid 8 Repairs to parts or systems to correct product damage or defects caused by unauthorized service alterat...

Page 23: ...OUR Table des matières SÉCURITÉ DE LA CUISINIÈRE 24 La bride antibasculement 25 GUIDE DES CARACTÉRISTIQUES 28 UTILISATION DE LA TABLE DE CUISSON 31 Brûleurs de surface scellés 31 Grilles 32 Taille du brûleur 32 Plaque à frire 33 Ustensiles de cuisson 33 Mise en conserve à la maison 34 UTILISATION DU FOUR 34 Commandes électroniques du four 34 Maintien au chaud 35 Mode Sabbat 36 Papier d aluminium 3...

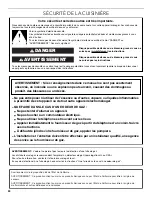
Page 24: ...décès Ne pas entreposer ni utiliser de l essence ou d autres vapeurs ou liquides inflammables à proximité de cet appareil ou de tout autre appareil électroménager QUE FAIRE DANS LE CAS D UNE ODEUR DE GAZ Ne pas tenter d allumer un appareil Ne pas toucher à un commutateur électrique Ne pas utiliser le téléphone se trouvant sur les lieux Appeler immédiatement le fournisseur de gaz à partir du téléph...

Page 25: ...er la bride antibasculement si la cuisinière a été déplacée Ne pas faire fonctionner la cuisinière si la bride antibasculement n est pas installée et engagée Le non respect de ces instructions peut causer un décès ou des brûlures graves aux enfants et aux adultes Pour vérifier que la bride antibasculement est bien installée et engagée Faire glisser la cuisinière vers l avant Vérifier que la bride ...

Page 26: ...ce Ne pas utiliser d eau pour éteindre un feu de graisse Étouffer le feu ou les flammes ou utiliser un extincteur à produits chimiques secs ou un extincteur à mousse N utiliser que des mitaines de four sèches Des mitaines de four mouillées ou humides sur des surfaces chaudes peuvent provoquer des brûlures provenant de la vapeur Ne pas laisser les mitaines de four toucher les éléments chauffants Ne...

Page 27: ...lations électriques Veiller à ce que l installation et la mise à la terre de la cuisinière soient correctement réalisées par un électricien qualifié Déconnecter la source de courant électrique avant d intervenir sur l appareil Des blessures peuvent résulter d un mauvais usage des portes ou tiroirs de l appareil par exemple marcher s appuyer ou s asseoir sur les portes ou tiroirs Entretien Mainteni...

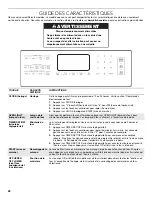
Page 28: ...s numériques pour régler la durée en hr min min Les zéros de gauche peuvent ne pas être entrés Entrer 2 pour 2 minutes par exemple 3 Appuyer sur TIMER SET OFF minuterie réglage arrêt pour commencer le compte à rebours Si activés les signaux sonores de fin de programme retentissent à la fin du compte à rebours L affichage de l heure est rétabli à la fin du compte à rebours 4 Appuyer sur TIMER SET O...

Page 29: ...dans la fourchette des températures autorisées la température minimale ou maximale autorisée s affiche Entrer une température dans la fourchette autorisée 3 Appuyer sur START mise en marche 4 Pour modifier la température répéter l étape 2 Appuyer sur START mise en marche pour que le changement puisse s effectuer 5 Appuyer sur OFF LOWER arrêt four inférieur après avoir terminé CONVECT BROIL cuisson...

Page 30: ...touches numériques pour régler la température souhaitée Si la température entrée ne se trouve pas dans la fourchette des températures autorisées la température minimale ou maximale autorisée s affiche Entrer une température dans la fourchette autorisée 3 Appuyer sur START mise en marche 4 Pour changer la température répéter les étapes 2 et 3 5 Appuyer sur OFF arrêt après avoir terminé DELAY START ...

Page 31: ...oujours nettoyer le chapeau de brûleur après un renversement enlever et nettoyer régulièrement les chapeaux conformément à la section Nettoyage général Ouverture du tube d arrivée de gaz Pour que le brûleur s allume convenablement il faut que le gaz puisse passer librement à travers l ouverture du tube d arrivée de gaz Garder cette zone exempte de souillures et veiller à ce que les renversements a...

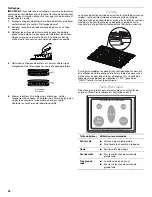
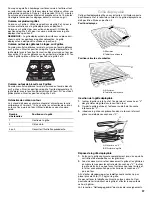
Page 32: ...alifié Grilles Les grilles de cette cuisinière couvrent toute la table de cuisson en largeur Il est possible d imbriquer les deux grilles à l aide du crochet situé à une extrémité de chacune d entre elles sur certains modèles L extrémité plate d une des grilles s emboîte sur le crochet de l autre grille tel qu indiqué dans l illustration suivante Sur certains modèles les deux grilles sont identiqu...

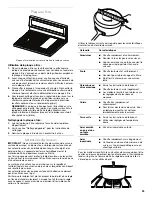
Page 33: ...uivre peuvent être utilisés comme fond ou base d un ustensile de cuisson Le matériau d un ustensile a une influence sur la rapidité et l uniformité de la transmission de la chaleur lesquelles contribuent aux résultats de cuisson Les ustensiles de cuisson avec surface anti adhésive ne doivent pas être utilisés sous le gril Vérifier que le récipient est plat en plaçant le bord plat d une règle en tr...

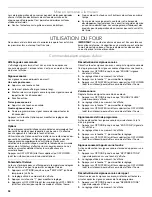
Page 34: ...PER arrêt four supérieur ou OFF LOWER arrêt four inférieur pour sortir du mode Options Fahrenheit et Celsius Le four est préréglé pour un affichage de la température en degrés Fahrenheit mais on peut le permuter en degrés Celsius 1 Appuyer sur OPTIONS jusqu à ce que TEMP UNIT unité de température s affiche 2 Le réglage utilisé à ce moment là s affiche 3 Appuyer sur la touche 1 pour modifier le rég...

Page 35: ...température constante mais leur température peut varier légèrement dans un sens ou dans l autre du fait de cette alternance De nombreux thermomètres réagissent lentement à un changement de température et ne donneront pas une mesure exacte du fait de cette alternance Le four fournit des températures précises toutefois il peut cuire plus rapidement ou plus lentement que votre four précédent c est po...

Page 36: ... sur l affichage et aucun son n est émis Le texte déroulant s affiche tel qu il était avant que l on n appuie sur la touche 2 Appuyer sur START mise en marche Réglage de la température lorsque le mode Sabbat fonctionne sur les deux fours 1 Appuyer sur la touche BAKE cuisson au four du four souhaité 2 Appuyer sur les touches numériques comme indiqué par le texte déroulant afin de sélectionner la no...

Page 37: ...L air chaud doit pouvoir circuler autour de l aliment pour le cuire uniformément Laisser 2 5 0 cm entre les ustensiles de cuisson au four et les parois du four Utiliser le tableau suivant comme guide Grille déployable Cette grille déployable offre un accès facile à l utilisateur pour le positionnement et le retrait des aliments La grille déployante ne doit pas être utilisée en position 5 Position ...

Page 38: ... de cuisson Lors du rôtissage il n est pas nécessaire d attendre la fin du préchauffage du four avant d y placer la nourriture sauf si la recette le recommande Cuisson au four vapeur La fonction de cuisson au four vapeur s utilise avec la grille d étuvage pour apporter davantage d humidité durant la cuisson au four La grille d étuvage est équipée d un réservoir d eau qui chauffe et libère de la va...

Page 39: ...coulée prolonger la cuisson avant que la cuisson ne soit terminée Voir la section Durée de cuisson Une fois la durée écoulée le four s éteint automatiquement 6 Appuyer sur OFF LOWER arrêt four inférieur après avoir terminé 7 Retirer les aliments du four Cuisson lente La fonction de cuisson lente est idéale pour les aliments tels que le bœuf la volaille et le porc Ce programme permet de cuire les a...

Page 40: ...peuvent être ajustée s en tout temps en répétant les étapes 2 à 5 6 Appuyer sur le bouton OFF arrêt du four sélectionné pour effacer l affichage du four REMARQUE Le réglage de durée de cuisson pour une fonction de cuisson minutée y compris la fonction de conversion EasyConvect peut être ajusté en suivant les étapes précédentes de 3 à 5 Réglage d une cuisson minutée différée 1 Appuyer sur DELAY STA...

Page 41: ...tement refroidi retirer la cendre avec un chiffon humide Pour éviter de briser le verre ne pas appliquer de chiffon humide froid sur le verre intérieur de la porte avant que le four n ait complètement refroidi La lampe du four ne fonctionne pas durant le programme d autonettoyage Pour arrêter le programme d autonettoyage à tout moment appuyer sur OFF UPPER arrêt supérieur ou OFF LOWER arrêt inféri...

Page 42: ...LLIQUE sur certains modèles Ne pas utiliser de nettoyants abrasifs de nettoyants avec agent de blanchiment de produits antirouille d ammoniaque ou d hydroxyde de sodium soude car la surface peinte pourrait se tacher GRILLES ET CHAPEAUX ÉMAILLÉS Les renversements d aliments contenant des produits acides tels que vinaigre et tomates doivent être nettoyés dès que la table de cuisson les grilles et le...

Page 43: ...on peut entraîner la formation de taches d un film de silice de piqûres ou de légères taches blanches Méthode de nettoyage Programme de nettoyage Voir la section Programme de nettoyage Lampes du four Les lampes du four sont des ampoules standard de 40 watts pour appareil électroménager Avant le remplacement s assurer que le four et la table de cuisson sont froids et que les boutons de commande son...

Page 44: ... cuisson Les ustensiles de cuisson ne correspondent pas à la flamme Les ustensiles de cuisson doivent être centrés au dessus du brûleur tout en étant posés à l horizontale au fond sur la grille La flamme doit être réglée de sorte qu elle ne s étende pas sur les côtés du plat La cuisson ne produit pas les résultats prévus Ustensiles de cuisson inappropriés Les ustensiles de cuisson idéals doivent a...

Page 45: ...tensiles de cuisson Voir la section Positionnement des grilles et ustensiles de cuisson au four Répartition irrégulière de la pâte dans le plat Vérifier que la pâte est répartie uniformément dans le plat Brunissement excessif des aliments causé par un plat à four terne ou foncé Diminuer la température du four de 25 F 15 C ou placer la grille plus haut dans le four Brunissement insuffisant des alim...

Page 46: ... pour acier inoxydable affresh modèles en acier inoxydable Commander la pièce numéro W10355016 Nettoyant pour cuisine et appareils ménagers affresh Commander la pièce numéro W10355010 Grattoir pour table de cuisson modèles avec vitrocéramique Commander la pièce numéro WA906B Nettoyant et poli pour granite Commander la pièce numéro W10275756 Nettoyant pour la grille à gaz et le plateau d égouttemen...

Page 47: ... Défauts ou dommage résultant de l utilisation de pièces ou accessoires KitchenAid non authentiques 6 Conversion de votre produit du gaz naturel ou du gaz de pétrole liquéfié 7 Dommages causés par accident mésusage abus incendie inondations catastrophe naturelle ou l utilisation de produits non approuvés par KitchenAid 8 Réparations aux pièces ou systèmes dans le but de rectifier un dommage ou des...

Page 48: ...W10694061C SP PN W10743250 2015 Used under license in Canada All rights reserved Utilisé sous licence au Canada Tous droits réservés 2 15 Printed in U S A Imprimé aux É U ...

Reviews: