background image


36 


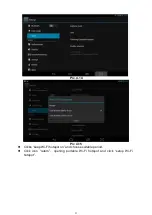
Pic 4.43 

4.  Once login successfully you can open synchronization function, see as picture 4.44; 


Pic 4.44


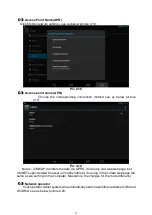
4.11 Location access 

Click 

setting

 and choose 

location access

, see as picture 4.45; 


Summary of Contents for PC7088

Page 1: ...ch on off 10 3 5 Power Saving Mode and Locked Mode 10 3 6 Operation of touch panel 11 3 7 Main Interface 11 3 8 Apps 13 3 9 USB Connect 13 3 10 Input Text 14 3 11 Use Skills 15 Widget interface 15 4 General Setup 15 4 1 SIM Card management WIFI Network 15 4 2 Bluetooth 18 4 3 Data Usage 21 4 4 More 21 4 5 Audio Profiles 26 4 6 Display 28 4 7 Storage 31 4 8 Battery 33 4 9 Apps 33 4 10 Account 35 4 ...

Page 2: ... 51 6 1 Phone 51 6 2 SMS 52 6 3 Contacts 52 7 Movil Teacher 53 7 1 Device setting 53 7 2 USER S INTERFACE 56 7 3NAVEGACION 56 8 Internet 61 8 1 Browser 61 8 2 E mail 62 9 GPS function 64 10 Other Applications 65 10 1 Clock 65 10 2 Calculator 66 10 3 Explorer 66 10 4 Recorder 69 11 Application Installation 70 11 1 Installation 70 11 2 Uninstall 70 12 Troubleshooting 71 ...

Page 3: ...the functions of build in multiple sensors build in mobile analog television image pickup etc So are you ready to embrace the new era of mobile internet entertainment in palm This manual will give you a general introduction about all kinds of functions use skills and notes please read it before using the device Thanks 1 2 Notes Maintenance The device is not waterproof please keep it dry In order t...

Page 4: ...ompany if you intend to use the device on a plane All the wireless equipment is subject to external interference and this can affect its performance Only qualified maintenance personnel can install or repair the device Opening the device in any way will invalidate the warranty Please keep the device away from strong magnetic fields in order to avoid damage to the product Please don t use the devic...

Page 5: ...e initial use 2 1 1 Please charge the MID with our original power adapter Note Please use the original accessories and battery provided with the device do not use the incompatible products in case of damage unexpected any damage of problem result from this could be beyond of our range of maintanence ...

Page 6: ... RJ45 USB Dongle 1 Leather Case 1 Keyboard Mouse 1 TF Micro SD Card 1 3 2 Product appearance 3 3 Instructions on Keys Symbol Name Description A Rear Camera Static and dynamic camera B Speaker For music or movie C Microphones hole Recording microphone D Front Camera Static and dynamic camera E receiver Telephone receiver F POWER Short press this button to enter sleeping wake up mode press long to s...

Page 7: ...upport MP3 WAV etc video formats Support E book format TXT LRC PDF EPUB etc automatic browsing zoom bookmarks text etc function Support built In WIFI access to broadband wireless Internet access colorful software can operational in the ANDROIED 4 4 system Some of the commonly used software system preset Internet Google browser IE video books etc Support Microphone and speaker function support reco...

Page 8: ...book Format TXT LRC PDF EPUB etc format Maximum capacity 5M GPS Frequency 1 57542GHZ Location accuracy 3m 2D cep Channels for receive satellite 16 channels Restarting time Cold boot 35s OPEN SKY Warm boot 32s Warm start 2s OPEN SKY Rate 515m s Date update rate for location 1HZ Maximum height 18 000m Antenna Build in GPS antenna WIFI Speed Max54Mbps Range Max100m Wifi System 802 11 b g n Built in 3...

Page 9: ... Description Icon Description Back to main menu downloading Power status Web search Return Language search Recently viewed Functions menu WIFI Status blue indicates Wi Fi connected Network status blue indicates 2G 3G network connected New e mail New message ...

Page 10: ...n the device is running low on battery power it will sound an alarm and then shut down automatically if it isn t plugged into a power source to start charging If the device cannot start up please check if the battery power is too low by charging the device 3 5 Power Saving Mode and Locked Mode Display turn off automatically when the device is under no usage status 1 Starting power saving mode disp...

Page 11: ...e Slide To move quickly on screen vertically or horizontally with your finger Drug Press on with certain pressure before drugging and then keep pressing until the icon be drugged to the target place Rotate To most interfaces for example the input text and music interface the direction can be changed easily just by swaying the device 3 7 Main Interface Main interface as pic 3 2 press blank place fo...

Page 12: ...face to provide more space for new added shortcuts or gadgets Pressing the blank place of interface slide to left or to right quickly to extend to left or right of outsider interface of screen and there are two extensible interfacs available see pic 3 3 V oicesearch Time Screen cut ...

Page 13: ...he main interface see pic 3 6 Pic 3 6 3 9 USB Connect Storage setup Set up the storage mode before transfer files Connect MID and computer with USB cable Open the notice interface refer to chapter 2 3 Condition and Status of MID Clicking USB Connected open the icon of USB Storage see pic 3 7 USB connected successfully ...

Page 14: ...B Storage device after copy finishes Note You get no access to the memory card in MID when the MID is under USB Connection but it is workable once USB Connection be breaking 3 10 Input Text Screen Keyboard When you need to input or edite android keyboard will show up Choose input method Open application setup Click Language and input All input installed will list on text setup Choose your target i...

Page 15: ...the widget to creat a shortcut and you can enter related app quickly just through the shortcut icon on desktop Creat a shortcut icon on desktop After enter into program interface or widget interface longpress any icons a shortcut icon will be created on the desktop or press on and drug the icon to desktop Note widget shortcut will not be created if there is no enough space left for main interface ...

Page 16: ... connection As pic 4 0 Pic 4 0 Connect WIFI Choose setup application on main interface Turn on WLAN MID will scan automatically available wifi network See pic 4 1 Choose target wifi network inputting password if requested click connect Pic 4 1 Add Network Click icon top right at screen see pic4 2 ...

Page 17: ... 4 3 Pic 4 3 WIFI Status Under WIFI Status turned on user can see the notice at bottom right corner when WLAM network available Connect WLAN during sleep mode Click icon top right at screen see pic4 3 and choose high class mode Click keep Wi Fi on during sleep and choose accordingly the option prefer to See pic4 4 ...

Page 18: ...e nearby device automatically when you click search for devices See pic 4 5 Pic 4 5 Click the target device name input the password and choose pair for sure after Bluetooth pairing request window pop up Click icon entering into the interface see pic4 6 and then you can operate accordingly Target device name can renamed if need ...

Page 19: ...c 4 7 shown choose rename tablet and change to the name as what you want Pic 4 7 Visibility Timeout As pic 4 7 shown click visibility timeout and choose time options accordingly See pic4 8 Note visibility timeout refers to the time setup of device be visible ...

Page 20: ...ic 4 7 shown choose Advanced setting and set up accordingly as pic4 9 Pic 4 9 FTP Server Turn on FTP Server means access to server side files and operation by client side is allowed Proximity reporter Under proximity reporter turn on the device will prompt by make a noise when distance between the two devices is too far away or when disconnect ...

Page 21: ...I data usage Click icon Choose Show Wi Fi usage see pic 4 11 Pic 4 11 4 4 More 4 4 1 Airplane Mode Airplane mode is function for quick turn off of WIFI SIM Card WIFI SIM card is out of reach under airplane mode but it recovers once airplane mode turn off 4 4 2 VPN ...

Page 22: ... Pic 4 12 Click VPN created as pic 4 13 shows Input VPN Account password accordingly and click connect to finish Pic 4 13 4 4 3 Tethering portable hotspot Tethering portable hotspot Click the app settings on menu interface Make sure the device is under wifi connected Choose More and click Tethering portable hotspot ...

Page 23: ...23 Pic 4 14 Pic 4 15 Clicks keep Wi Fi hotspot on and choose suitable period Click icon return opening portable Wi Fi hotspot and click setup Wi Fi hotspot ...

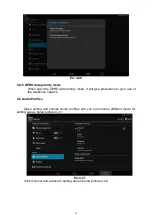
Page 24: ...e SIM card Data roaming Under data roaming you can surf the internet by SIM card in the situation of roaming This data roaming means roaming between operators but not areas Network mode Choose 2G 3Gfrequency channel GSM means 2g network this device support GSM 850 900 1800 1900MHz and 3g WCDMA 2100MHz 3g frequency channel WCDMA 850MHz 900MHz 1900MHz is optional See pic 4 17 Pic 4 17 ...

Page 25: ...19 Pic 4 19 Notes CMWAP transfers the date via GPRS it can only visit wap webpage but CMNET supports www browser on mobile internet it can log in the similar web page the same as we surfing on the computer Meanwhile the charges for them are different 3 Network operator Click operator tablet system will automatically search available networks GSM and WCDMA see as below picture 4 20 ...

Page 26: ...rity mode it will give preference to your use of the telephone network 4 5 Audio Profiles Open setting and choose Audio profiles and you can choose different mode for setting see as below picture 4 21 Pic 4 21 Click General and access to setting see as below picture 4 22 ...

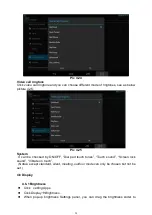
Page 27: ...you dial phone call see as above picture Volumes Click Volumes which can control the volumes of Ringtone notifications alarms see as below picture 4 23 Pic 4 23 Voice call ringtone Click voice call ringtone and you can choose the different ringtone as you like see as below picture 4 24 ...

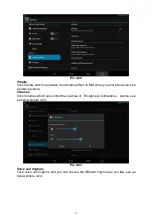
Page 28: ...25 System It can be checked by ON OFF Dial pad touch tones Touch sound Screen lock sound Vibrate on touch Notes except standard silent meeting outdoor mode can only be chosen but not be set 4 6 Display 4 6 1 Brightness Click setting Apps Click Display Brightness When pop up brightness Settings panel you can drag the brightness slider to ...

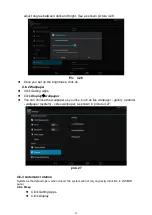
Page 29: ...Apps Click Display wallpaper You can choose the wallpaper as you like such as live wallpaper gallery custom wallpaper system video wallpaper as shown in picture 4 27 pic4 27 4 6 3 Automatic rotation System as the default open when closed the system will not rely on gravity induction to shift MID panel 4 6 4 Sleep Click Setting Apps Click Display ...

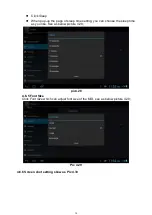
Page 30: ...leep time setting you can choose the sleep time as you like See as below picture 4 28 pic4 28 4 6 5 Font Size Click Font Size which can adjust font size of the MID see as below picture 4 29 Pic 4 29 4 6 6 Screen shot setting show as Pic 4 30 ...

Page 31: ...ferred installation space when you install new applications Check available space of SD Card and MID Enter into setting Apps Click storage to check total space Internal storage Internal storage which is the system files storage space but can not check the content see as picture 4 31 Pic 4 31 ...

Page 32: ...ou can go to main menu files managements for checking Pic 4 32 SD Card In the storage you can check the SD Card total space available unmount SD Card and Erase SD Card and see as below picture 4 33 Pic 4 33 Remove SD Card safely Click setting Apps Click storage Click uninstall SD Card ...

Page 33: ...SD Card 4 8 Battery Click settings battery and then to check the battery using status as shown below Pic 4 34 4 9 Apps 1 Please select setting in the application list 2 Choose application and enter and then you can manage and delet the installed applications In the lower left corner you can check the syetem storage space see as below picture 4 39 ...

Page 34: ...34 Pic 4 39 3 Check internal storage space see as below picture 4 40 Pic 4 40 4 Check the running applications of their usage and available space see as below picture 4 41 ...

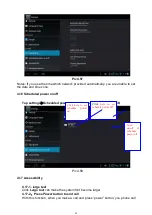
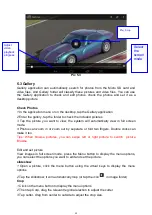
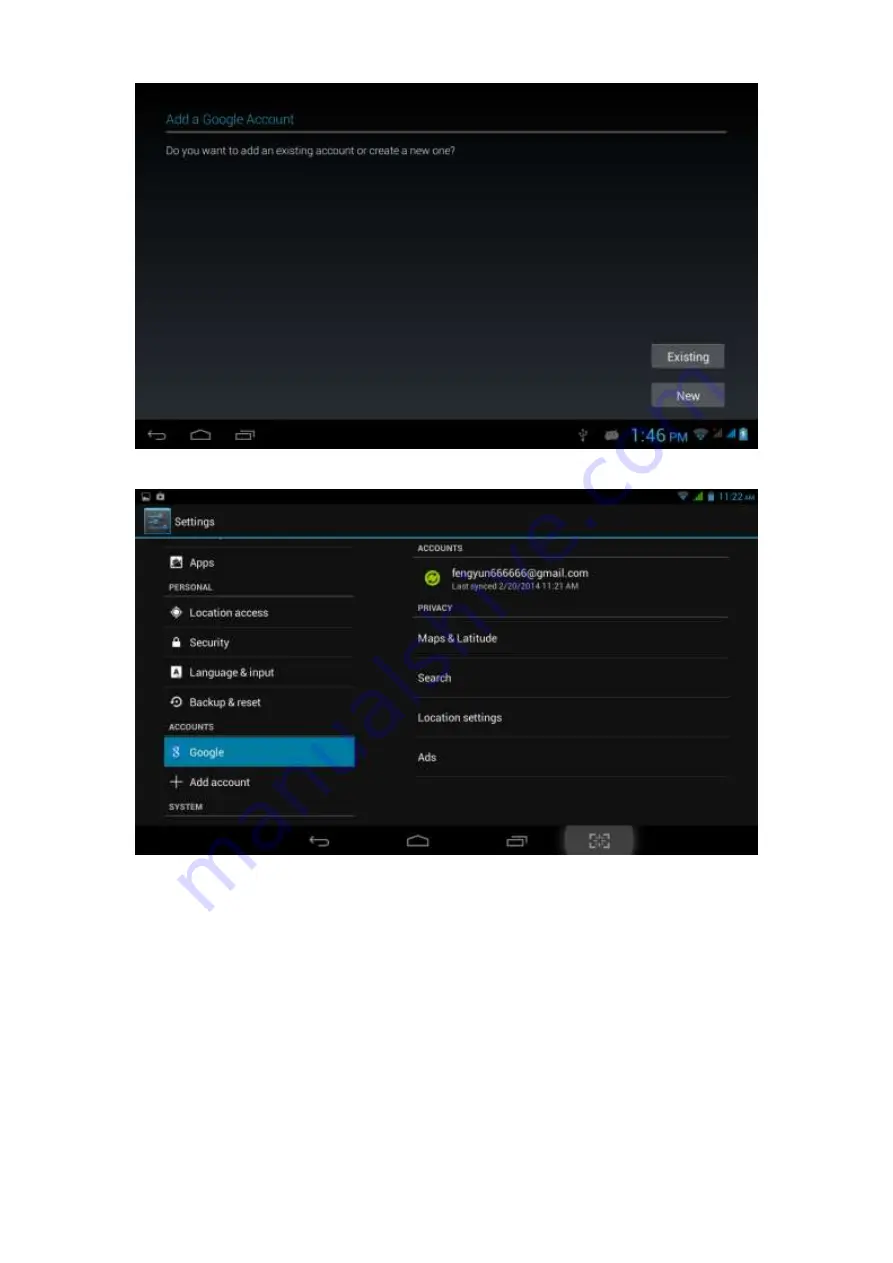
Page 35: ...35 Pic 4 41 4 10 Account 1 Click setting 2 Click Add account see as picture 4 42 Pic 4 42 3 For example tap Google see as picture 4 43 ...

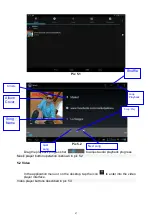
Page 36: ...36 Pic 4 43 4 Once login successfully you can open synchronization function see as picture 4 44 Pic 4 44 4 11 Location access Click setting and choose location access see as picture 4 45 ...

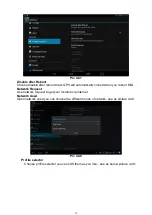
Page 37: ...S EPO assistance Use GPS assistance date EPO to speed up GPS positioning but it need insert SIM Card and generate lots of traffic EPO Setting Tap EPO Setting to check EPO position date and whether it automatically downloads Pic 4 46 GPS GPS can speed up the fixed time of location via internet when used A GPS Tap A GPS settings and you can see below picture 4 47 ...

Page 38: ...ed when you reboot MID Network Request Use network request to get your location via internet Network Used Open network used you can choose the different mode of network see as picture 4 48 Pic 4 48 Profile selector Choose profile selector you can shift them as you like see as below picture 4 49 ...

Page 39: ...ch screen will request to enter your password Set up unlock pattern 1 In the main menu page please click setting Application 2 Click the security 3 Click the Screen lock 4 In the pop up text setting area choose pattern 5 Click Next step as it mentioned 6 It will pop up unlock pattern screen which has 9 dots Slide your finger to connect the dots in any order on the next screen for creating a person...

Page 40: ...d finger and tap Next type again new PIN password and tap OK Set up password In main menu please tap settings Security Lock screen in the pop up text set area choose Password type new Password alphanumeric an tap Next type again new Password and tap OK Unknown sources In main menu tap Settings Security Unknown sources see as shown picture 4 51 Pic4 51 ...

Page 41: ...ut Tap setting Language input You can choose the language as you need See as below picture 4 52 Pic 4 52 Tap settings Language input Android keyboard settings input language see as below picture 5 34 pic4 53 In the effective input method you can change the default language as you need See as picture 4 54 ...

Page 42: ...ckup my date after you have logged in Google account and connected Wifi the system will automatically backup your date to Google server For some reasons you have to restore the factory settings please tap restore the factory settings If you want to format MID NAND please click on Erase USB Storage and tap reset tablet is ok See as picture 4 56 ...

Page 43: ...croll down the screen you can check more time zones 6 Click set date and tap up and down button to select Day Month and Year thne tap set to finish the setting 7 Tap set time and tap up and down button to select hours minutes choose AM and PM to set morning or afternoon it will not support 24 hour format and then tap set to finish the setting 8 Click Use 24 hour format you can shift between 12 hou...

Page 44: ...uled power on off see as below picture 4 58 Pic 4 58 4 17 Accessibility 4 17 1 large text Click Large text can make the system font become larger 4 17 2 Press Power button to end call With this function when you make a call and press power button you phone call Click here to set schedule power on Click here to set schedule power off Turn on off of schedule power off ...

Page 45: ...need to manually bring up before us 4 18 2 stays awake When you open stay awake MID screen will never sleep while charging 4 18 3 Cursor position When you open Cursor position you can read the touching point operation s transverse and longitudinal axis coordinates of your MID 4 18 4 Display touching operation When you open display touching operation it will display your touching area of MID And it...

Page 46: ... No Android version version no and other information 3 Click status information Can view the battery status battery SIM status IMEI No IP address etc 5 Multimedia 5 1 Music Player In the application menu or on the desktop click the icon to enter into the Music Player interface as pic 5 1 select a different way to find songs ...

Page 47: ...ss Music player button operation is shown in pic 5 2 5 2 Video In the application menu or on the desktop tap the icon to enter into the video player interface Video player buttons described in pic 5 3 Album Cover Stop Play Next song Last song Artists Song Name Shuffle Loop Playback ...

Page 48: ...m out by separate or fold two fingers Double clicks can make it too Tips When browse pictures you can swipe left or right picture to switch picture Browse Edit and set picture View images in full screen mode press the Menu button to display the menu options you can select the options you want to edit and set the picture slideshow 1 Open a picture click the menu button using the virtual keys to dis...

Page 49: ... settings 4 Click Save 5 As abandon editing click the Back key in the pop up dialog box click NO back to picture browsing 5 4 Camera In the application menu or on the desktop tap the icon to enter into the Camera interface Camera operation button and Switching camera as shown in pic 5 4 and pic 5 5 Pic 5 4 Switch front and rear camera Click shooting Submenu Panorama mode Video camera Camera mode V...

Page 50: ...hones Select the top right corner button pic 5 6 Pic 5 6 Select the search Then FM band can be found in as 5 7 Open external audio Play Stop Enter into the channel list Favorite s button Last channel Next channel Current frequen cy Menu Settings Panorama mode Color effects Back High dynamic range Flash light Adjust balance light ...

Page 51: ...adio plug in your headphones as an antenna If no antenna you will not be able to search the MID band radio 6 Communication function 6 1 Phone 6 Select the dialing application 7 Operate according to Figure 6 1 Pic 6 1 Show number Call Dial up area Function keys Hide dial pad Call records Contacts ...

Page 52: ...S interface 6 2 2 Select edit new message Pic 6 2 6 3 Contacts In the application menu or on the desktop tap the icon to enter into the Contacts interface Pic 6 3 Search for contacts Click the button to enter into the search function Input the phone number directly Add recipients Send message ...

Page 53: ...utton to enter into the Add contact interface 7 Movil Teacher 7 1 Device setting Click the Setting icon to enter in the setting panel Pic 7 1 Locate and choose Language and keyboard and select Voice Search Pic 7 2 Select Language ...

Page 54: ...54 Pic 7 3 Select English pic 7 4 ...

Page 55: ...55 Under Dialect choose select English US Pic 7 5 Select Keyboard and Language and select Output of Voice Text on the right Pic 7 6 Select Language Pic 7 7 ...

Page 56: ...ERFACE Pic 7 9 7 3NAVEGACION The main screen contains the Main Menu of each chapter From here you can enter all of the chapters of course There are two methods of navigation between chapters You can move forwards and back from one chapter to another as shown in the following image ...

Page 57: ...57 Pic 7 10 Drag the tabs to navigate between chapters Pic 7 11 Drag lessons panels for details of that lesson ...

Page 58: ...uch tabs to access that section Pic 7 13 Once you enter a letter or a word in the search query in the dictionary you can scroll through all the words in the dictionary or choose the word that interests you to access more options Pic 7 14 ...

Page 59: ...ion of the word Practice writing Listen to the pronunciation Practice your pronunciation of the word Pic 7 15 Touch the panels to access the main menu of the lessons in this chapter Pic 7 16 The main menu of the lessons allows access to each individual lesson and also displays information about your score and progress in each lesson ...

Page 60: ...t lesson As you progress through the chapter you will have access to more lessons You can always go back and review the finished lesson to review topics or improve your score Pic 7 18 The lessons have several different types of activities all complete with instructions and guidance In all the lessons you can find the same functionality and continuity of concepts of user s interface ...

Page 61: ...61 Pic 7 19 8 Internet 8 1 Browser When wifi or net work is well connected click to input IP address and can surf internet As pic 7 1 ...

Page 62: ...l setup wizard can add common Web e mail service provider Such as Yahoo Gmail and 163 other provider external POP3 or IMAP e mail account Figure 7 2 Pic 8 2 A E mail settings 1 After clicking the icon E mail setup wizard will appear to help you set up ...

Page 63: ... 2 Enter into your inbox 3 Click the Menu key 4 Tap the Settings 5 Right down select Delete Account 6 Click OK to remove C Send E mail message 1 Tap to display your inbox 2 Click the e mail inbox will automatically refresh click to read 3 Click the Menu key to pop up the menu 4 Tap the top right corner enter into edit new mail interface 5 input the recipient s e mail address 6 Input a subject and ...

Page 64: ...ic 9 1 Pic 9 1 After successfully positioned blue part will be transformed into green And display the latitude longitude and altitude speed position location time pic 9 2 Satellite value represent positioning signal of the intensity Positioning time associated with the choice of setting time zone range If time does not match with positioning location time please check your time zone selection is c...

Page 65: ...ications 10 1 Clock In the application menu or on the desktop tap the icon Clock to enter into the Clock interface Figure 9 1 Click the alarm settings alarm clock can be set pic 10 1 Clock Setting Satellite No Satellite value ...

Page 66: ... panel or operator to calculate pic 10 2 10 3 Explorer Explorer with the TF card files or folders to copy cut delete rename and other operations can also share the file install apk and other functions In the application menu or on the desktop tap the icon to enter into the Explorer interface Figure 9 3 ...

Page 67: ...delete rename etc Select a folder or file long press a folder or file to enter into Figure 9 4 Interface pic 10 4 B Paste the copied or cut file or folder on the directory you want to paste you can select the icon in the upper right corner to paste ...

Page 68: ...op up list to select the way you want to share Pic 10 6 D Install apk file select the suffix Apk file on the Explorer pop up the installation program follow the prompts to install third party software E Create new folder Select the folder you want to create the directory Click the right button select the Creat New Folder Follow the prompts to ...

Page 69: ...e Record button to start recording click the Stop button to stop recording Just click the play button to play the recording the system automatically prompts to use this recording or to give up please manually select Play recordings Select to use audio player audio in accordance with the Explorer select the audio files and click to play Figure10 7 ...

Page 70: ...can be run Note Applications only with APK suffix are compatible with system 11 2 Uninstall Uninstall application 1 On the Home screen tap Settings bitmap 2 Tap the application that lists all the applications installed on the system list of programs 3 Tap the APK you want to uninstall click Uninstall 4 Click OK to complete the uninstall Tips system pre installed program manager can easily achieve ...

Page 71: ...should not cause any inconvenience when in use 4 Cannot set E mail Account or registration application Ensure that the tablet is connected to a Wi Fi network and can connect to the Internet Ensure your E mail settings have been entered correctly for the account being accessed Make sure your system time and local time is the same 5 System has anomalies and doesn t work correctly Installing some thi...

Page 72: ...at least 10 seconds if the device can not be turned on normally Insert the Driver CD and copy the file named MTK Android Upgrade Tool to your computer desktop NOTE The device can not be updated directly from CD Open file SP_Flash_Tool_v3 1332 0 187 and double click shown as below picture It shows as below picture after open the tool ...

Page 73: ...e MT8312_Android_scatter txt then click Open shown as below picture 3 After device has been turned off connect the device to the PC by the USB cable supplied with the device Choose Install from a list or specific location Advanced and then click Next see the picture below ...

Page 74: ...arch MTK Android Upgrade Tool Driver_Auto_Installer_v1 1236 00 SmartPhoneDriver x86 Infs Click OK Shown as below picture Then click NEXT The system will detect and install the driver automatically finally click Finish see the pictures as below ...

Page 75: ...75 The Found New Hardware Wizard window will pop up on the bottom right corner as shown below ...

Page 76: ...76 4 Pull out USB cable then click Firmware Upgrade 5 The upgrade process begins shown as below picture please reconnect the tablet pc to computer if it shows that it is being charged ...

Page 77: ...e Download OK pops up The upgrading process is done and USB cable can be pulled out 7 NOTE Please don t disconnect the USB cable during the updating process because this will cause update failure or possible system failure of the device ...

Page 78: ...its and should be avoided For more information about RF exposure please visit the FCC website at www fcc gov Your wireless handheld portable telephone is a low power radio transmitter and receiver When it is ON it receives and also sends out radio frequency RF signals In August 1996 the Federal Communications Commissions FCC adopted RF exposure guidelines with safety levels for hand held wireless ...

Page 79: ...cations However there is no guarantee that interference will not occur in a particular installation If this equipment does cause harmful interference to radio or television reception which can be determined by turning the equipment off and on the user is encouraged to try to correct the interference by one or more of the following measures Reorient or relocate the receiving antenna Increase the se...

Reviews: