Rackmount LCD Console
(8 Port /16 Port)
User Manual
www.kinankvm.com
@ All rights reserved Shenzhen Kinan Technology Co. Ltd.
Print date
:
2019/10
Version
V1.0
Page 1: ...Rackmount LCD Console 8 Port 16 Port User Manual www kinankvm com All rights reserved Shenzhen Kinan Technology Co Ltd Print date 2019 10 Version V1 0...
Page 2: ...Size 17 3 5 Hardware Installation 6 Rack Mounting 6 Installation instruction 7 Opening the console 8 LED Instructions 9 LED OSD Configuration 10 OSD Operation 11 OSD Functions 12 F1 ADM 13 F2 Scan 16...
Page 3: ...99 keys keyboard with small numeric keyboard High resolution and high flexibility with touchpad with two function buttons and scroll wheel Switch Functions A single console controls up to 8 16 compute...
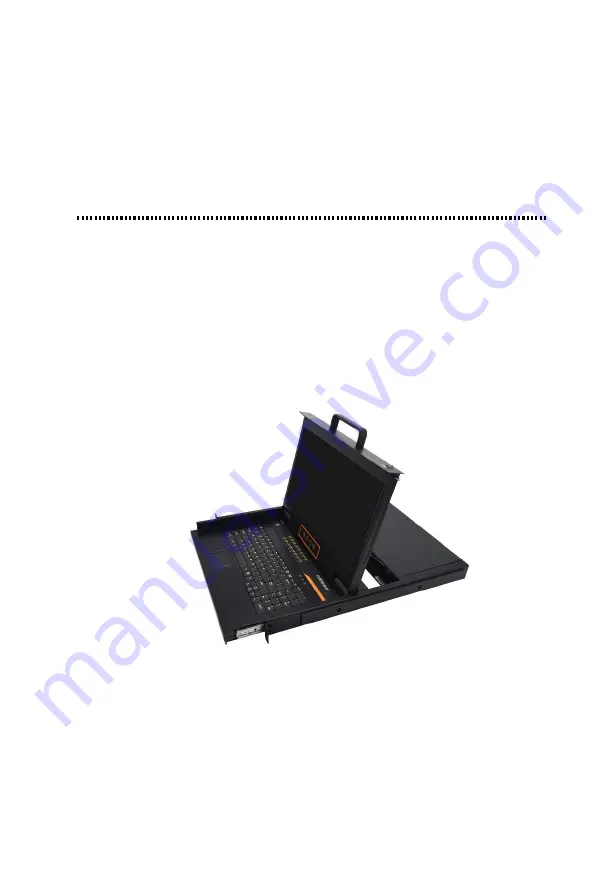
Page 4: ...rt 16 Port User Manual 4 Front view 1 1 1 front view 1 LED Module 6 Touchpad 2 Rear Bracket Slot 7 Handle 3 LED OSD Controls 8 Release Catch 4 Front Bracket 9 Display panel 5 Keyboard 10 Switch pushbu...
Page 5: ...8 Port 16 Port User Manual 5 Structure and Size 17 3 1 1 2 1 1 3 back view 1 Ground connection screw 2 HDMI Output 3 USB port 4 KVM port 5 Power input AC...
Page 6: ...andard 19 rack For other mounting distance the rear brackets need to be customized accordingly With one person hold the switch in place and the other person slides the L bracket into the switch s side...
Page 7: ...nd in the diagram 2 Connect power cable to KVM port as shown in in the diagram 3 Connect KVM switch with the computer according to in the diagram 4 Turn on the power the KVM start to work after power...
Page 8: ...expose the LCD screen the LCD module can be rotated up to108 Best Resolution 1280x1024 60Hz 2 1 4 rotate angle of the console Turn on power switch KVM will beep twice The Port LEDs light flashes 4 tim...
Page 9: ...Table 3 1 1 LED instructions No Components Function 1 1 8 or 1 16 1 Switching freely from port 1 to port 8 16 2 Port Selection Buttons LEDs Indicator LEDs are built into the switches the online LED li...
Page 10: ...make corresponding adjustment LED state Green running Red power off or access nonstandard VESA signal Flash green energy saving mode or no signal Table 3 1 2 LED OSD configuration instruction Press AU...
Page 11: ...cted port and then press Enter 2 Press any key from 0 9 to enter any port of current station To access the OSD menu through keyboard Move port selected Click port switch Double click display OSD menu...
Page 12: ...ports Set F3 Auto Scan set scanning time period Port ID set how long a port displays on the monitor OSD Hotkey set OSD hotkeys Lout Time off to set the time out value Tool F4 Reset KM press Enter rese...
Page 13: ...characters 4 1 1 4 1 2 Note You can set up an account and password according to diagram 4 1 2 then a User setup ok pops up showing you have done your set and Password Not Match pops up you need to ty...
Page 14: ...ports VIEW View only function you can only view the port but you can t operate it if set this function NULL If you set this function the port will be not displayed on the user s OSD menu Note The adm...
Page 15: ...6 2 Open the port that need broadcast function Press key select the port that need broadcast function press F7 a BC symbol appears in the QV column which shows the port has entered broadcast mode 3 Cl...
Page 16: ...nction to scan all ports with according to the set scanning interval Quick View Use this function to scan all ports with quick view symbols according to the set scanning interval Operating instruction...
Page 17: ...Ctrl KVM Hotkey Lout Time off 0 close the screen saver setting 01 99M set the screen saver timeout Note It is automatically log out if the current operator is no longer operate for a while then the KV...
Page 18: ...2 to skip to the second port of the current station F1 F8 Switch ports from 9 16 Switch to previous next port Auto scanning S 1 Auto Scan automatically scan ports that attached PC or server Users can...
Page 19: ...this function Mouse Hot On To open and close the mouse with this function We can t operate the OSD when it is Off Restore Values Restore to original factory default values About KVM It shows the KVM v...
Page 20: ...umn to indicate so Note Press F7 to cancel the QV symbol is the current port has already have a QV arrowhead symbol in its QV column If you want to cancel all the QV function press Restore Values unde...
Page 21: ...t display mode Port No Port name Port name SYSTEM Scan duration 5 seconds Scan mode All Auto log out Esc System support The device support system below Operation System Version Windows 2000 or above L...
Page 22: ...0 1989 H 0 1989 W Mouse X Y Resolution 1000 points inch 40 points mm Scroll Wheel Supports scroll wheel function Keyboard 99 keys 82 keys main keyboard 17 independent small numeric keyboard Port Selec...
Page 23: ...e heard the indicating sound and the keyboard LED is on after starting up the computer 3 Check the LED power and make sure the LED signal cable has connected to the KVM console 3 I can t log in the KV...
Page 24: ...ure it is working 2 Double click Scroll_Lock 3 Double click F12 4 Double click Caps Lock 5 Double click Ctrl Space 8 The OSD code is in disorder or abnormal displayed when daisy chaining Solution Invo...