U35WF Product User Manual
2. Product Features:
※
USB3.0 high speed HDD enclosure
※
WIFI storage device, private cloud
※
Wireless router
※
NAS function
※
Through USB port to read the data from U-disk, mobile
hard disk drive and some other external storage device
※
Can support multi devices simultaneously
※
Can support samba and FTP share server perfectly
※
Supports FAT32/NTFS/EXT4 3types disk format to read
and write data through wireless
( WiFi storage only can support this four formats, please must
check and confirm the hard disk format is correct)
1. Product Description
This product is WiFi mobile HDD enclosure also is
wireless router. It 's a mobile device which can exchange
data high-speed via USB port or WiFi network and
computer, at the same time, this device has added WiFi
transimission function and it has their own APP software
for LAN and WAN ( remote) management, at the same
time it can support the third party APP to bring more
easy usage experience to customers. It can support
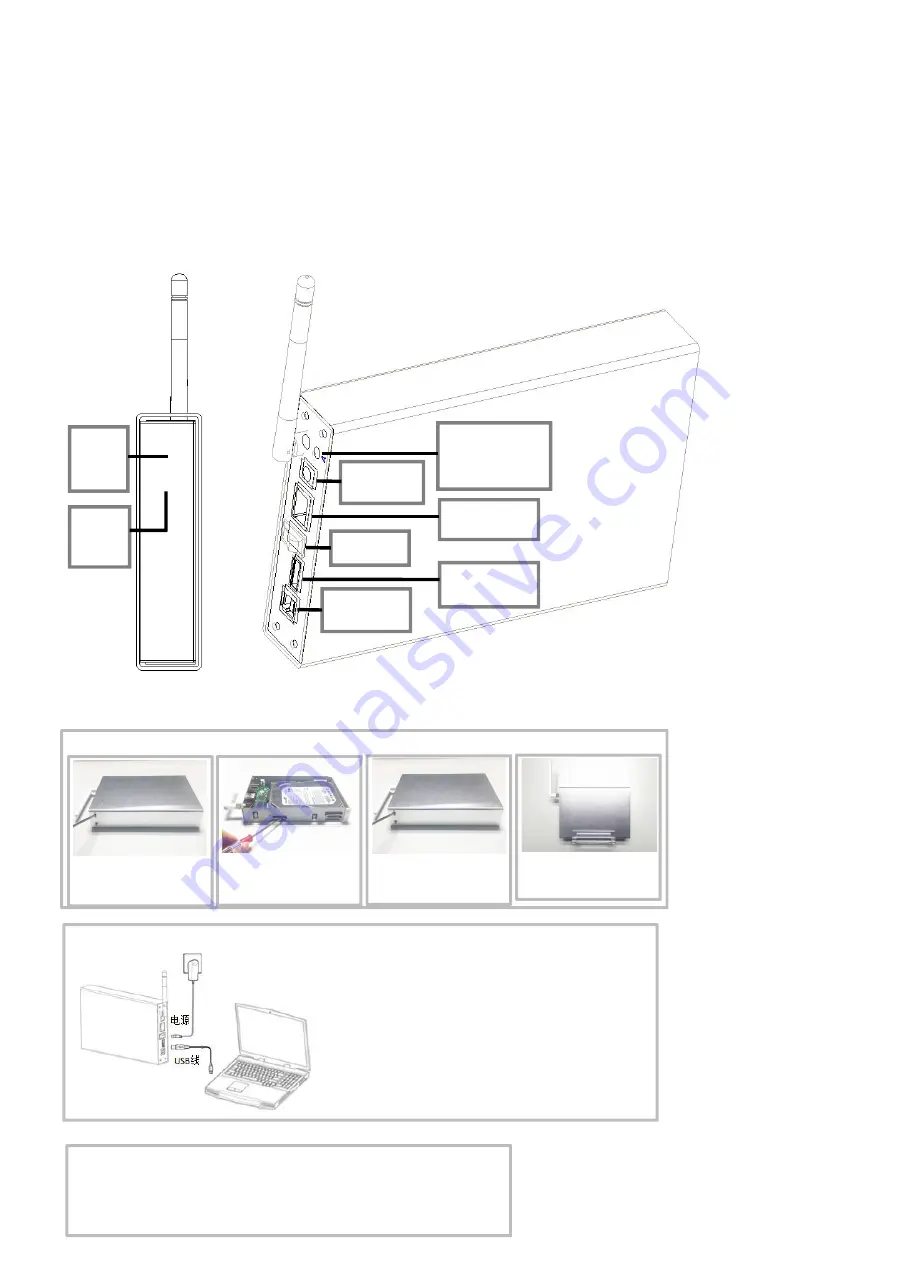
3. Structure
Description
USB2.0 expansion port:
USB2.0 peripheral data
transmission port
RJ45 WAN port:
Insert the RJ45 network
USB3.0 interface:
USB3.0 peripheral data
transmission port
Master Switch:
Open / close the
Reset switch:
Wifi long after the start of
this switch to release more
than 5 seconds to restore
the factory settings
DC power port:
Insert the 12V / 2ADC
power supply
Built-in WIFI
indicator:
Blinks when a
device is
connected
Built-in power
indicator: Box
On The lamp
lights up
Step 2: Wired storage
Access to power, and then use the USB cable to connect the
computer, you can store the files within the disk management.
(
New hard drive for the first time needs to be used for hard disk
initialization, or not out disk, only Disk Manager can be seen.
Specific
steps can Baidu look at the "disk initialization." Disk initialization is
recommended to format into EXFAT format, or FAT32 / NTFS / EXT4 three
formats are also the other format will result in wireless storage, or can
only read can not write. Unplug the USB cable after initialization is
complete)
Note: Wired USB storage and wireless storage can not be used at the
Step 1: Install hard disk drive
First, unscrew the two captive
screws on the box and remove
1
Then, insert the housing and
tighten the two captive screws.
3
And then insert the hard disk
into the corresponding interface,
2
And finally put himself on the
box can be used normally.
4
4. Operate Steps
Step 3: Turn on the WiFi
1.Access the power, press switch to turn on
;
2.Wait about 2 minutes to open WIFI, and then use your computer or phone connection to KIMAX - *****
named network;
3.Use your computer or mobile phone to open the browser, enter 192.168.169.1 Enter, enter the
password in the interface kimax login.
2
1


