Keyspan TuneView for iPod Quick Start
This Quick Start guide is intended to guide you through the basic setup and fi rst use of the Keyspan
TuneView for iPod. More detailed documentation can be found on Keyspan’s website (http://www.
keyspan.com/).
If you are setting up multiple TuneView units, set them up one at a time.
Package Contents
The Keyspan TuneView for iPod package (TVI-200C Package) contains the following items:
• TuneView Dock
• TuneView Remote
• Dock Adapters (x3)
• Batteries (2 x AA)
• USB Power Adapter
• USB Cable
• Audio Cable
• Printed Quick Start
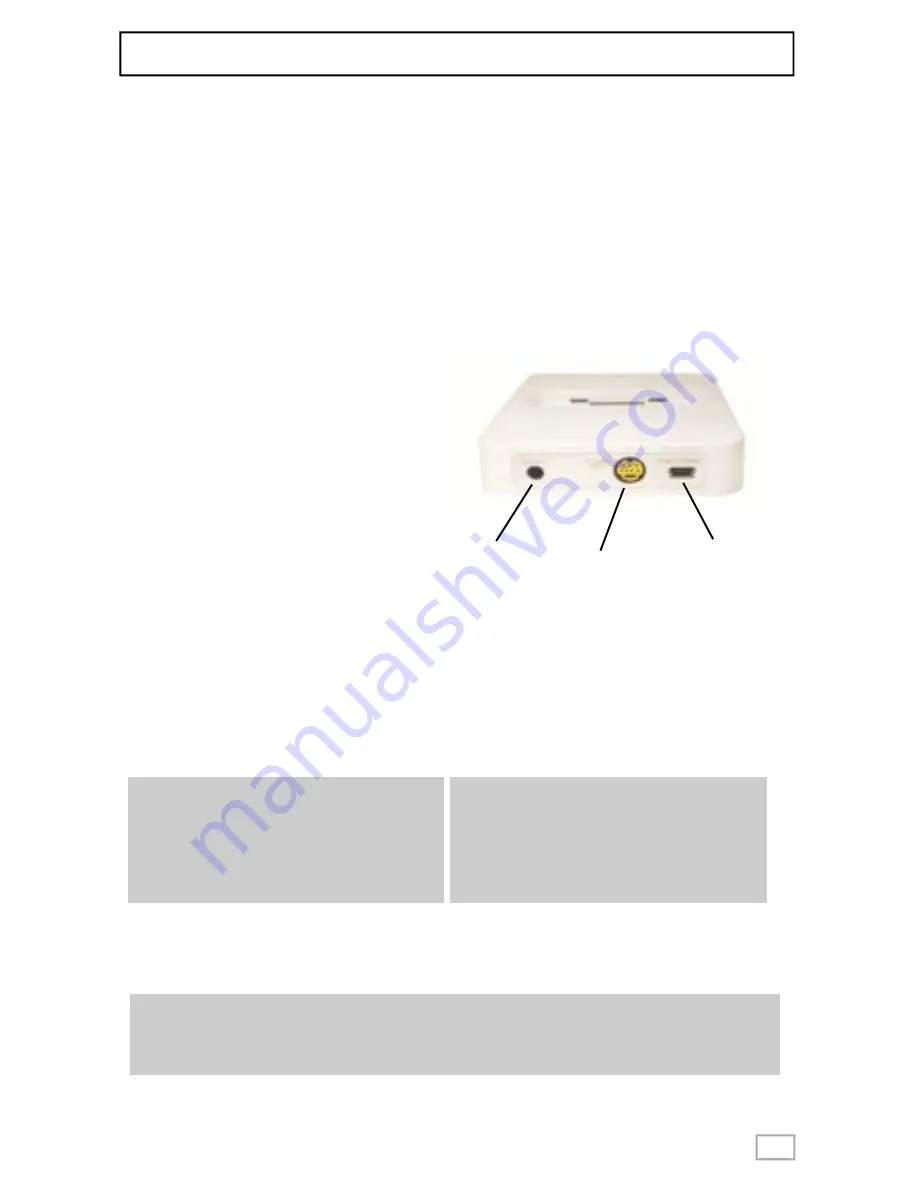
Step 1 - Connect Audio and Video Cables
Audio:
Connect the audio cable’s 3.5mm stereo jack
to the LINE OUT port on the back of the
TuneView Dock. Next, connect the stereo
cable’s dual RCA connectors to your stereo/
speakers.
Video:
The S-Video jack allows connection to a TV for
viewing slideshows and video on your televi-
sion (if your iPod supports these features).
Connect one end of an S-Video cable (not
included in the TVI-200C Package) to the
S-VIDEO OUT port on the TuneView
Dock and then con-
nect the other end to your TV.
Step 2 - Connect The USB Cable/Power Supply To Your Dock
Connect one end of the USB cable to the SYNC/POWER port on the TuneView Dock. Connect
the other end of the USB cable to the USB port on the USB Power Adapter.
Step 3 - Insert Included Batteries Into The TuneView Remote
Turn over your TuneView Remote and remove the battery cover. Then insert the two AA batteries
Pg 1
Pg 1
Troubleshooting Tip:
When you power up your TuneView Dock,
its status light will turn on and then turn off
indicating that the dock is working and ready
to use.
Note:
You can connect the TuneView Dock to your
computer via the included USB cable. When
the Dock is connected to your computer, the
TuneView Remote will not be able to
communicate with your iPod.
Note:
The TuneView Remote’s LCD screen will now turn on. If the LCD does not turn on,
please verify that you have inserted the batteries correctly.
SYNC/POWER
[USB]
S-VIDEO OUT
[video]
LINE OUT
[audio]


