


36
Keysight Instrument Rack E7950A-1.3m E3661B-1.6m E3662B-2.0
Procedures
Rear Door Hinge Replacement
1
Align the door hinge with the pressed nuts in the rear rack column.
2
Insert and tighten the two mounting screws through the hinge into the
column (on the upper hinge, also insert the two mounting screws into the
side panel).
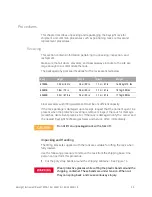
Rail Removal
This procedure is also used to remove a rail clamp.
1
Remove the component mounted on the rail being removed.
2
Remove the two rail mounting screws.
3
Lift the rail out of its notches in the support columns.
4
To remove the rail clamp, remove the clamp screw and slide the clamp out of
the rail groove.
Rail Replacement
1
Slide the rail clamp onto the rail.
2
Insert the rail tabs into the appropriate support column notches.
3
Insert and tighten the two mounting screws through the rail into the clip nuts
on the column.
4
Reinstall the component.
5
Slide the rail clamp up to the rear of the component and insert the clamp
screw.
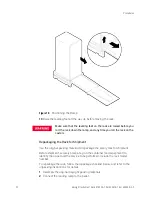
Leveler or Caster Removal
1
Turn the rack power switch OFF.
2
Disconnect AC power to the rack.
3
Carefully move the rack to an area with enough room to allow the rack to be
laid on its side.
4
Remove all equipment components from the rack.
5
Carefully lay the rack on its side.
6
Unscrew the leveler, or remove the castor by removing the four mounting
nuts and pulling the castor off.
Be sure to tag the cables disconnected for easy reconnection.