background image

SKU:  17201421

MANUAL

Create amazing spaces

A-1578-1  5007337

www.keter.com

ITM. / ART. 1921567

USER MANUAL | 

MODE D’EMPLOI

 | MANUAL DEL USUARIO | 

GEBRAUCHSANLEITUNG

 | 

MONTAGEHANDLEIDING | 

MANUALE PER L’UTENTE

 | MANUAL DO UTILIZADOR

OAKLAND


 7511

For outdoor use only.  Not for commercial use | Utilisation non commerciale à l'extérieur seulement | Uso 

esterno. Non indicato per usi commerciali | Alleen voor buitenshuis gebruik. Niet voor commercieel gebruik

US, Canada
Tel: +1877-638-7056, [email protected]

Mon - Fri | 8am - 6pm ET / Lundi-Vendredi 8h -18h

Sat - Sun | 9am - 6pm ET / Samedi-Dimanche 9h-18h


UK
Tel: +44-121-506-0008, [email protected] 

Mon - Fri | 8:30am - 5pm 

For other European countries see the last page  

Pour les autres pays d’Europe, voir la dernière page

Per altri Paesi europei, consultare l’ultima pagina

Voor andere Europese landen, zie de laatste pagina

IMPORTANT |  IMPORTANT | IMPORTANTE | BALANGRIJK

RETAIN FOR FUTURE REFERENCE: READ CAREFULLY

À CONSERVER POUR DE FUTURS BESOINS DE RÉFÉRENCE : À LIRE SOIGNEUSEMENT

CONSERVARE PER RIFERIMENTO FUTURO: LEGGERE ATTENTAMENTE

BEWAREN VOOR TOEKOMSTIGE RAADPLEGING: ZORGVULDIG LEZEN

4 ft. EXTENSION

OAKLAND 757

242cm

95.2''

82.7”

210 cm

134.6”

342 cm

Summary of Contents for 1921567

Page 1: ... com Mon Fri 8am 6pm ET Lundi Vendredi 8h 18h Sat Sun 9am 6pm ET Samedi Dimanche 9h 18h UK Tel 44 121 506 0008 CSUK keter com Mon Fri 8 30am 5pm For other European countries see the last page Pour les autres pays d Europe voir la dernière page Per altri Paesi europei consultare l ultima pagina Voor andere Europese landen zie de laatste pagina IMPORTANT IMPORTANT IMPORTANTE BALANGRIJK RETAIN FOR FU...

Page 2: ...ATION PRÉPARATION DU SITE PREPARACIÓN DEL LUGAR VORBEREITUNG DES AUFSTELLUNGSORTES VOORBEREIDING VAN HET TERREIN PREPARAZIONE DEL LUOGO DI ASSEMBLAGGIO PREPARAÇÃO DO LOCAL Recommendation Construct a wooden or concrete base as a foundation Recommandation fabriquez une base en bois ou en béton en guise de fondation Recomendación construya una base de madera o de cemento a modo de cimiento Empfehlung...

Page 3: ...bitte VOR dem Zusammenbau dass keine Teile beschädigt sind oder fehlen Nehmen Sie alle Teile aus der Verpackung und breiten Sie sie auf einer sauberen Arbeitsfläche aus Gehen Sie noch einmal die komplette Aufbauanleitung durch Bauen Sie alle Teile entsprechend der Anleitung in diesem Handbuch zusammen Lassen Sie dabei keinen Arbeitsschritt aus Lees de richtlijnen over zorg en veiligheid achterin d...

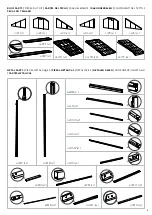
Page 4: ...du des paquet s et étalez les sur une surface de travail propre Des lettres sont imprimées sur chaque pièce pour une identification facile Saque todas las piezas del paquete o paquetes y póngalas sobre una superficie de trabajo limpia El código de letras está marcado en cada pieza para que sea más fácil identificarla Nehmen Sie alle Teile aus der Verpackung und breiten Sie sie auf einer sauberen A...

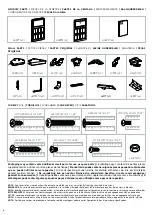
Page 5: ...x1 OLZ2 x1 OLZ3 x1 OLZ4 x1 OLZ5 x1 OLZ6 x1 MOFTU x2 MOFTD x2 MOFT9 x4 MOM11 x2 MOMP x4 MOMB x1 MOFM7 x4 NEFM x1 MOMH x2 MOMG x4 NEUK x1 NELR x2 NEDC x4 NEDSO x2 NEDSI x1 NEDSW x1 METAL PARTS PIÈCES MÉTALLIQUES PIEZAS METÁLICAS METALLTEILE METALEN DELEN COMPONENTI IN METALLO PARTES METÁLICAS NEMB x2 MOB7 x1 OKEXT x1 ...

Page 6: ...können De verpakking kan een aantal kleine extra onderdelen bevatten die als reserveonderdeel gebruikt kunnen worden L imballo potrebbe contenere piccoli componenti supplementari da utilizzare come ricambistica A embalagem pode conter algumas pequenas peças adicionais para utilização como peças de reposição NOTE Due to variations in production the actual assembled size may vary slightly from the s...

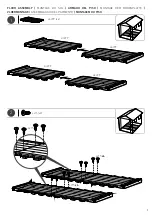
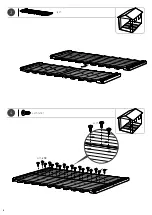
Page 7: ...7 sc15 2 sc15 x8 MOFF9 MOFF9 1 MOFF9 x4 MOFF9 MOFF9 FLOOR ASSEMBLY MONTAGE DU SOL ARMADO DEL PISO MONTAGE DER BODENPLATTE VLOERMONTAGE ASSEMBLAGGIO DEL PAVIMENTO MONTAGEM DO PISO sc15 x4 sc15 x4 ...

Page 8: ...8 4 sc15 x18 3 x2 sc15 x18 sc15 ...

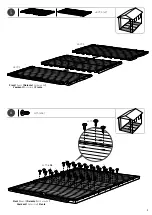
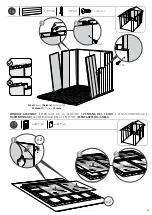
Page 9: ...9 sc15 5 MOFFL x2 MOFFL MOFFL Front Avant Delante Vorderseite Voorkant Anteriore Frente 6 sc15 x 36 Front Avant Delante Vorderseite Voorkant Anteriore Frente sc15 x36 ...

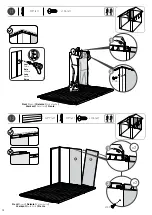
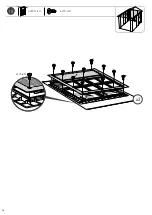
Page 10: ...rseite Voorkant Anteriore Frente OLPC 7 1 2 s26b x2 NEDT x1 s26b x2 Front Avant Delante Vorderseite Voorkant Anteriore Frente No pre drilled holes Pas de trous pré percés Sin agujeros pretaladrados Ohne vorgebohrte Löcher Geen voorgeboorde gaten Predisposizione per fori non presente Sem buracos perfurados previamente Outside Extérieure Exterior Außenseite Buitenkant Esterno Exterior ...

Page 11: ...10 OLP7 x1 Front Avant Delante Vorderseite Voorkant Anteriore Frente Low Faible Bajo Niedrig Laag Bassa Baixa 6 1 2 1 2 3 s13b x1 9 KP x1 Front Avant Delante Vorderseite Voorkant Anteriore Frente 1 2 s13b ...

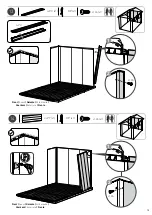
Page 12: ...Front Avant Delante Vorderseite Voorkant Anteriore Frente 1 2 s13b x2 x2 2 x2 1 s13b Front Avant Delante Vorderseite Voorkant Anteriore Frente s13b x1 11 KP x1 Low Faible Bajo Niedrig Laag Bassa Baixa 6 1 2 1 2 3 1 2 s13b ...

Page 13: ...3 14 OLP7 x1 s13b x1 KP x1 Front Avant Delante Vorderseite Voorkant Anteriore Frente 1 2 s13b 6 1 2 1 2 3 13 OLPC x1 s13b x1 KP x1 Front Avant Delante Vorderseite Voorkant Anteriore Frente OLPC 2 1 s13b ...

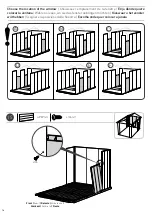
Page 14: ...b Choose the location of the window Choisissez l emplacement de la fenêtre Elija dónde quiere colocar la ventana Wählen sie aus wo sie das fenster anbringen möchten Kies waar u het venster wilt hebben Scegliere la posizione della finestra Escolha onde quer colocar a janela A B C F E D ...

Page 15: ...OW ASSEMBLY MONTAGE DE LA FENÊTRE VENTANA DEL TECHO FENSTERHMONTAGE RAAMMONTAGE ASSEMBLAGGIO DELLE FINESTRE MONTAGEM DO JANELA 1 x2 x2 s13b x3 Front Avant Delante Vorderseite Voorkant Anteriore Frente 16 OLP7 x3 KP x2 1 2 s13b s13b ...

Page 16: ...16 18 MOWN x2 sc15 x22 sc15 x 11 x2 ...

Page 17: ...17 19 1 2 3 ...

Page 18: ...18 MOMP 20 MOMP x1 90 1 90 MOMP sc15 x1 sc15 ...

Page 19: ...19 MOMP 21 MOMP x1 Pre drilled holes Trous pré percés Agujeros pretaladrados Vorgebohrte Löcher Voorgeboorde gaten Predisposizione per fori Orifícios pré perfurados 2 3 90 1 90 sc15 sc15 x1 ...

Page 20: ...20 FNME x2 sc8 x2 scn8 x2 22 scn8 sc8 MOMG MOMG MOMH MOMG MOMG MOMH 23 sc8 x12 scn8 x12 MOMH x2 MOMA x2 MOMG x4 FNME 1 2 sc8 scn8 FNME 1 2 sc8 scn8 sc8 x4 scn8 x4 ...

Page 21: ...21 24 sc8 x4 scn8 x4 2 1 sc8 x2 scn8 x2 ...

Page 22: ...22 25 1 2 3 4 OLP7 x3 OLPW x1 KP x2 x2 2 1 x2 s13b x4 s13b s13b ...

Page 23: ...23 26 1 2 3 ...

Page 24: ...24 27 MOMP x1 MOMP 90 90 MOMP sc15 x1 sc15 ...

Page 25: ...25 MOMP 28 MOMP x1 Pre drilled holes Trous pré percés Agujeros pretaladrados Vorgebohrte Löcher Voorgeboorde gaten Predisposizione per fori Orifícios pré perfurados 2 90 1 90 sc15 x1 3 sc15 ...

Page 26: ...26 FNME x2 sc8 x2 scn8 x2 29 30 sc8 x4 scn8 x4 2 1 FNME 1 2 sc8 scn8 FNME 1 2 sc8 scn8 sc8 x2 scn8 x2 ...

Page 27: ...27 OLPC x2 KP x2 31 OLPC OLPC s13b x4 32 x2 x2 s13b s13b ...

Page 28: ...28 34 s13b x4 33 NEPF x2 KP x2 s13b s13b s13b s13b ...

Page 29: ...29 35 S45b x2 s45b x1 ...

Page 30: ...30 OKCB OKCB 2 OKCM OKCB 1 OKCB 2 1 1 OKCB x2 OKCM x1 36 Inside Intérieur Interior Innenseite Binnenkant Interno Interior ...

Page 31: ...31 37 sc15 x6 sc15 x 6 1 1 2 38 NEFM x1 1 2 x2 s45b s45b x2 ...

Page 32: ...32 1 x2 s45b 39 s45b x2 2 2 1 1 NELR x2 40 ...

Page 33: ...33 41 OKCL x1 OKCR x1 42 NEUK x1 1 2 OKCL OKCR OKCL OKCR sc7t x1 x2 sc7t x2 ...

Page 34: ...c15 x4 No pre drilled holes Pas de trous pré percés Sin agujeros pretaladrados Ohne vorgebohrte Löcher Geen voorgeboorde gaten Predisposizione per fori non presente Sem buracos perfurados previamente NEDPC sc15x4 1 2 3 ...

Page 35: ...OLZ3 1 3 x2 s13b x 4 s13b OLZ1 x1 OLZ2 x1 OLZ3 x1 OLZ4 x1 OLZ5 x1 OLZ6 x1 44 s13b x8 2 OLZ4 OLZ6 OLZ5 ROOF ASSEMBLY MONTAGE DU TOIT ARMADO DEL TECHO DACHMONTAGE DAKMONTAGE ASSEMBLAGGIO DEL TETTO MONTAGEM DO TELHADO ...

Page 36: ...36 45 x2 MOAK x2 s13b x2 1 2 46 MOAK x2 s13b x 1 s13b Inside Intérieur Interior Innenseite Binnenkant Interno Interior Outside Extérieure Exterior Außenseite Buitenkant Esterno Exterior ...

Page 37: ...37 48 47 x2 KP x2 2 1 ...

Page 38: ...38 MOMB MOMB sc15x5 sc15 50 MOMB x1 sc15 x6 1 2 49 s13b x8 s13b x4 ...

Page 39: ...39 MOFTU MOFTD MOFM7 MOFM7 sc15 sc15 MOFTU MOFTD MOFM7 MOFM7 sc15 sc15 51 MOFTU x2 MOFM7 x4 MOFTD x2 sc15 x20 2 1 sc15 x 5 ...

Page 40: ...40 52 MOFT9 x4 MOFT9 MOFT9 MOFT9 MOFT9 53 sc15 x16 x2 sc15 ...

Page 41: ...41 MOFT9 MOFT9 MOFT9 MOFT9 MOM11 x2 MOM11 MOM11 sc15 x16 54 sc15 sc15 2 1 sc15 x 5 ...

Page 42: ...42 55 MOFTD x1 MOFTD 1 2 3 6 5 4 ...

Page 43: ...43 sc15 x 3 sc15 x 3 57 sc15 x3 sc15 1 2 3 6 5 4 56 sc15 x 1 sc15 x1 1 2 3 6 5 4 ...

Page 44: ...44 58 MOFT9 MOFT9 x1 1 2 3 6 5 4 sc15 x3 59 sc15 x 3 sc15 x 3 sc15 1 2 3 6 5 4 ...

Page 45: ...45 60 sc15 x8 sc15 x 8 61 MOFTU x1 MOFTU 1 2 3 6 5 4 1 2 3 6 5 4 ...

Page 46: ...46 sc15 x1 62 sc15 63 sc15 x8 sc15 x 8 1 2 3 6 5 4 1 2 3 6 5 4 ...

Page 47: ...47 64 MOFTD x1 MOFTD 1 65 sc15 x1 sc15 1 2 3 6 5 4 1 2 3 6 5 4 ...

Page 48: ...48 67 sc15 x3 MOFT9 MOFT9 x1 sc15 x 3 2 1 sc15 x 3 66 sc15 x3 1 2 3 6 5 4 1 2 3 6 5 4 ...

Page 49: ...49 68 sc15 x8 sc15 x 8 1 2 3 6 5 4 MOFTU x1 69 sc15 x1 MOFTU 1 sc15 2 1 2 3 6 5 4 ...

Page 50: ...50 70 sc15 x9 71 MOBC9 x1 sc15 x4 2 1 sc15 x4 MOBC9 sc15 x 8 1 2 3 6 5 4 3 sc15 2 ...

Page 51: ...51 72 MOPLS x2 1 2 3 x2 MOPLS 73 1 2 MOB7 x1 MOB7 x1 MOB7 OKEXT x1 OKEXT x1 OKEXT MOB7 x1 OKEXT x1 ...

Page 52: ...52 75 MOAC x1 sc15 x3 2 1 sc15 x3 74 MOAC x1 sc15 x3 1 2 sc15 x3 ...

Page 53: ...53 76 sc15 x32 1 77 s45b x8 MOFTC x4 sc15 x8 2 sc15 x2 3 s45b x2 sc15 x10 sc15 x12 sc15 x10 ...

Page 54: ...8 78 sc15 x8 s45b x8 79 s13b x12 Pre drilled holes Trous pré percés Agujeros pretaladrados Vorgebohrte Löcher Voorgeboorde gaten Predisposizione per fori Orifícios pré perfurados s13b s13b 1 2 sc15 x1 s45b x1 3 ...

Page 55: ...55 s13b s13b x2 81 sc15 x6 80 s13b x50 Low Faible Bajo Niedrig Laag Bassa Baixa 6 1 2 1 2 3 sc15 x6 x8 x8 x4 x8 x8 x6 x4 x4 ...

Page 56: ...DOOR ASSEMBLY MONTAGE DE LA PORTE ARMADO DE LA PUERTA MONTAGE DER TÜR DEUR MONTAGE ASSEMBLAGGIO DELLA PORTA MONTAGEM DA PORTA 문 조립 82 sf13 x16 x4 NEDC x4 NEDMC x8 sf13 x4 sf13 83 NUHF x2 NEDOR x1 1 2 NEDOR ...

Page 57: ...57 84 85 NEDSO x2 NEDSI x1 NEDSW x1 NEDOR x1 NEDOL x1 NEDSW NEDSO NEDSO NEDSI NEDOR NEDOL NEDOR NEDOL ...

Page 58: ...58 87 sc15 x12 86 sc15 x2 sc15 sc15 NUHH x2 sc15 x4 NUHG x2 ...

Page 59: ...59 88 x8 sc15 x12 89 NEDH x6 s13b x28 s13b x2 sc15 x2 ...

Page 60: ...60 90 1 x2 3 sc7t x8 sc7t x2 x4 NEDOL NEDOR 2 x4 ...

Page 61: ...61 91 92 sc7t x4 NUHC x1 NUHD x1 sc8 x1 scn8 x1 NUHB x1 1 sc8 NUHA x1 sc7t x2 ...

Page 62: ...62 93 3 4 2 sc15 x2 NEMB x2 NUHE x1 sc15 1 1 ...

Page 63: ...63 s45b x 34 94 S45b x34 ...

Page 64: ...64 95 ...

Page 65: ...oor Si vous trouvez que votre abri n est pas de niveau mettez des cales sur chaque côté ou au niveau de la porte Nel caso in cui la casetta non dovesse essere in posizione orizzontale usare degli spessori nella zona interessata B A OPTION OPTION OPCIÓN OPTION OPTIE OPZIONE OPÇÃO A B ...

Page 66: ...66 96 s13b x5 s13b x9 x4 Inside Intérieur Interior Innenseite Binnenkant Interno Interior s13b ...

Page 67: ...67 sc15 x4 97 sc15 x2 ...

Page 68: ...tán incluidos ABSICHERN DES SCHUPPENS AN EIN FUNDAMENT Bringen Sie den Schuppen auf dem Fundament an indem Sie an den Markierungen Löcher in den Schuppenboden bohren und diesen mit passenden Schrauben auf dem Fundament festschrauben Schrauben nicht enthalten HET SCHUURTJE OP HET FUNDAMENT VASTZETTEN Bevestig het schuurtje aan de fundering door op de aangegeven plaatsen gaten te boren in de vloer v...

Page 69: ...69 50mm 6 10mm OPTION OPTION OPCIÓN OPTION OPTIE OPZIONE OPÇÃO ...

Page 70: ...upport dans les murs Ne peignez ni les fenêtres ni les portes ou le tour de porte ni le toit ni le sol ni aucun autre élément de l abri seulement les murs Rappelez vous la peinture exige un certain entretien Après un certain temps il peut être nécessaire de repeindre Pour votre propre sécurité suivez bien les instructions d utilisation de la peinture avant la première application COBERTIZOS KETER ...

Page 71: ...re riferimento alle istruzioni dettagliate su cura e manutenzione Tipo di vernice I pannelli possono essere verniciati con una vernice acrilica per uso esterno Raccomandiamo una tinta poco diluita ombreggiature leggere e rifiniture lucide o semilucide Consultare un esperto al momento della scelta della vernice più adatta Applicazione utilizzare un rullo per applicare la vernice sulla superficie asc...

Page 72: ...côté de la porte Maintenant les portes fermées et verrouillées lorsque l abri n est pas utilisé afin d éviter tout dégât dû au vent Ne montez pas sur le toit Consultez les autorités de votre localité pour vérifier la nécessité de disposer d un permis pour ériger l abri INSTRUCTIONS DE SÉCURITÉ ET D ENTRETIEN La cobertizo está diseñada solo para el cobertizo de productos No está diseñada para habitar...

Page 73: ...tto pulito da neve e da cumuli di foglie Grandi quantità di neve sul tetto potrebbero danneggiare la casetta compromettendone la struttura La direzione del vento è un fattore importante da considerare nella scelta della posizione della casetta Ridurre il più possibile l esposizione al vento in particolare per la parte frontale Tenere le porte chiuse con lucchetto quando la casetta non è in uso per...

Page 74: ...urée de la garantie GARANTIE ILLIMITÉE Su caseta Keter El Producto ha sido fabricada con materiales reciclables de alta calidad bajo rigurosos controles y supervisión En caso de que aparezca un problema con el Producto por favor dirija su reclamación al servicio al cliente de Keter en nuestra página web www keter com o por teléfono Esta garantía cubre fallas de producto por defectos de fabricación...

Page 75: ... irragionevole abuso negligenza alterazione verniciatura movimentazione trasporto o spostamento del prodotto eventi naturali tra cui ma non limitati a grandine qualsiasi tipo di tempesta inondazioni incendi e danni conseguenti o accidentali L assemblaggio e la manipolazione non in conformità con le raccomandazioni le linee guida e le restrizioni descritte nel manuale utente del prodotto ed il loro...

Page 76: ...e poland keter com Hungary Tel 36 52 565 920 email Service hungary keter com Other European Countries Tel 31 1612 28300 email service keter com Mon Fri 8 30am 5pm South Africa Tel 0861 866 766 email info keter co za Website za Keter com WWW KETER COM IF THERE ARE MISSING OR BROKEN PARTS PLEASE DO NOT RETURN THE PRODUCT TO THE STORE Please log onto our website or contact Customer Service at S IL Y ...

Reviews: