59
PBJ_N-SH-e-1810.docx
24
11. Trouble shooting
11.1
General trouble shooting
Symptom
Probable cause
Remedy
(a) Nothing appears in the
display.
Correct power is not supplied.
Check the power supply and connect
correctly.
Wrong AC adapter or failure
Replace the AC adapter.
Cable, Flat26 (B6) is disconnected.
Connect Cable,Flat (B6) correctly.
Assy,Display (B4) is failed.
Replace Assy, Display (B4).
(b)Missingnumbers,
symbols in the display.
Assy,Display (B4) is failed.
Replace Assy, Display (B4).
(c) Keys do not operate
Cable,L105(14) is disconnected.
Connect Cable,L105(14) correctly.
Switch board assy(C3) is failed.
Replace Switch board assy(C3).
Assy,Display(B4) is failed.
Replace Assy,Display(B4).
(d)
"oL" or "-oL"
is displayed.
Pan assembly(6) and/or Cap,Pan
supporter(5) are not installed.
Install Pan assembly(6) and Cap,Pan
supporter(5) correctly.
Protect cover assy(8) and Pan
assembly(6) are in contact.
Install Protect cover
assy(8) with
double-sided tapes firmly when used.
Pan assembly(6) is not installed
correctly.
Install Pan assembly(6) correctly.
Pan is loaded exceeding the weighing
capacity.
Use the balance within its capacity.
Cable,L65(U27) is disconnected.
Connect Cable,L65(U27) correctly.
Pt-Ni band(U14) is twisted/bent/badly
soldered.
Replace Pt-Ni band(U14) / Solder Pt-Ni
band(U14) correctly.
The hole of Stopper plate(U11) is
contacting with the pin of Lever Assy.
Position and lock Stopper plate(U11)
correctly without contacting with the
lever pin.
Stopper, Lever
(U12)
and/or
Assy,Detector(U8) are not correctly
positioned.
Position Stopper, Lever (U12) correctly
and
adjust
the
height
of
Assy,Detector(U8) correctly.
Assy,Analog(B3) is failed.
Replace Assy,Analog(B3).
Force coil assy(L1) wire break/ earth
leak
Replace Force coil assy(L1).
Force coil assy(L1) and Magnet
assy(U6) are contacting directly or
with dusts.
Remove dusts and position Force coil
assy(L1) correctly.
Unit assy(1) is damaged.
Replace Unit assy(1).
(e) Large linearity error
Linearity adjustment was incorrect.
Inputted calibration weight value was
not correct in linearity adjustment.
Perform linearity adjustment correctly
using accurate calibration weights.
Essentially
poor
repeatability
is
causing the symptoms.
Check repeatability and refer to (i)
(Repeatability)
Essentially large drift is causing the
symptoms.
Check drift and refer to (f) (Drift)
Essentially large corner load error is
causing the symptoms.
Check corner load performance and
refer to (h) (Corner load error)
Span
calibration
has
not
been
performed correctly.
Perform span calibration.
Damaged EEPROM data.
Input the data with the Adjustment S/W.
Unit assy(1) is damaged.
Replace Unit assy(1).
(f) Zero drift, sensitivity
drift are large.
Warm up is insufficient.
Warm up the balance sufficiently.
Direct sunlight, or air current from
heater or cooler exist.
Change the balance installation site.
Remove sunlight / air current.
The
installation
site
has
been
changed.
Warm up sufficiently and perform span
calibration.
Temperature sensor is failed.
Replace temperature sensor.
Damaged EEPROM data.
Input the data with the Adjustment S/W.
Unit assy(1) is damaged.
Replace Unit assy(1).
Summary of Contents for PBJ-N
Page 4: ...PBJ_N SH e 1810 docx 4 ...
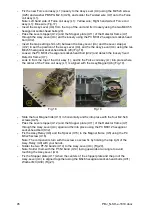
Page 40: ...PBJ_N SH e 1810 docx 40 Fig 7 Fig 8 ...
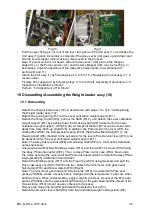
Page 47: ...47 PBJ_N SH e 1810 docx Fig 22 Fig 23 ...
Page 55: ...55 PBJ_N SH e 1810 docx 23 Drawing Fig 31 ...
Page 56: ...PBJ_N SH e 1810 docx 56 ...
Page 57: ...57 PBJ_N SH e 1810 docx Fig 33 ...


