background image

Summary of Contents for 415.16117

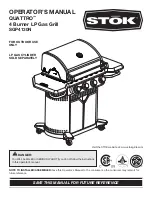
Page 1: ...or other reproductive harm CAUTION Read and follow all Safety Statements Assembly instructions and Use Care Directions before attempting to assemble and cook Some parts may contain sharp edges especially as noted in these instructions Wear protective gloves if necessary Parts Assembly Safety Rules Use and Care Troubleshooting Espahol Assembly Questions Call 1 800 241 7548 Parts Ordering Call 1 800...

Page 2: ...t to the possibility of serious bodily injury if the instructions are not followed Be sure to read and carefully follow all of the messages cAo CAUTION indicates a potentially hazardous situation which if not avoided may result in minor or moderate injury installation Safety Precautions Use grill as purchased only with LP propane gas and the regulator valve assembly supplied Grill installation mus...

Page 3: ...ional repair specialists who have access to over 4 5 million quality parts and accessories That s the kind of professionalism you can count on to help prolong the life of your new purchase for years to come Purchase your Repair Protection Agreement today Some limitations and exclusions apply For prices and additional information call 1 800 827 6655 Sears installation Service For Sears professional...

Page 4: ...Safety relief valve UL listed Overfill Protection OPD HandWheel Device OPD This OPD safety feature is identified by a unique triangular hand wheel Use only LP tanks equipped with this type of valve LP tank must be arranged for vapor withdrawal and include collar to protect LP tank valve LP Liquefied Petroleum Gas LP gas is nontoxic odorless and colorless when produced For Your Safety LP gas has be...

Page 5: ... test must be repeated each time LP tank is exchanged or refilled Do not smoke during leak test Do not use an open flame to check for gas leaks Grill must be leak tested outdoors in a well ventilated area away from ignition sources such as gas fired or electrical appliances During leak test keep grill away from open flames or sparks Usea clean paintbrush and a 50 50 mild soap and water solution Br...

Page 6: ...annot complete the connection disconnect regulator and repeat steps 5 and 6 If you are still unable to complete the connection do not use this regulator Do not insert any tool or foreign objects into the valve outlet or safety relief valve Youmay damage the valve and cause a leak Leaking propane may result in explosion fire severe personal injury or death If a leak is detected at any time STOP and...

Page 7: ...ank out of correct position specified in assembly instructions Always close LP tank valve and remove coupling nut before moving LP tank from specified operation position Safety Tips A Before opening LP tank valve check the coupling nut for tightness A When grill is not in use turn off all control knobs and LP tank valve A Never move grill while in operation or still hot A Use long handled barbecue...

Page 8: ...he lighting procedure 5 igniteother burners by turning knob to 5 6 if ignitor does not work wait 5 minutes then follow match lighting instructions Before Your First Cookout Light burners check to make sure they are lit close the lid and warm up grill on HIGH for 15 minutes This curing of paint and parts will produce an odor only on first lighting Burner Flame Check Light burner rotate knobs from H...

Page 9: ... water or use a grill cleaner with scrub brush on insides d grill lid and bottom Rinse and allow to completely air dry Do not apply a caustic grillloven cleaner to painted surfaces Plated wire grates Wash grates with concentrated grill cleaner or use soap and water solution Dry thoroughly and store indoors between cookouts Plastic parts Wash with warm soapy water and wipe dry Do not use citrisol a...

Page 10: ...ion When LPtank is connected to grill store outdoors in well ventilated space and out of reach of children Cover grill if stored outdoors Store grill indoors ONLY if LP tank is turned off and disconnected removed from grill and stored outdoors When removing grill from storage follow CleaningBurner Assembly instructions before starting grill Food Safety Food safety is a very important part of enjoy...

Page 11: ...o direct flame to ignite the fats and juices that drip during cooking indirect Cooking instructions Always cook with the lid closed Due to weather conditions cooking times may vary During cold and windy conditions the temperature setting may need to be increased to insure sufficient cooking temperatures I Burner Cooking Cookwithdirector indirectheat Bestforsmallermealsorfoods Consumeslessfuel 2 Bu...

Page 12: ...els 80009030 Knobs 80009030 Burners 80009027 Electrode 80009029 Carry Over Tubes 80009028 Lid 80009023 Handle 80009026 Temperature Gauge 80009025 12 464321907 464322107 K_y 30 31 32 33 34 35 36 37 38 39 40 41 42 43 44 45 46 47 48 49 50 51 Qty 1 12 16 8 4 4 1 1 1 1 1 2 3 Descri_ art Logo Plate 80009024 1 4 20xl 2 Screws HMSO2520050CPNBZC Right Side Shelf 80009033 Right Fasda 80009048 Sideburner She...

Page 13: ...46 49 27 43 41 26 12 30 10 9 9 8 31 13 13 J 32 33 464322107 464321907 13 ...

Page 14: ...shown A Left leg assembly has large holes on ends of legs Hook tank exclusion wire into right and meftmegassembmies B TankExclusion Wire A RightLegnoholes onendsof leg LeftLegAssembly has largeholesonendsof legs 14 4643210907 464322107 ...

Page 15: ...Bottom Shelfto Legs Attachbottomshelfto right and leftlegassemblies with 4 1 4 20x14 2 screwsand 1 4 20 flange nuts 10 Qty 4 7 Qty 4 8 464322107 46432t907 15 ...

Page 16: ...ttachonefront panelto lowerhalfof cartwith 4 8xl 2 self4apscrews Slideslotinother panelonto tank exclusionwireandattach to upperhalfof cartwith 4 8xl 2 self tap screws 13 Qty 8 FrontPanel Back of cart FrontPanel 16 464321907 464322107 ...

Page 17: ...mbmy upside down mnsertaxmerod into wheem megsand other wheel Attach with a fiat washer and hitch pin Push meg extenders into right megs Qty l 16 Qty 1 Leg Extenders _X Axle Rod Cone side of wheel against leg Wheel I I I 464322107 464321907 17 ...

Page 18: ...people to lift and position grill head onto cart Carefully lower the grill head onto the cart Make sure the regulator hose is hanging outside the cart Attach with 1 4 20x1 2 screws and 7mm lock washers Grill Head X GrillHea 9 Qty 4 31 Qty 4 18 464321907 464322107 ...

Page 19: ...defireboxinsertfiber washersand 1 4 20x1 2 screwsas shown B Attachshelfwithflangenuts C lO Qty 4 8 Qty 4 31 Qty 4 B 8 31 A RightSideShelf Back ofcart 10 FasciaRightSide Shelf Attachfasciato fireboxwith 1 8x3 8 self tapscrew 40 Qty l Fascia RightSideShelf 40 464322107 46432t907o19 ...

Page 20: ...ner shelf oversupport brackets on side of firebox A insidefirebox insertfiber washers and 1 4 20xl 2 screws as shown B Attach sideburner sheff with flange nuts C A Sideburner Shelf 31 4O Qty 1 10 Qty 4 8 Qty 4 Back of cart 31 Qty 4 10 20 464321907 464322107 ...

Page 21: ...d screws B Placesideburnerintoshelf C Makesurevalve is insidesideburnertube Attachsideburner withtwo screwsand washers Presssideburner controlknobontovalvestem D Undersideburnershelf attach sideburnerignitorwireto electrode E Correctlyassembledburner4o valve engagement Lookingunderneath sideburner assembly 13 E A Valve ignitorWire B SideburnerBezel SidebumerKnob 40 Qty l 464322107 464321907 21 ...

Page 22: ...x1 2 screws and flange nuts B Pmace sideburner mid onto sideburner body Attach with 4 10 24xl 2 screws and flangenuts C SideburnerHandle A SideburnerLid 10 Qty 8 35 Qty 8 31 Qty 2 Sideburner Grate or Griddle Placesideburner grate or griddle onto sideburner body SideburnerGriddle SideburnerGrate_ 22 464321907 464322107 ...

Page 23: ...ing Away pivot wire into holes in sides of grill lid insert ends of Swing Away leg wire into holes in sides of firebox NOTE Pivot and leg wires running side to side should be under wires running front to back If pivot and leg wires are on top Swing Away is installed upside down Unscrew ignitor cap and place AA battery into ignitor slot with positive end facing outward Screw ignitor cap onto ignito...

Page 24: ...ithan OPD over fill protection device equipped LP tank Fill and meak check before attaching to grill and regulator PlaceLP tank into hole in bottom sheffwith tank collar opening facing to side as shown Finger tighten tank thumbscrew to hold LP tank securemy in place SeeUseand Caresection to correctly LeakTest and perform the Burner FlameCheck m m t cAu rlo Failure to install tank correctly may all...

Page 25: ...pento allowflamesto diedown continuousexcessive Aftercooling cleanfood particlesandexcessgreasefrom inside flamesabovecooking fireboxarea greasecup pan tray andother surfaces surface GASISSUES Tryingto lightwrongburner Burnernotengagedwith controlvalve Obstruction in burner Burner s will not light usingignitor Continued onnext page No gasflow Vaporlockat couplingnut to LPtank Couplingnutand LPtank...

Page 26: ...eplaceignitor Inspectwire insulationandproperconnection Replacewiresif insulationis broken See Match Lighting sectionof UseandCare Checkfor gas inLPtank Turnoff knobs wait30secondsandlightgrill Ifflamesarestilllow turnoff knobsand LPtankvalve Disconnectregulator Reconnect regulatorand leak test Turnon LPtankvalve wait30secondsand thenlightgrill Turnoff knobsandLPtankvalve Disconnect couplingnutfro...

Page 27: ...eright direction Isthe gaptoo big Are outputconnections on andtight If possible observegrillin darklocation Operate ignitionsystemand lookfor arcingbetweenoutputwires andgrillframe All sparkspresentbutweak or atslow rate Hasmoistureaccumulated onelectrodeand orin burner ports Inspectelectrodesfor cracks Installbattery makesure that and connectorsareorientedcorrectly with endup and enddown Replaceb...

Page 28: ...ums lawnequipment and electronics call or go on linefor the location of your nearest iiiiiiiiiiiiiiiiii 1 800 488 1222 iiiiiiiiiiiiiiiiii Call anytime day or night U S A only iiiiiHHHHHHi To purchasea protectionagreement U S A or maintenanceagreement Canada ona productservicedbySears 1 800 827 6655 U S A 1 800 361 6665 Canada Pard pedir servicio de reparaci6n a domidlio y pard ordenar piezas 1 888...

Reviews: