1064KIT – 1064EKIT
Kit Saldatore Profess 2 bombole
Kit Professional Heating Torch + 2 cylinders
Kit Lampe à Souder Professio 2 Bouteille
3/4
Kemper SRL
VIA Prampolini 1/q – 43044 Lemignano di Collecchio – Parma Italy
TEL 0521/957195 fax 0521/957195
DT istr (1064KIT – 1064EKIT) 04/2011 – REV 2 18/11/2014
EN
GENERAL WARNING
IMPORTANT
•
Read these instructions carefully so as to familiarize yourself with the appliance before connecting it to its gas container.
•
Keep these instructions for future reference.
•
Carefully read the information stamped on the cartridge before you connect the unit to it.
•
Art 1064: This device works only with the gas cylinder KEMPER mod. 582 (and with mod. 581 with adapter 584).
•
Art 1064E: This device works only with direct pressure gas cartridge KEMPER 581.
•
It can be dangerous to try to use other gas cartridges.
•
Make sure the valve is closed before handling the equipment.
•
Always check that the seal, between the device and the cartridge, is in place and in good condition before connecting it
to the gas container.
•
Never use appliances with worn or damaged seals.
•
Do not use appliances which is leaking, damaged or which does not operate properly.
•
This device should only be used in sufficiently ventilated area in accordance with national requirement. The volume of air
needed for proper combustion and prevent formation of dangerous unburned gas mixtures is 2 m3 / h per kW.
•
The appliance should be operated away from flammable materials and at a distance of 30 cm from furniture, walls and
ceiling.
If there is a leak on Your appliance (smell of gas) take it outside immediately into a well ventilated flam free location,
where the leak may be detected and stopped. If you wish to check for leaks on your appliance, do it outside. Do not try to
detect leaks using flames, use soapy water.
•
Do not modify the device: it can be dangerous and void the warranty and all liability.
•
This unit can also be used upside down after a minimum functioning period of at least 2 minutes. In any case, the inverted
position is incorrect and the torch can not be kept constantly in that position.
•
Do not use the appliance if not complete all of its components.
COMPONENTS
•
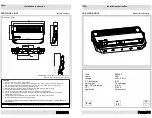
A Fine Flame Burner- B Turbo L Flame Burner – C Burner’s locking nut – D Valve’s knob - E Ignition Button –F lock for
continuous flame –G Gas Cartridge
GENERAL INSTRUCTIONS FOR USE AND ASSEMBLY
•
Check that the valve is completely closed
•
Check the presence and good condition of the seal inside the valve’s threaded area and screw the appliance completely on
the cartridge.
•
Slightly open the valve counterclockwise and push the ignition button. Repeat in case of lighting failure.
•
At the beginning of operations, keep the appliance working for at
least two minute in vertical position before incline it,
in order to heat the valve and avoid leakage of gas in liquid phase.
BURNER REPLACEMENT
•
Make sure that the gas valve is closed (-) by turning the knob clockwise. DO NOT FORCE.
•
Turn the lock nut counterclockwise to loosen the burner tube and remove it.
•
Fully insert the other burner and tighten the lock nut by turning it clockwise
POWER ADJUSTMENT
•
Increase the power of the apparatus by turning the knob to the sign «+» (counterclockwise). To decrease the power, turn
the knob to the sign «-» (clockwise) until the shutdown.
CARTRIDGE REPLACEMENT
•
No not replace the cartridge until you are sure it is completely empty. Shake the gas container and you should not hear the
splash of the liquid in the cartridge.
•
The cartridge must be replaced in a ventilated area, preferably outside, away from open flames, pilot flames and away
from other people.
•
Make sure the valve is closed, unscrew the unit from the empty cartridge, check the presence and condition of the seal
between the device and the cartridge, screw the unit on the new cartridge
•
Never
throw an empty cartridge into the fire.
MAINTENANCE
•
To clean the body of your device, use a cotton ball soaked in warm water and soap. Never use abrasive products.
•
To clean the burner, use a soft brush.
STORAGE
•
When not using the equipment must be stored upright, in suitable places, to protect it from degradation risks, the place
must be well ventilated and away from children.
MAINTENANCE – REPAIR
•
Kindly contact our customer assistance departments for any support on this product: Kemper Srl: Via Prampolini, 1/Q,
43044 Lemignano di Collecchio, Parma, Italy – Tel. +39 0521/957111 – Fax +39 0521/957195 - www.kempergroup.it -


