


Model 2657A High Power System SourceMeter® Instrument Reference Manual
Appendix C: LAN concepts and settings
2657A-901-01 Rev. B/December 2012
C-9
5. Change the subnet mask from the LAN CONFIG menu:
a. Select
CONFIG > SUBNETMASK
, and then press the
ENTER
key. The SUBNETMASK menu item is to
the right of GATEWAY. Use the navigation wheel
to scroll through the options.
b. Modify the SUBNETMASK value to match the computer settings recorded earlier (or
255.255.255.000
if DHCP Enabled = YES).
c. Press
the
ENTER
key or the navigation wheel
when you are finished changing all the characters.
d. Press
the
EXIT (LOCAL)
key to return to the LAN CONFIG menu.
6. From
the
LAN CONFIG
menu, select
APPLY_SETTINGS > YES
, and then press the
ENTER
key.
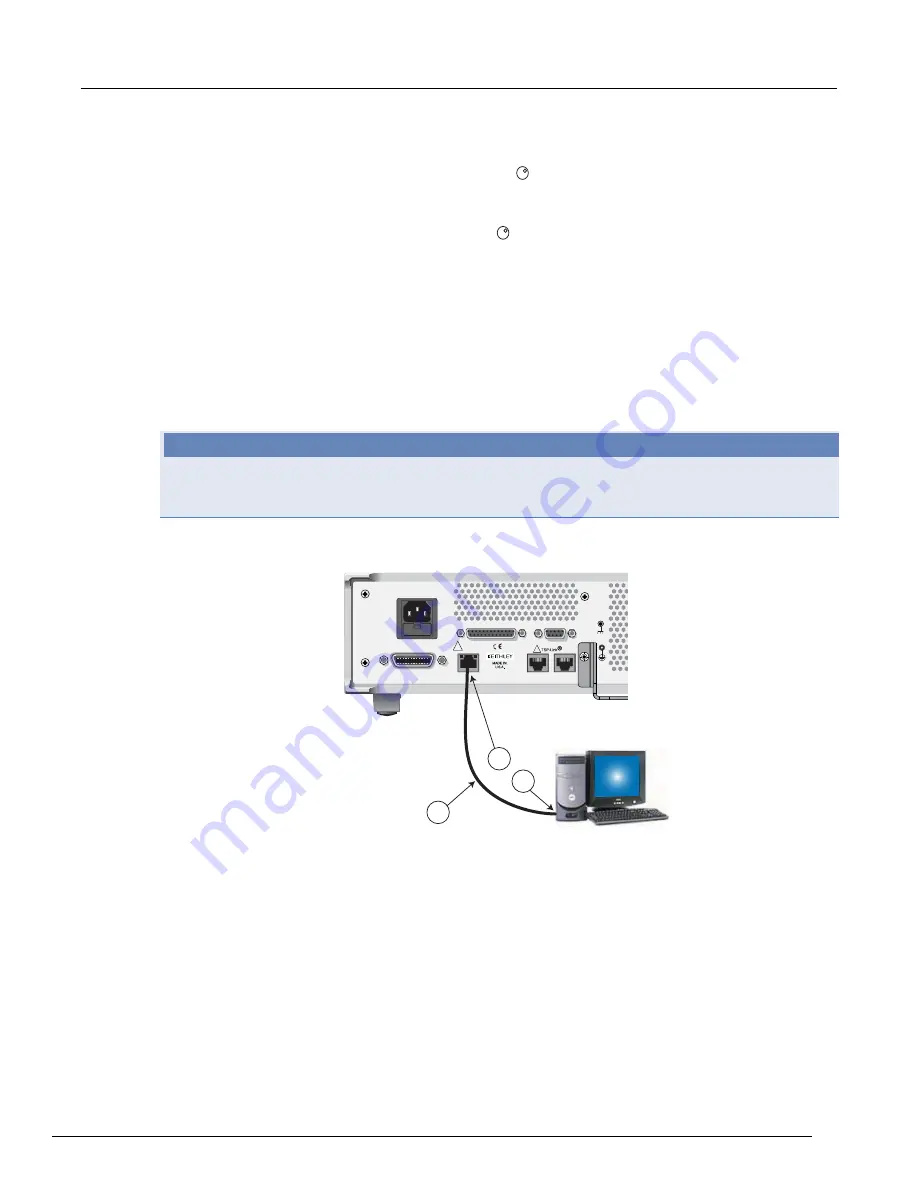
Step 4: Install the crossover cable
Connect the supplied crossover cable between the computer's network adapter card and the LAN
connector on the instrument’s rear panel. There are other similar connectors on the Model 2657A rear
panel. Be sure to connect to the LAN connection port (see the following figure).
Connect the crossover cable into the same computer LAN port used during instrument configuration
to ensure that the system is using the correct network card.
Figure 139: LAN connection
(1) Model 2657A LAN connection port
(2) Crossover cable
(3) Ethernet port (located on the host computer)
Step 5: Access the instrument's web page
1. Open a web browser on the host computer.
2. Enter the IP address of the instrument in the web browser address box. For example, if the
instrument IP address is 192.168.1.101, enter
192.168.1.101
in the browser address box.
3. Press
Enter
on the computer keyboard to open the instrument web page.
NOTE
LINE RATING
100-240 VAC
50, 60 Hz
350 VA MAX.
LINE FUSE
SLOWBLOW
5.0 A, 250 V
NO I
SERV
REP
WARNING:
RS-232
DIGITAL I/O
LAN
!
IEEE-488
!
3
2
1
Summary of Contents for 2657A
Page 3: ......