HD Intelligent Speed Dome Camera User Manual
113
Select the timeline of any day and delete the default blue bar. Left click on the mouse and drag on
the timeline from left to right to form a blue bar, above which it shows the start time and end time.
Copy duration: click the copy icon
behind the timeline and copy the durations on the day to one
or several other days.
Delete duration: click "
Delete All
" above the timeline to delete all the durations. Select any duration
and click "
Delete
" on the popup window or above the timeline to delete the duration.
Note: Select any duration with a mouse, and drag the blue bar on the timeline as a whole without changing
the length of recording duration
5)
Click “
Save
” to validate setting.
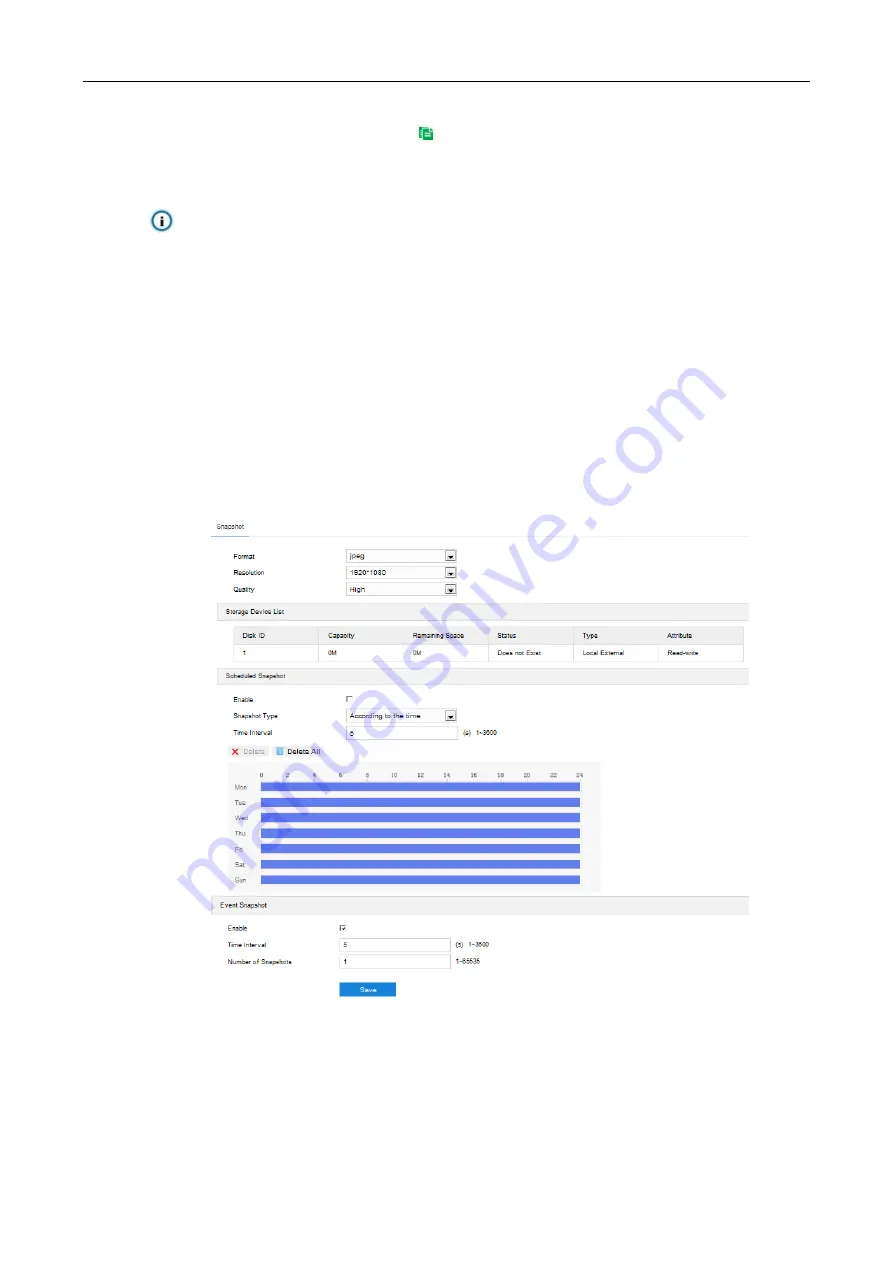
8.3 Snapshot
After configuring scheduled snapshot, the camera will perform different snapshot tasks automatically in the
configured durations and save the pictures in the storage card. Configuration steps are shown below:
1) Go to
Settings > Storage > Storage Management
to configure disk full strategy and format the storage
card recognized by the camera. If formatting is successful, the Status will turn “Normal” which means the
storage card can be used normally;
2) Go to
Settings > Storage > Snapshot
to configure;
Format: only support .jpeg format.
Resolution: same as that of current main stream.
Quality: the quality of captured image.
Picture 8-4 Scheduled snapshot
3) Configure scheduled snapshot:
a)
Select “Enable” enable scheduled snapshot;
b)
Snapshot Type: select “According to the time” or “According to the number”. The latter requires
configuration of
“Number of Snapshots”;
c) Time Interval: select the interval between snapshots;


