990330 September 14, 2007
C-3
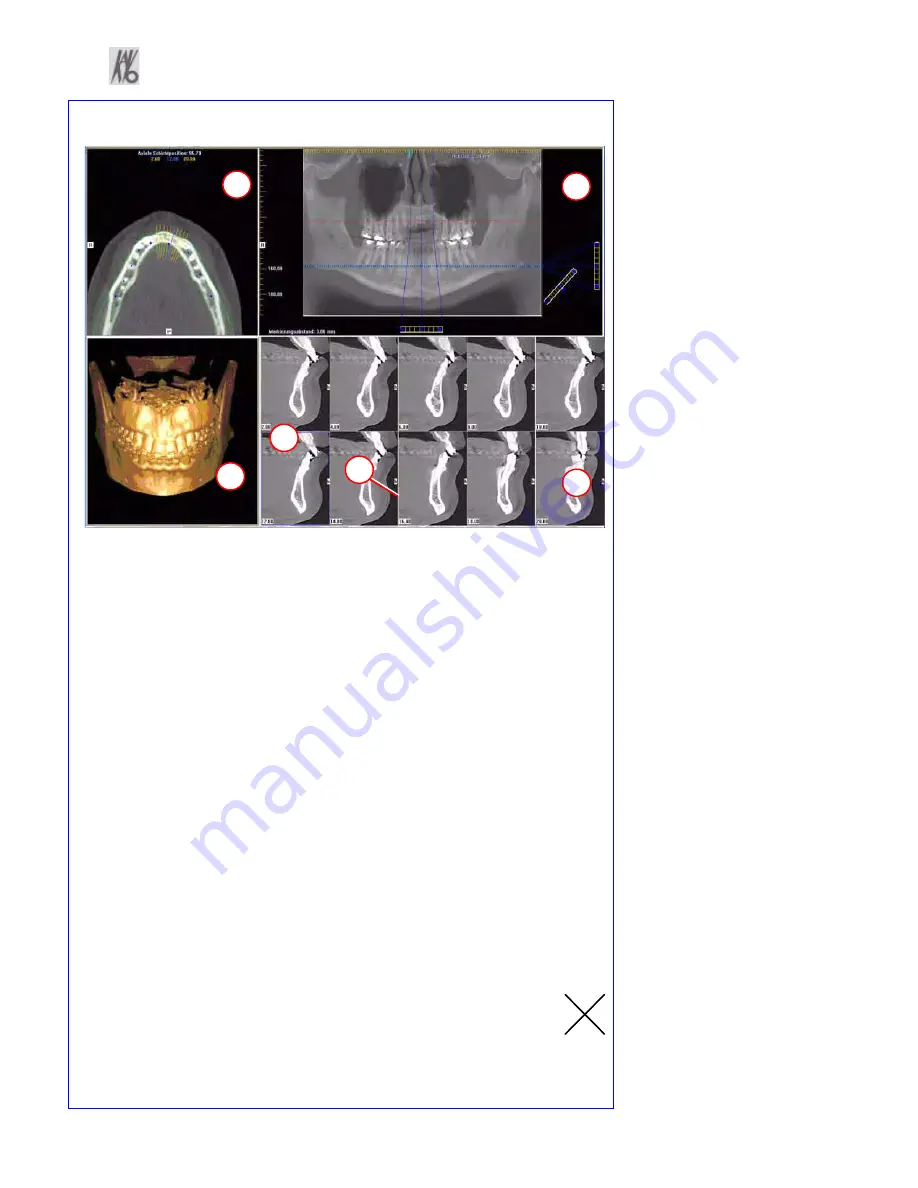
Implant Planning Screen
•
Double click an individual Cross Section to zoom in. Double click again to
reduce to original size.
LABELS:
The following labels on the images help clarify the orientation of the anatomy:
•
R: Right Side (Axial, Pan)
•
P: Posterior (Axial)
•
B: Buccal (Cross Sections)
POP UP MENUS
Right click cross section views to display the Pop Up menu to select:
•
HU Statistics
•
Distance
•
Display Formats : The default is 5 x 2. The other options are 7 x 3 and 3 x 1.
Nerve Canal detection is not yet functioning.
•
Set Filters
•
Save as JPEG
•
Open Output Folder
CURSOR TOOLS
•
All views, except the 3D Model, have Brightness/Contrast, Rotate, Drag,
Zoom and Pan. 3D Model only has Rotate.
•
Back Tool
: to exit out of a planning screen back to the Main Display,
move cursor to the very top left corner of screen until
X
is displayed
and click. Or click the
Level Up
button on the Main Menu bar.
1
2
3
4
5
6
REMINDER
Implant Screen is acquired by
double clicking Panoramic View
from Preview window.
DISPLAYED VIEWS
1.
AXIAL SLICE POSITION
2.
PANORAMIC MAP
3.
3D MODEL
4.
CROSS SECTIONS
5.
Center Slice is outlined in Blue.
6.
Slice Location Number
Slice Location numbers start at “0”
for center of anatomy or midline.
(The “0” slice is outlined in Red).
All slices to the patient’s right are
negative #’s. All slices to the
patient’s left are positive #’s.
Midline is determined by axial map.
Summary of Contents for 3D eXam
Page 30: ...Kavo 3D eXam Operators Manual k990400 September 19 2007 5 8...
Page 46: ...Kavo 3D eXam Operators Manual k990400 September 19 2007 6 16...
Page 90: ...Kavo 3D eXam Operators Manual k990400 September 19 2007 9 12...
Page 126: ...Kavo 3D eXam Operators Manual k990400 September 19 2007 11 10...
Page 161: ...k990400 September 19 2007 B 7...
Page 162: ...Kavo 3D eXam Operators Manual k990400 September 19 2007 B 8...
Page 163: ...k990400 September 19 2007 B 9...
Page 164: ...Kavo 3D eXam Operators Manual k990400 September 19 2007 B 10...


