


20
English
Attach the dusting brush.
For cleaning wall surfaces, curtains,
gaps in furniture, etc.
You can use the flexible hose to extend
the length.
Illustration H
Attach the crevice nozzle.
Illustration F
1
For cleaning joints, grooves between
doors and windows, tiny slits, etc.
2
For cleaning delicate objects with care,
e.g. bookcases, handicrafts, etc.
Attach the upholster brush.
For cleaning upholstered furniture, mat-
tresses, laced curtains, etc.
Attach the mattress nozzle.
For cleaning mites / dust in the mattress-
es and pillows, etc.
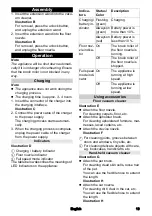
Operation
1. Place the vacuum cleaner on the sur-
face to be cleaned.
2. Press the ON/OFF button to start vacu-
uming up the dust / dirt.
The appliance runs at high speed.
Illustration I
3. Press the energy saving mode button.
The appliance runs at low speed.
Illustration J
4. Press the floor nozzle button to switch
the floor nozzle on or off.
Illustration K
Adjust the suction power
You can adjust the suction power while vac-
uuming via the energy saving mode button.
Illustration J
Energy saving mode off: The appliance
runs at high speed, and the full mode in-
dicator is on.
Energy saving mode on: The appliance
runs at low speed, and the full mode in-
dicator is off.
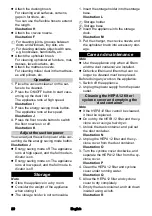
Storage
Note
Store the appliance in a dry room.
Consider the weight of the appliance
when storing it.
The storage holder is not removable.
1. Insert the storage holder into the storage
base.
Illustration L
1
Storage holder
2
Storage base
2. Insert the appliance into the storage
dock.
Illustration M
3. Put the charger, the crevice nozzle and
the upholster brush into accessory stor-
age.
Care and maintenance
Note
Use the appliance only when all filters
and the dust container are installed.
Defective filters and filters that can no
longer be cleaned must be replaced.
Before doing any work on the appliance:
1. Switch off the appliance.
2. Unplug the power supply from the power
outlet.
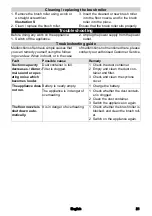
Cleaning the HEPA 12 filter /
cyclone cover and emptying the
dust container
Note
If the HEPA 12 filter cannot be cleaned,
it must be replaced.
Do not dry the HEPA 12 filter and the cy-
clone cover using a hair dryer.
1. Unlock the dust container, and pull out
the dust container.
Illustration N
2. Unplug the HEPA 12 filter and the cy-
clone cover from the dust container.
Illustration O
3. Turn the cyclone cover clockwise, and
separate the HEPA 12 filter from the cy-
clone cover.
Illustration P
4. Clean the HEPA 12 filter and cyclone
cover under running water.
Illustration Q
5. Allow the HEPA 12 filter and cyclone
cover to dry completely.
6. Empty the dust container, and rub down
inside it using a cloth.
Illustration R
Summary of Contents for VC 4i Cordless
Page 2: ...2...
Page 3: ...10 9 8 6 5 4 15 16 17 11 12 13 14 22 21 20 19 1 10 7 2 23 3 18 24 25 A...
Page 4: ...a b B C 1 2 3 D E 1 2 F G H I J K 1 2 L M...
Page 5: ...5 REACH www kaercher com REACH www kaercher com 5 5 5 5 5 5 5 7 7 7 8 8 9 10...
Page 9: ...9 1 S 2 3 1 2 1 2 3 1 1 2 3 1 2...
Page 11: ...11 REACH www kaercher com REACH www kaercher com 11 11 11 11 11 11 11 13 13 13 14 14 14 15...
Page 23: ...23 REACH www kaercher com REACH www kaercher com 23 23 23 23 23 23 23 25 25 26 27 27 28 29...
Page 24: ...24 8 30mA K RCHER IEC 60364 1...
Page 26: ...26 3 4 1 C 2 3 D 1 2 3 LED E F 1 2 G H H H F 1 2 10 10...
Page 28: ...28 1 2 1 2 3 1 1 2 3 1 2...
Page 52: ...52 REACH www kaercher de REACH www kaercher com 52 52 52 52 52 52 53 55 55 55 56 56 57 58...
Page 53: ...53 8 30 mA...
Page 56: ...56 E F 1 2 G H H H F 1 2 1 2 I 3 J 4 K J 1 L 1 2 2 M 3 1 2...
Page 61: ...3 4 1 C 2 3 D 1 2 3 LED E F 1 2 G H H H F 1 2 10 10 61...
Page 63: ...8 30 K RCHER IEC 60364 1 63...
Page 64: ...64 REACH www kaercher com REACH www kaercher com 64 64 64 64 64 62 62 62 60 60 59 64 64 60...
Page 65: ......
Page 66: ...a b b b N O a b P Q R a b S...
Page 67: ......


