24
English
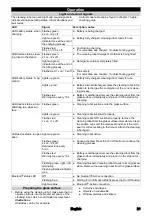
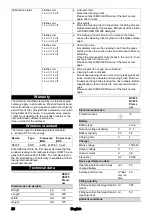
1. Switch off the cleaning robot by pressing and hold-
ing the On / Off button 1 s for a longer period of time.
2. Use e.g. a screwdriver to carefully unlatch and re-
move the cleaning brush from the left and right hold-
ers without jamming it.
Illustration Y
3. Insert a new cleaning brush into the left and right
mount without tilting it.
Note
Align the cleaning brush so that its gear engages with
the gear of the drive motor.
Renewing the protection filter
Note
Replace the protective filter if it is very dirty (dark colour
from dust, lint, etc.).
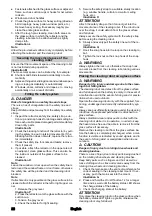
1. Switch off the cleaning robot by pressing and hold-
ing the On / Off button 1 s for a longer period of time.
2. Unclip both locking hooks of the protective filter cov-
er and remove the cover with the protective filter.
Illustration Z
3. Renew the protective filter.
Note
The beveled corner of the protection filter must point to
the bevelled shape on the cover.
4. Press the cover with protective filter until both snap-
in hooks clip into place.
Transportation
The battery has been tested in accordance with the rel-
evant rules for international transport, and can be
transported / shipped.
Storage
Clean the cleaning robot before each storage (see
chapter
) and fully charge
the battery (see chapter
몇
CAUTION
Failure to observe the weight
Risk of injury and damage
Be aware of the weight of the device during storage.
몇
CAUTION
Risk of damage due to leaking detergent
When placing the cleaning robot on its underside, deter-
gent may leak out and damage sensitive surfaces.
Do not place the cleaning robot on its underside. Always
place the cleaning robot in the station.
1. Disconnect the charger from the mains socket and
the station and place accessories in the storage
compartment.
2. Place the cleaning robot in the station.
3. Store the station with the cleaning robot in a dry,
well-ventilated location. Do not store the product
outdoors.
Note
The cleaning agent can remain in the station tank.
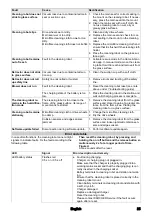
Troubleshooting guide
Note
If a fault is present, this can be remedied by reset-
ting the cleaning robot.
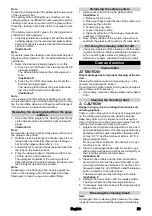
To perform a reset to correct a fault, press and hold
the on / off button and release button simultaneous-
ly
2 s
for a longer period of time.
Figure U
A tone sounds after the reset.
Fault
Cause
Rectification
Battery is not charging
Charger or charging plug not plugged in. 1. Make sure that the charger is properly
plugged into a working mains socket and
that the charging plug is correctly inserted
in the charging socket.
2. Reset the cleaning robot.
Please contact KÄRCHER Service if the
fault occurs again after a reset.
Battery terminals to cleaning robot and
station not working.
1. Clean battery terminals on cleaning robot
and station with a soft, dry cloth.
2. Ensure that the cleaning robot is placed
correctly in the cleaning robot mount.
3. Reset the cleaning robot.
Please contact KÄRCHER Service if the
fault occurs again after a reset.
Charger damaged.
1. Replace a damaged charger.
2. Reset the cleaning robot.
Please contact KÄRCHER Service if the
fault occurs again after a reset.
The cleaning robot can-
not be switched on
Battery is discharged.
Note
This also happens when the cleaning ro-
bot is taken out of the packaging and has
to be placed in the station for the first
time.
1. Place the cleaning robot in the station and
wait until charging process is complete.
Summary of Contents for RCW 5
Page 2: ......
Page 3: ...A ...
Page 4: ...B C D E F G H I J K L M ...
Page 5: ...N O P Q R S T U V W X Y ...
Page 6: ...Z AA ...


