English
69
10.Install all cleaned filters again.
10.7.7Changing a wheel
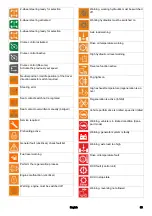
DANGER
Risk of fatal injury from flowing road traffic
Bring the vehicle out of the hazard zone of flowing road
traffic before starting any repair work.
Switch on the warning flashers.
Erect a warning triangle.
Don warning clothing.
몇
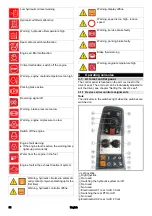
WARNING
Risk of injury due to sinking vehicle
Do not stand under the vehicle raised only with a jack.
몇
CAUTION
Danger of accident
Ensure that the ground is level and solid. If necessary,
place a large-scale, stable surface under the jack.
ATTENTION
Perform the wheel change only if you are familiar with the
necessary steps for changing a wheel. Otherwise, seek
expert assistance.
Use only suitable and undamaged tools for changing a
wheel.
Use a suitable commercial jack with a lifting capacity of at
least 5000 kg.
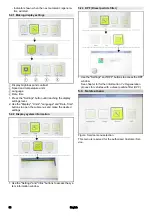
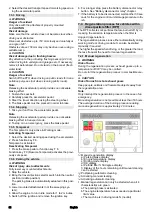
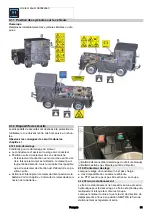
1
Wheel
2
Wheel bolts with washers
1. Park the vehicle on level and solid ground.
2. Remove the ignition key.
3. Secure the vehicle against rolling away (e.g. with wheel
chocks).
4. Use a suitable tool to release the wheel nuts by approx.
1 turn.
5. Position the jack at the jacking point and lift the vehicle.
6. Additionally support the vehicle safely.
7. Unscrew the wheel bolts.
8. Remove the wheel.
9. Clean dirty wheel bolts.
10.Fit the new wheel and screw in all wheel bolts with
washers all the way to the end stop, do not tighten with
full torque.
11.Tighten the wheel nuts step by step in the specified se-
quence (A - F).
12.Lower the vehicle with the jack.
13.Finally, tighten the wheel bolts in the specified se-
quence using a correctly working torque wrench to 330
Nm.
14.Re-tighten the wheel bolts after 50 - 100 km.
10.7.8Checking/topping up the engine oil level
몇
CAUTION
Danger of burns
Do not touch any hot surfaces such as the exhaust pipe,
SCR catalytic converter, motors or gearbox components.
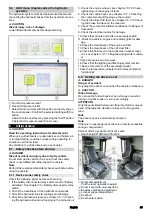
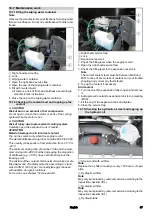
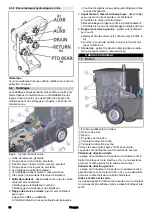
1
Oil filler opening
2
Oil dipstick
1. Check the engine oil level only when vehicle is level.
2. Bring the engine to operating temperature (70 - 80 °C).
3. Stop the engine and wait a few minutes so that the com-
plete oil can drain into the oil pan.
4. Open the fresh water tank latch at the left (bonnet) with
a square wrench.
5. Pivot the fresh water tank to the side.
6. Measure the oil level using the oil dipstick.
If the oil level is below the lower marking (MIN), add en-
gine oil in small steps (100 - 200 ml) until the correct oil
level is reached.
For the correct oil type see chapter "Technical data".
10.7.9Changing the engine oil/engine oil filter
ATTENTION
The engine oil and engine oil filter may only be replaced by
authorized Customer Service.
After every oil change, the function (calculation of the oil di-
lution) must be reset with a diagnostic instrument.
Summary of Contents for MC 250
Page 2: ......

