PowerKon QE
Assembly, installation and operating instructions
20
7
Electrical connection
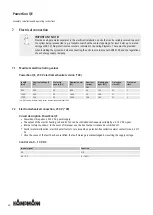
IMPORTANT NOTE!
Provide an all-pole mains separator in the electrical installation on site that can be reliably secured to avoid
the system being reconnected (e.g. a lockable switch with a contact opening of at least 3 mm up to a rated
voltage of 480 V). No protective measures are indicated in the wiring diagrams. These must be provided
when installing the system and when connecting the units in accordance with VDE 0100 and the regulations
of each energy supply company.
7.1
Maximum electrical rating values
PowerKon QE, 230 V electromechanical version (*00)
Length
[mm]
Nominal voltage [V
AC]
Mains fre-
quency [Hz]
Nominal power
[W]
Nominal
current
[A]
Ri analogue
input [kΩ]
Protection
class [IP]
Protection
class
825
230
50
800
3.5
100
21
I
1250
230
50
1600
7.0
100
21
I
1700
230
50
2400
10.6
100
21
I
Tab. 3: Maximum electrical rating values, electromechanical model 230 V
7.2
Electromechanical connection, 230 V (*00)
Circuit description PowerKon QE
PowerKon QE requires a 230 V AC power supply.
The output of the electric heating coil and EC fan can be controlled continuously variably by a 0-10 V DC signal.
Internal safety shut-down: In the event of improper use, the heat output is reduced or switched off.
Faults (motor malfunction, electric heater fault etc.) are issued by a potential-free collective alarm contact (max. 60 V/ 1
A).
Once the cause of the fault has been rectified, the fault message is acknowledged by resetting the supply voltage.
Control via 0 – 10 V DC
control signal
Function
0 V
Off
2 V – 9 V
0 – 100%
Summary of Contents for PowerKon QE
Page 2: ......
Page 15: ...PowerKon QE Assembly installation and operating instructions 15...
Page 16: ...PowerKon QE Assembly installation and operating instructions 16...
Page 17: ...PowerKon QE Assembly installation and operating instructions 17...
Page 18: ...PowerKon QE Assembly installation and operating instructions 18...
Page 31: ...PowerKon QE Assembly installation and operating instructions 31...
Page 33: ......
Page 34: ......
Page 35: ......


