1715 Serial Number 409-
1750 Serial Number 13409-
CE1750 Serial Number 497-
Operator & Parts Manual
KaiVac
®
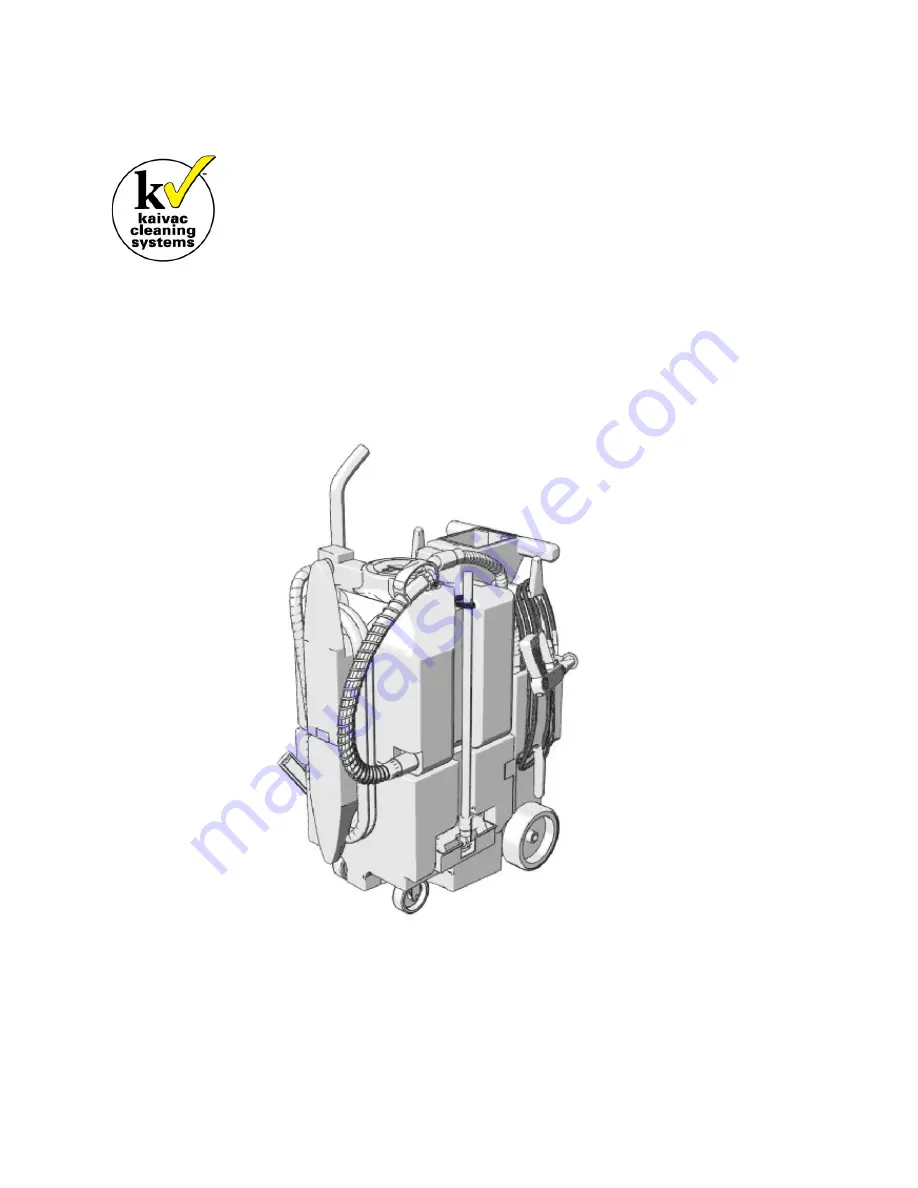
1700 Series
www.kaivac.com
© 2006-2016 Kaivac, Inc. All Rights Reserved
Page 1: ...1715 Serial Number 409 1750 Serial Number 13409 CE1750 Serial Number 497 Operator Parts Manual KaiVac 1700 Series www kaivac com 2006 2016 Kaivac Inc All Rights Reserved ...
Page 2: ...kets cords casters vacuum wand assembly squeegee blades RCD HEPA filter cartridges chemical feed caps and other accessory tools are excluded from warranty coverage All Kaivac replacement parts are guaranteed for 90 days from the date of installation Any warranty claims will result in the good or part of the good being returned to Spillz Pty Ltd for inspection upon receipt If goods are found to be ...
Page 3: ..._________________ Date of Purchase _________________________ Street Address ____________________________________________________________________________________________ City _______________________________________ State __________________________ Post Code ____________________ Product Type NoTouch Cleaning KV1250 KV1750 KV2750 OmniFlex Dispense and vac Spray and vac Autovac SUV Serial Number _____...
Page 4: ...ot spray liquid from the Kaivac onto electrical outlets or on any electrical devices Turn off the unit before unplugging Do not pull on the cord to unplug Grasp the plug at the outlet and pull GROUNDING INSTRUCTIONS This product must be grounded If it should malfunction or breakdown grounding provides a path of least resistance for electric current to reduce the risk of electric shock This product...
Page 5: ...PMENT CAN CAUSE SERIOUS INJURY IF THE SPRAY PERMEATES THE SKIN DO NOT POINT THE GUN AT ANYONE OR ANY PART OF THE BODY IN CASE OF PERMEATION SEEK MEDICAL AID IMMEDIATELY THIS SYSTEM IS CAPABLE OF PRODUCING 500 PSI 345 kPa TO AVOID RUPTURE AND INJURY DO NOT OP ERATE THIS PUMP WITH COMPONENTS RATED LESS THAN 500 PSI 345 kPa WORKING PRESSURE INCLUDING BUT NOT LIMITED TO SPRAY GUNS HOSE AND HOSE CONNEC...
Page 6: ...red to the dump hose cap and tether 5 SMALL HOSE CUFF Attach vac motor hose to elbow and vac motor inlet as shown above LARGE HOSE CUFF 4 3 After removing machine from container attach the plastic elbow to the vac tank as shown above Remove vac wand from accessory box and attach vac wand by sliding the sections together until the locking pin engages as shown 2 1 PLACARDS Open Accessory Box and rem...
Page 7: ...Metering Tips MTIPSNEW Right Overhead View Front Left Window Squeegee CAA06 Placards PLCRD Vac Hose VH25 Front Right View Electric Cord CES19A Vac Wand OFVWGB Squeegee Head CVS12S Squeegee Brush VBRUSH Dump Hose DH25 Deck Brush CAS01A Brush Handle CAS03A Items purchased Separately Rear Right View Chemical Holder VLJHA Spray Gun for 1750 1715 SUBGAKW Chemical On Off Valve VA3W Spray Line PH45 ...
Page 8: ...on 3 Check machine for all tools and supplies needed to complete task See Tool Arrangement in Section 2 2 of this manual 4 If using a cleaning product that has high foaming use a foam inhibitor to cut down on foam Pour 2 capfuls of inhibitor in the vac hose with vac running to coat inside of hose 5 Check all hoses and spray lines for damage prior to use If damage is found do not continue until pro...
Page 9: ...n 1 After dumping is complete remove vac lid from vac tank 2 Using pressure gun or other water source rinse inside of tank thoroughly 3 After tank has been rinsed lock the front caster wheels by pressing down on the locks as shown 4 After caster wheels have been locked tip the machine to the left and slightly forward to allow the remaining water to drain Re attach dump hose and unlock wheels 5 ...
Page 10: ...tting on vac tank 2 Un snap straps holding the vac tank to the lid water tank upper assembly 3 Slightly pull the bottom section of the vac tank out while tipping it backwards Lift and pull the vac tank away from the unit 5 Remove vac hose and vac wand before removing vac tank 1 Un snap straps holding the vac tank to the water tank lower assembly 2 locations one on each side 4 ...
Page 11: ...nits KV1700 Series shown for illustration Inject LOW Pressure Mode Chemicals Fan Spray Fan Spray Manual Brush Manually brush heavily soiled areas Extract Pressure wash and rinse Fresh Water Fan Spray HIGH Pressure Mode Loop Set up Fill with clean cool water Add 1 cap of KaiDri for spot free rinsing Select metering tip and insert into cap barb ...
Page 12: ...y the water tank to prevent mildew and bacteria growth Empty tank by dipping the vacuum hose into the water tank and transferring the water to the vacuum tank Vacuum Tank Empty and flush vacuum tank Clean and disinfect Check the float shutoff screen to be sure it is not plugged up A plugged filter screen restricts airflow and results in reduced suction Leaks Be alert for leaks around hoses fitting...
Page 13: ... panel and on the left and right of the black box mid section 2 Tilt the black box assembly away from the machine until it rests on the floor Next remove the 2 axle strap wing bolts on either side of the machine behind the wheels 3 Locate and disconnect the water line and return line behind the black box on the machine 4 Slide assembly away from water 5 Remove all hoses cords and tools prior to bl...
Page 14: ...em No Weak vacuum Vac tank full Empty vac tank Squeegee blades or wheels worn Replace wheels or blades and check periodically Float shutoff screen dirty Spray off float screen to clean Float ball stuck Tap float and release clean Damaged hose Cut and repair replace Dump hose plug missing Contact dealer and replace Access lid not tight Tighten lid hand tight Vacuum hose plugged Flush hose to remove...
Page 15: ...ose kinked Unkink and check for damage Seals in pump need re placed Remove and replace seals Bad fan pattern or pinpoint pattern on gun Debris in nozzle Remove orifice with Allen wrench and clean Orifice damaged Remove and replace No chemical flow Out of chemical Refill chemical Chemical Injection System Safety cap not secure Check safety cap tighten Chemical valve off Check on off valve Safety ca...
Page 16: ...h or replace Clamp loose Tighten hose clamp Dump cap missing Replace cap Wheels and Casters Wheels won t roll or they rub Flat tires Inflate tires to 30 p s i Debris wrapped around axle Check for debris on axle Bearings tight Grease bearings Wheels too loose on axle Remove wheel add washers to take up slack Bearings falling out Replace bearing assembly Squeegee Head Floor streaks Worn blades or wh...
Page 17: ...www kaivac com 2006 2016 Kaivac Inc All Rights Reserved Phone 1 800 287 1136 3 4 VACUUM DIAGRAM 3 0 MAINTENANCE Page 3 6 ...
Page 18: ...www kaivac com 2006 2016 Kaivac Inc All Rights Reserved Phone 1 800 287 1136 3 4 PUMP DIAGRAM 3 0 MAINTENANCE Page 3 7 ...
Page 19: ...www kaivac com 2006 2016 Kaivac Inc All Rights Reserved Phone 1 800 287 1136 3 4 ELECTRICAL DIAGRAM Page 3 8 3 0 MAINTENANCE ...
Page 20: ...9 VLJHA includes gasket VLJH no gasket HGAS CSS39 VMH27A SCCAP tethered to machine see NOTE 1 for legacy cap NOTE 1 DHCAP tethered to hose Caps are not interchangeable DH25R Includes hose cap and snap stud CSS14 DUMP HOSE CAPS SCCAP tethered to machine DHCAP tethered to hose Note that Caps are not interchangeable SUBSS11 ...
Page 21: ...www kaivac com 2006 2016 Kaivac Inc All Rights Reserved Phone 1 800 287 1136 3 4 MACHINE DIAGRAMS 3 0 MAINTENANCE Page 3 10 KYTRAY square VLJHA round ...
Page 22: ...www kaivac com 2006 2016 Kaivac Inc All Rights Reserved Phone 1 800 287 1136 3 4 MACHINE DIAGRAMS 3 0 MAINTENANCE Page 3 11 See HEPA Assembly page for details BBA217 Complete Assembly PCKV1A ...
Page 23: ...c Inc All Rights Reserved Phone 1 800 287 1136 3 4 MACHINE DIAGRAMS 3 0 MAINTENANCE Page 3 12 CPS64 CPS19 CPS38 CPS39 CPS38 CPS39V viton o ring Complete pump and motor assembly PA217 120V PA1750240V 2 240V RL1750 P217AM CPS14B CPS14 ...
Page 24: ...www kaivac com 2006 2016 Kaivac Inc All Rights Reserved Phone 1 800 287 1136 3 4 MACHINE DIAGRAMS 3 0 MAINTENANCE Page 3 13 ...
Page 25: ...t have the vac motor installed with a bracket can be upgraded to this setup but must order entire assembly VMA1700 See part numbers below for this assembly HEVM1 High Efficiency Vac Motor 120V VMH10 Vac Motor Hose motor to HEPA CSS39 Hose Clamp for HEPA Housing VMH27A Vac Motor Hose motor to tank VBRAK4 Vac Motor Mounting Bracket Hardware for mounting motor to bracket CSS203 Hex head bolt CSS27 Ny...
Page 26: ...Rights Reserved Phone 1 800 287 1136 3 4 MACHINE DIAGRAMS 3 0 MAINTENANCE Page 3 15 PART NO PART DESCRIPTION 1 HCOVER HEPA COVER 2 FKEEP2 HEPA FILTER KEEPER 3 HEPA HEPA FILTER 4 HEPAH2 HEPA FILTER HOUSING HEPA HOUSING ASSEMBLY HEPAHA2 1 2 3 4 ...
Page 27: ...S2 For these versions the pump switch is P N 5ACBS and the vac switch is P N 15ACBS no clear outer case See NOTE 1 NOTE 2 The switch plate that fits the RS2 switch is no longer available Must up grade to SPDCSSB and replace switches with 5ACBS and 15ACBS SPADC Switch plate complete assembly includes circuit breaker switches and hour meters see NOTE 2 SPDCSSB Switch plate only for circuit breaker s...
Page 28: ...www kaivac com 2006 2016 Kaivac Inc All Rights Reserved Phone 1 800 287 1136 3 4 MACHINE DIAGRAMS 3 0 MAINTENANCE Page 3 17 DRYVACRK Complete Assembly HGAS ...
Page 29: ... SUBSS6 6 IN SNAP AND STRAP 2 CSS158 90 DEG BRASS 3 8 NPT X 1 2 HS 1 ST16 SIGHT TUBE 16 INCH 1 CPS70 HOSE TIE DOWN BLACK 1 CSS11 NO 10 X 3 4 SELF DRILLING 1 FIG8LABEL FIGURE 8 LABEL 1 1 4 X 3 1 4 1 WDVTC OMNIFLEX VAC TANK TOOL CUP 2 CSS88 1 4 20 X 3 4 SST SCREW 2 CSS133 5 16 SPLIT LOCK WASHER 300 SS 2 CSS205 9 16 EXTERNAL TOOTH LOCK WASHER 2 VAC TANK ASSEMBLY 1700 VTA18 VTY18 VAC TANK YELLOW 18 LB...
Page 30: ...2 PCKV1A 22 IN POWER CORD WITH MOLDED 1 CPS75 CABLE CLAMP FOR EXT CORD 1 CSS11 NO 10 X 3 4 SELF DRILLING 2 CSS130 RUBBER CUSHIONED STEEL LOOP 1 SPADC SWITCH PANAL ASSEM DUAL CHEM 1 CSS17A 8 SST SCREW 3 4 6 CPS12JQC QUICK CONNECT INJECTOR 1 CSS21F SNAP GRIP HOSE CLAMP SIZE C 1 CSS136 6 NATURAL CABLE TIE 1 AX205 AXLE 20 5 IN X 1 2 DIA 303 SST 1 AXSTRAP AXLE STRAP 2 WHEEL8B FLAT FREE TIRE 8IN 1 2 HUB...
Page 31: ...A1700 110V VMASM240V 240V 1 HEVM1 HIGH EFFICIENCY 120V VAC MOTOR HEVM1240V HIGH EFFICIENCY VAC MOTOR 240V 1 CSS127 QUICK DISCONNECT TERMINAL 3 VEH19 VAC MOTOR EXHAUST HOSE 19 INCH 1 CSS39 1 1 16 2 HOSE CLAMP 1 CSS11 NO 10 X 3 4 SELF DRILLING 4 VBRAK4 VAC MOTOR BRKT KV1700 1 CSS27 1 4 NYLOC NUT 2 CSS44 1 4 FLAT WASHER 2 CSS08 5 16 18 U NUT 2 CSS203 HEX HEAD BOLT 1 4 20 X 1 1 4 2 CSS153 1 4 20 U NUT...
Page 32: ... PIGGY BACK TERM 2 15ACBS 15 AMP CIRCUIT BREAKER SWITCH 1 5ACBS 5 AMP CIRCUIT BREAKER SWITCH 1 STANDARD ACCESSORIES 1700 SERIES CSS152 3 8 16X2 THUMB SCREW ZINC 2 CSS156 3 8 X 3 4 T THUMB SCREW YELLOW 2 CSS157 3 8 X 2 T THUMB SCREW YELLOW 2 KMB16 3 8 SST FLAT WASHER 6 CSS137 3 8 SPLIT LOCK WASHER 2 CES19A 50FT IN LINE GFCI 12 3 YELLOW 110V ONLY 1 PH45 PRESSURE HOSE ASSEM 45 FT 1 UFH UNIVERSAL FILL...
Page 33: ...BBLHSST 33 FT BLOW HOSE 1 MANUAL1750 MANUAL FOR 1700 SERIES 1 KYQS QUICK START CD 1700 SERIES 1 KTDVD KAITUTOR TRAINING DVD DISK 1 PLCRD PLACARD FOR 1200 1700 2100 UNITS 1 STF SMART TOWEL FLYER 1 1715 ACCESSORY KIT 1715ACC VH25 VAC HOSE 25 FT 1 VHST20 BLACK STRETCH BLACK CUFFS 20 FT 1 HC5 HOSE CONNECTOR 1 DRWED DOOR WEDGIE 1 TBAG TOTE BAG 1 OFVWGB VAC WAND W CLIP STRAP GRTBRUSH 1 VBRUSH SQUEEGEE H...