10
17
C
16
14
15
L
L
L
L
L
x3
C
B
C
B
B
C
C
B
100%
13
x3
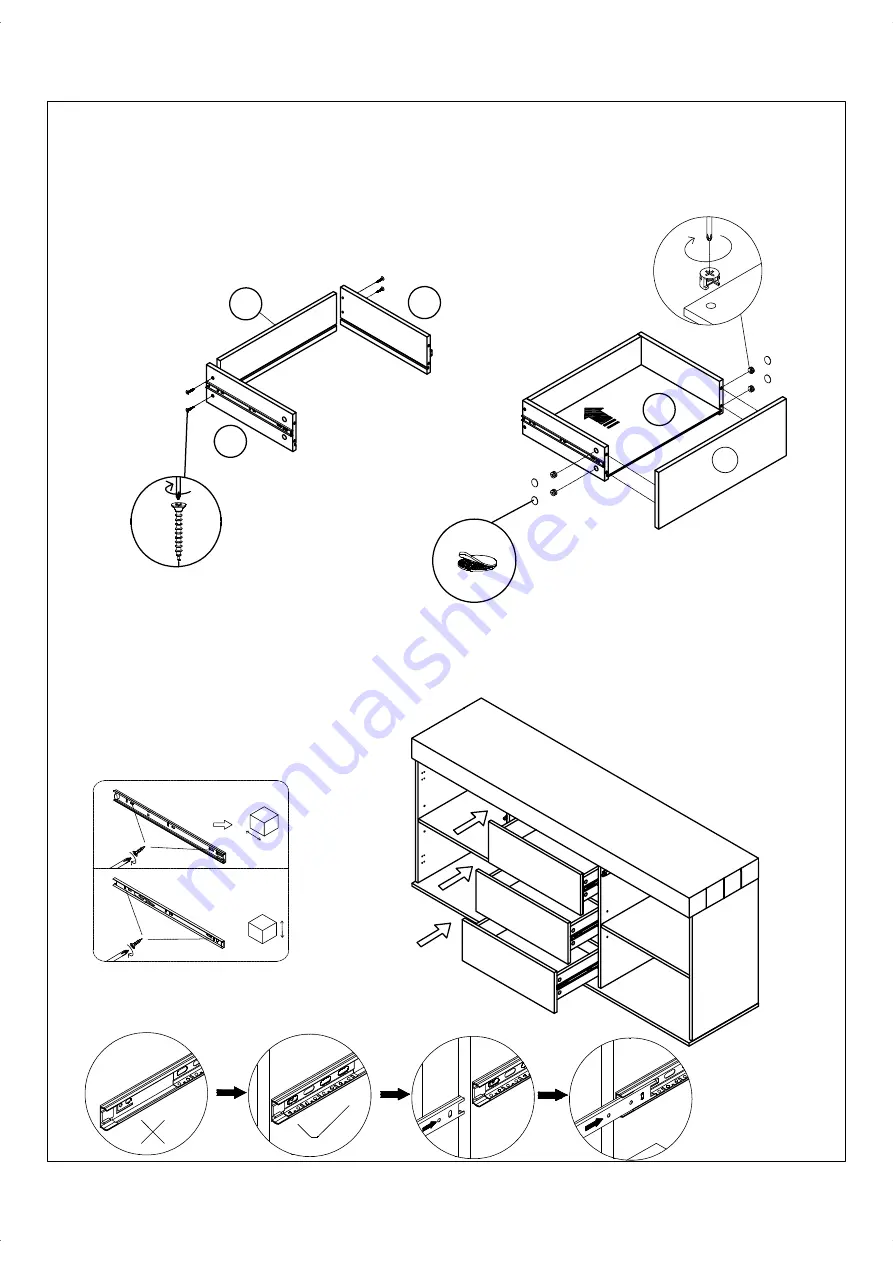
STEP 13:
• Attach panels (14)(15) to panel (16) with screw(L).
• Insert drawer base (17) as shown.
• Attach drawer front to the body with cam lock parts.
STEP 14:
• Assemble drawers to the body.


