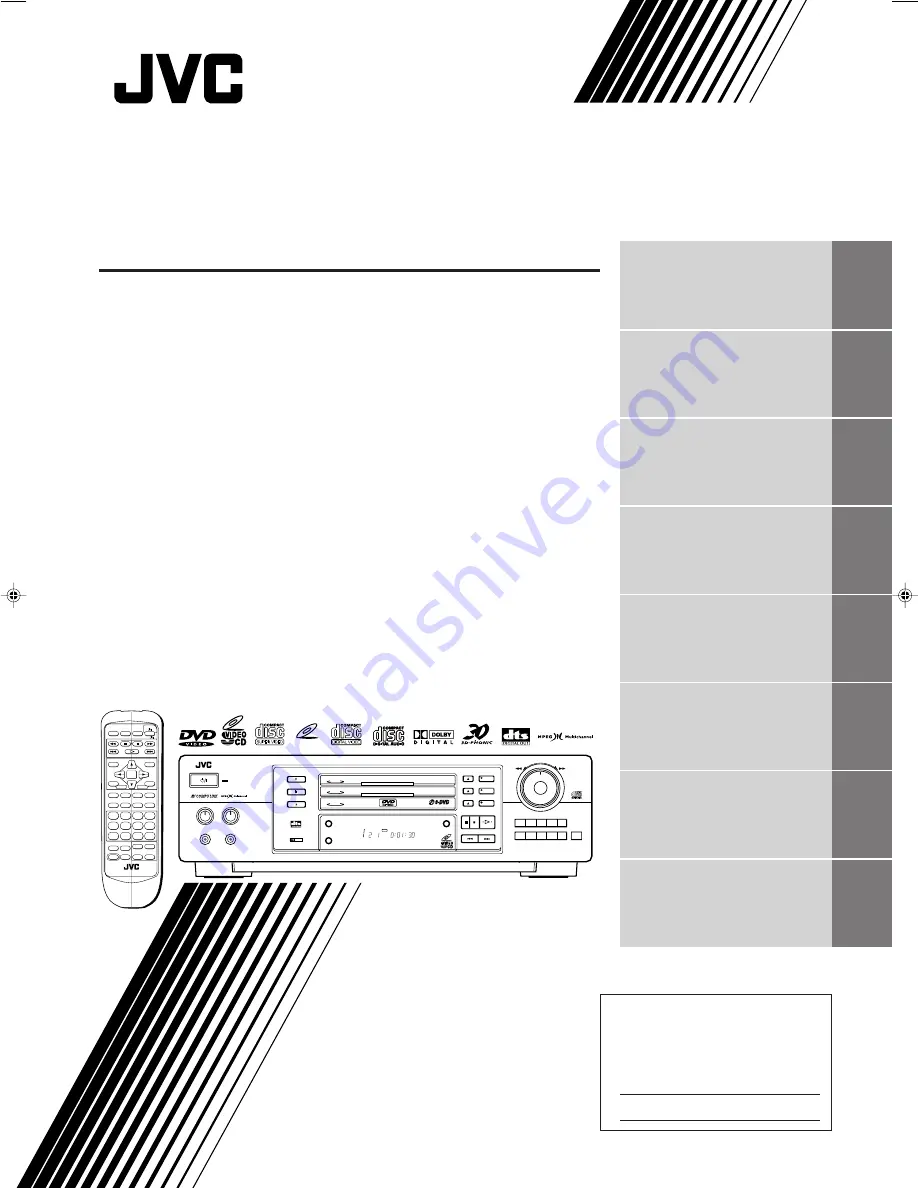
background image

XV-M557GD/XV-M556TN (EN)
LVT0391-016A [UX, 3U, 4U, US, UT, UB]

LVT0391-016A

[UX, 3U, 4U, US, UT, UB]

INSTRUCTIONS

XV-M557GD/XV-M556TN

DVD PLAYER

For Customer Use:

Enter below the Model No. and Serial No.
which are located on the rear, bottom or
side of the cabinet. Retain this informa-
tion for future reference.

Model No.

Serial No.

Introduction

1

Preliminary knowledge

4

Getting started

12

Basic operations

17

Advanced operations

20

Karaoke operation

35

Initial settings

42

Additional information

48

DISC 2

DISC 1

SLOW (–)

PREVIOUS

SELECT

NEXT

SLOW (+)

DISC 3

PLAY MODE SUBTITLE

AUDIO

ANGLE

DIGEST STROBE

ZOOM

CANCEL

3D PHONIC

THEATER
POSITION

ENTER

MENU

TITLE

RETURN

CHOICE

DISPLAY

TV ch

TV VOL.

+

+

1

2

3

4

5

6

7

8

9

10

0

+10

SHIFT

TV/VIDEO

TIME

KARAOKE KARAOKE MENU RESERVE

RM-SXVM557U  REMOTE  CONTROL

TV 

DVD


STANDBY

SHUTTLE

DVD 

3

DVD 

2

DVD 

1

DISC TITLE CHAP

RESUME

DVD

RESERVE

CANCEL

3

2

1

DOLBY

D


I


G


I


T


A


L

EACH

MIC1

MIC2

MIC1

MIC2

MIN

MAX

MIN

MAX

PLAY & EXCHANGE

DVD / SUPER VIDEO CD / VIDEO CD / CD

1

2

3

4

5

6

7

8

9

10

0

+10

STANDBY/ON

KARAOKE

ON/OFF

STOP PAUSE

PLAY

SKIP

                  DVD PLAYER

VIDEO CD

TM

EN XV-M557GD/556TN[U]COVER

99.10.29, 4:55 PM

1

Summary of Contents for XV-M556TN

Page 1: ...dditional information 48 DISC 2 DISC 1 SLOW PREVIOUS SELECT NEXT SLOW DISC 3 PLAY MODE SUBTITLE AUDIO ANGLE DIGEST STROBE ZOOM CANCEL 3D PHONIC THEATER POSITION ENTER MENU TITLE RETURN CHOICE DISPLAY TV ch TV VOL 1 2 3 4 5 6 7 8 9 10 0 10 SHIFT TV VIDEO TIME KARAOKE KARAOKEMENU RESERVE RM SXVM557U REMOTE CONTROL TV DVD STANDBY SHUTTLE DVD3 DVD2 DVD1 DISC TITLE CHAP RESUME DVD RESERVE CANCEL 3 2 1 ...

Page 2: ...t the mains plug to shut the power off completely The button in any position does not disconnect the mains line The power can be remote controlled IMPORTANT FOR LASER PRODUCTS REPRODUCTION OF LABELS 1 CLASSIFICATION LABEL PLACED ON REAR ENCLOSURE 2 WARNING LABEL PLACED INSIDE THE UNIT 1 CLASS 1 LASER PRODUCT 2 DANGER Visible laser radiation when open and interlock failed or defeated Avoid direct e...

Page 3: ... the desired order PROGRAM 26 Introduction Page 1 Preliminary Knowledge Page 4 Getting started Page 12 Basic operations Page 17 Advanced operations Page 20 To playback titles or tracks in random order RANDOM 27 Repeat playback To repeat a current title chapter or track or all discs REPEAT 27 To repeat a desired part A B REPEAT 28 Viewing from multiple angles To select a scene angle from the normal...

Page 4: ...honic function You can enjoy surround sound with your 2 channel system Other functions 7 Triple disc trays You can insert up to three discs in the unit and can play them continuously 7 Multi language subtitles and sound You can select a subtitle or sound language from those recorded on the DVD disc 7 Multi disc playback You can enjoy Audio CD discs and Video CD discs as well as DVD discs 7 Operati...

Page 5: ...ons 3 Press ENTER The unit starts random playback of the selected disc When all titles tracks of the disc have been played once the unit starts random playback of the next disc if inserted After playing all titles tracks of the second disc the unit starts random playback of the third disc if inserted After playing all titles tracks of all the discs random playback ends The same title or track will...

Page 6: ...near a heating device When you re away When away on travel or otherwise for an extended period of time remove the plug from the wall outlet Do not insert foreign objects into the unit Do not insert wires hairpins coins etc into the unit Do not block the vents Blocking the vents may damage the unit Care of the cabinet When cleaning the unit use a soft cloth and follow the relevant instructions on t...

Page 7: ...sed for slow motion playback of a picture for DVD Video CD SVCD 8 Numeric buttons Mainly used to select title track numbers when reserving songs for karaoke or starting from a desired title track 9 PLAY button 18 Starts playback Also used as a SELECT button for the PBC of Video CDs SVCDs Functions the same as the SELECT button on the remote control unit 0 8 PAUSE button 18 Pauses playback 7 STOP b...

Page 8: ... POSITION button SHIFT button Infrared signal emitting window DVD TV button 8 PAUSE button SELECT button MENU button for DVD ENTER button DISPLAY TIME button _ ANGLE button for DVD AUDIO button CANCEL button ZOOM RESERVE button for DVD Video CD SVCD TV ch buttons DISC 2 DISC 1 SLOW PREVIOUS SELECT NEXT SLOW DISC 3 PLAY MODE SUBTITLE AUDIO ANGLE DIGEST STROBE ZOOM CANCEL 3D PHONIC THEATER POSITION ...

Page 9: ... the TV screen Numeric buttons 10 Mainly used to select a title track number or a TV channel Also used to enter a time for the Time search and a chapter number for the Chapter search 3D PHONIC button 32 Produces a simulated surround effect THEATER POSITION button 31 Selects a picture character from 4 settings SHIFT button 16 33 35 42 45 Used together with other keys for activating their second fun...

Page 10: ...n indicators light up 1 VIDEO OUT jack 12 Outputs a composite video signal 2 S VIDEO OUT jack 12 Outputs an S video signal 3 COMPONENT VIDEO OUT jacks Y PB PR 13 Outputs component video signals 4 AV COMPU LINK jacks 48 Connects with other JVC equipment supporting the AV Compulink function to facilitate integrated operations 5 ATTENUATOR ON OFF switch 12 Attenuates the output level when it is set t...

Page 11: ...splays The Opening display appears automatically in some conditions At the bottom the following information are indicated depending on the unit s status NOW READING The unit is now reading the disc information TOC REGION CODE ERROR The DVD disc loaded cannot be played because the region code of the disc does not match the unit CHANGE DISC 1 The unit is now changing the disc tray to DISC 1 OPEN The...

Page 12: ...or a DVD disc pressing the DISPLAY TIME button toggles between the DVD function status display and the disc time display and off For a Video CD or Audio CD disc pressing the DISPLAY TIME button switches the disc time display on and off CD CONTROL REPEAT A B REPEAT TIME SEARCH VCD CONTROL REPEAT A B REPEAT TIME SEARCH PBC CALL During Audio CD playback During Video CD SVCD playback Karaoke function ...

Page 13: ...d 10 Press the corresponding button for the number To select a number higher than 10 Use the 10 button Examples To select 13 10 3 To select 34 10 10 10 4 To select 40 10 10 10 10 To enter a time or chapter number The method for entering a time for Time search or chapter number for Chapter search is different from above See the corresponding sections in this manual for the details To select a TV ch...

Page 14: ...hapter 1 Chapter 2 Title 1 Title 2 Track 1 Track 2 Track 3 Track 4 Non playable discs DVD ROM DVD RAM DVD Audio DVD R DVD RW CD R CD ROM PHOTO CD CD RW CD EXTRA CD G CD TEXT Playing back discs listed as Non playable discs in the table above may generate noise and damage speakers This unit can play back audio recorded in CD G CD EXTRA and CD TEXT discs ALL 5 2 5 3 4 2 3 2 1 6 5 4 The DVD Logo is a ...

Page 15: ...audio input instead of stereo you need to use an optional audio cable which converts stereo audio output to monaural If your TV has an S video input you should connect it with the S VIDEO output of the unit using the supplied S video cable in addition to the standard video connection to get better picture quality The ATTENUATOR switch should be normally set to OFF If you hear distorted audio becau...

Page 16: ... with the video cables Connect Y to Y PB to PB and PR to PR correctly When the component video input jacks of the TV are of the BNC type use an adapter to convert the pin jacks to BNC jacks optional If you do not connect the unit with the S video cable some functions of your TV may not work Audio cable not supplied Component video cable not supplied S video cable supplied TV The unit White Red Red...

Page 17: ...ings for COMPRESSION and DOWN MIX in the AUDIO page of the preference display are invalid Settings for these items must be made from the decoder For digital connection connect the unit s DIGITAL OUT optical to the digital input of audio equipment using an optional digital cable Audio cable not supplied The unit Optical digital cable not supplied White Red White Red To connect the power cord When a...

Page 18: ...mpartment and press down lightly The batteries will last about six months with normal use If the functions of the remote control become erratic replace the batteries See below for more information Precaution Remove the batteries from the remote control if it is not going to be used for a long period of time Remove dead batteries and dispose of them properly Never leave dead batteries lying around ...

Page 19: ...FT functions as the button Switches input mode either TV or VIDEO The remote control unit is initially set for operating a JVC TV If there is more than one code listed for the manufacturer of your TV try them one by one until you succeed TV ch TV VOL TV VIDEO NOTES SHIFT DVD TV SHIFT 9 0 to Manufacturer code list Example To enter the manufacturer code 01 Press 0 then 1 No Manufacturer 01 JVC 02 PA...

Page 20: ...may insert a disc into any of disc trays 1 through 3 1 Press 0 OPEN CLOSE located on the right of the tray corresponding to disc number The corresponding disc tray opens 2 Place the disc in the tray 3 Press 0 OPEN CLOSE to close the disc tray To insert an 8 cm disc place it in the inner recess With the label side up The unit can playback DVD Audio CD Video CD and SVCD discs only Do not load other ...

Page 21: ...AOKEMENU RESERVE RM SXVM557U REMOTE CONTROL TV DVD To stop playback completely Press 7 The unit stops playback To stop playback temporarily Press 8 The unit pauses playback To continue playback press DISC1 DISC2 DISC3 With a DVD disc or a Video CD SVCD disc with PBC function or when the Karaoke function is activated the unit does not automatically playback the next disc To playback the next disc i...

Page 22: ...SUME on the SYSTEM page of the preference display is set to ON the unit memories the position on a disc where you interrupt playback and resumes playback from that position next time you press See Page 45 When the unit memorizes the resume position RESUME is displayed in the display window 7 When the disc you interrupted playback last time remains selected and stopped Press The unit starts playbac...

Page 23: ...VD disc for its particular menu 2 Use CURSOR 2 3 5 to select a desired item then press ENTER The unit starts playback of the selected item Example 1 2 To locate a desired scene from the menu of the Video CD with PBC Some Video CD discs are compatible with the PBC function PBC is an abbreviation of PlayBack Control A Video CD disc recorded with PBC has its own menus such as a list of the songs of t...

Page 24: ...t contained in the disc This function does not work during Video CD SVCD playback with PBC function NOTES DIGEST STROBE ZOOM CANCEL 3D PHONIC THEATER POSITION TV ch TV VOL 1 2 3 4 5 6 7 8 9 10 0 10 SHIFT TV VIDEO KARAOKE KARAOKEMENU RESERVE RM SXVM557U REMOTE CONTROL To locate a desired chapter or track using or 4 7 For DVD During playback For Audio CD During playback For Video CD SVCD During play...

Page 25: ... with the correct number When is displayed in the TV screen in step 4 The chapter you have selected is not contained in the disc or chapter search does not work on the disc With some discs the unit automatically starts searching for the chapter after entering the chapter number in step 3 To turn off the play mode menu Press PLAY MODE NOTES To locate a desired position in the current title or track...

Page 26: ...ess 4 GO TO _ _ _ _ _ GO TO 2 _ _ _ _ GO TO 2 3 _ _ _ GO TO 2 3 4 _ _ To locate a desired scene from the opening scene digest display DIGEST The unit can display the opening scene of each title or chapter on a DVD or each track of a Video CD SVCD You can select a desired scene from those displayed on the TV screen DISC 2 DISC 1 SLOW PREVIOUS SELECT NEXT SLOW DISC 3 PLAY MODE SUBTITLE AUDIO ANGLE D...

Page 27: ...ou press 8 the still picture advances to the next frame Pressing returns to the normal playback mode To display still pictures STROBE DISC 2 DISC 1 SLOW PREVIOUS SELECT NEXT SLOW DISC 3 PLAY MODE SUBTITLE AUDIO ANGLE DIGEST STROBE ZOOM CANCEL ENTER MENU TITLE RETURN CHOICE DISPLAY 1 2 3 4 TIME KARAOKE KARAOKEMENU RESERVE TV DVD DISC 2 DISC 1 SLOW PREVIOUS SELECT NEXT SLOW DISC 3 PLAY MODE SUBTITLE...

Page 28: ...3 5 to move the zoomed in scene To pause zoom play Press 8 To resume zoom play press To return to normal playback Press ZOOM RESERVE ZOOM To zoom a scene ZOOM DISC 2 DISC 1 SLOW PREVIOUS SELECT NEXT SLOW DISC 3 PLAY MODE SUBTITLE AUDIO ANGLE DIGEST STROBE ZOOM CANCEL ENTER MENU TITLE RETURN DISPLAY 1 2 3 4 CHOICE TIME KARAOKE KARAOKEMENU RESERVE TV DVD 1 1 1 2 1 Press 8 then press or 1 To play for...

Page 29: ...GLE DIGEST STROBE ZOOM CANCEL 3D PHONIC THEATER POSITION ENTER MENU TITLE RETURN DISPLAY TV ch TV VOL 1 2 3 4 5 6 7 8 9 10 0 10 SHIFT TV VIDEO CHOICE TIME KARAOKE KARAOKEMENU RESERVE RM SXVM557U REMOTE CONTROL TV DVD 1 7 13 3 33 2 8 14 2 22 3 9 15 1 1 4 10 16 2 15 5 11 17 6 12 18 When you specify a wrong selection Press CANCEL The last selection programmed is erased To clear the program Press 7 2 ...

Page 30: ...ck with PBC 1 Press PLAY MODE The play mode menu appears on the TV screen 2 Use CURSOR 2 3 to move to REPEAT then press ENTER Each time you press ENTER the repeat mode changes as follows The selected repeat mode appears on the TV screen During DVD playback DISC 2 DISC 1 SLOW PREVIOUS SELECT NEXT SLOW DISC 3 PLAY MODE SUBTITLE AUDIO ANGLE DIGEST STROBE ZOOM CANCEL ENTER MENU TITLE RETURN CHOICE DIS...

Page 31: ...ff While stopped REPEAT ALL all disc repeat REPEAT 1 current track repeat No indication off for DVD Point B for Audio CD Point A for Video CD Point B Point A Point B Point A To repeat a desired part A B REPEAT 7 During playback 1 Press PLAY MODE The play mode menu appears on the TV screen 2 Use CURSOR 2 3 to move to A B REPEAT then press ENTER at the beginning of the part you want to repeat point ...

Page 32: ...NTER When appears on the TV screen The current scene is not recorded from multiple angles 1 3 2 3 3 3 NOTES Viewing from multiple angles You can enjoy a variety of scene angles if the DVD disc contains multi angle parts where multiple cameras were used to shoot the same scene from different angles At the beginning of multi angle parts appears on the TV screen To select a scene angle from the norma...

Page 33: ...select the subtitle language SUBTITLE 7 During playback 1 Press SUBTITLE The Subtitle selection display appears on the TV screen For DVD pressing SUBTITLE while the subtitle selection display is shown on the TV screen turns the subtitle on or off DISC 2 DISC 1 SLOW PREVIOUS SELECT NEXT SLOW DISC 3 PLAY MODE SUBTITLE AUDIO ANGLE DIGEST STROBE ZOOM CANCEL ENTER MENU TITLE RETURN CHOICE DISPLAY 1 2 3...

Page 34: ...REO R L Selecting the picture character You can select the quality of the image from among four options OFF 1 2 and 3 according to the type of programming picture tone or personal preferences To select the picture character THEATER POSITION THEATER 1 THEATER 2 THEATER 3 THEATER OFF OFF is the normal position Selecting a higher number tones down the picture character 7 During playback 1 Press THEAT...

Page 35: ...OM CANCEL 3D PHONIC THEATER POSITION TV ch TV VOL 1 2 3 4 5 6 7 8 9 10 0 10 SHIFT TV VIDEO KARAOKE KARAOKEMENU RESERVE RM SXVM557U REMOTE CONTROL 1 2 Selected effect mode The 3D phonic function works correctly when playing back discs recorded in the Dolby Surround or Dolby Digital 5 1 CH format It also works when playing back discs other than those above but does not provide the correct effect The...

Page 36: ... number Time for Video CD SVCD playing with PBC 3 1 25 25 PBC DISC TRACK TIME Disc number Current track number Time PBC on 2 To change the time display mode only for Audio CD or Video CD SVCD without PBC press DISPLAY TIME while holding down SHIFT The time display mode cycles as below EACH REMAIN current track remaining time EACH current track elapsed time TOTAL disc elapsed time TOTAL REMAIN disc...

Page 37: ...2 DISC 1 SLOW PREVIOUS SELECT NEXT SLOW DISC 3 PLAY MODE SUBTITLE AUDIO ANGLE DIGEST STROBE ZOOM CANCEL ENTER MENU TITLE RETURN CHOICE DISPLAY 1 2 3 4 TIME KARAOKE KARAOKEMENU RESERVE TV DVD 1 The current selections of the camera angle audio language and subtitle language are displayed To turn off the DVD function status display Press DISPLAY TIME twice ENGLISH ENGLISH 1 2 1 2 1 2 ...

Page 38: ...ou cannot turn on the KARAOKE function During program or random playback you cannot turn on the KARAOKE function NOTE DISC 2 DISC 1 SLOW PREVIOUS SELECT NEXT SLOW DISC 3 PLAY MODE SUBTITLE AUDIO ANGLE DIGEST STROBE ZOOM CANCEL 3D PHONIC THEATER POSITION ENTER MENU TITLE RETURN CHOICE DISPLAY TV ch TV VOL 1 2 3 4 5 6 7 8 9 10 0 10 SHIFT TV VIDEO TIME KARAOKE KARAOKEMENU RESERVE RM SXVM557U REMOTE C...

Page 39: ...to be reserved Move to the position where you want to insert a song using CURSOR 2 3 then press the DISC and numeric button to select the song you want to reserve To cancel the reserved song Move to the song you want to cancel using CURSOR 2 3 then press CANCEL 1 2 3 4 5 6 3 5 1 2 1 7 2 4 Reserving songs You can reserve songs to play in the desired order while the disc is stopped Up to 12 songs ca...

Page 40: ...oke menu also appears by pressing STROBE KARAOKE MENU while holding down SHIFT 2 Use CURSOR 2 3 to move to AUDIO 3 Use CURSOR 5 to select the desired audio track s to be played back Example For DVD Multi audio karaoke 1 3 With guide vocal 2 3 Accompaniment only 3 3 1 1 AUDIO L R KARAOKE SOUND NORMAL VOCAL 2 ECHO OFF EFFECT 0 KEY CONTROL To cancel display of the Karaoke menu Press DISPLAY TIME When...

Page 41: ...oke KARAOKE SOUND cannot be changed NOTES 1 1 AUDIO L R KARAOKE SOUND NORMAL VOCAL 2 ECHO OFF EFFECT 0 KEY CONTROL 3 Use CURSOR 5 to select MASK Pressing CURSOR 5 cycles the vocal mode as shown below Pressing CURSOR cycles the mode in reverse order NORMAL MASK REPLACE With guide vocal 1 1 With guide vocal 2 2 With guide vocal 1 2 1 2 Only accompaniment PRO With guide melody OFF 2 and 1 2 above app...

Page 42: ...uide vocal is played back only when no sound is fed to the microphone s 1 1 AUDIO L R KARAOKE SOUND NORMAL VOCAL 2 ECHO OFF EFFECT 0 KEY CONTROL 3 Use CURSOR 5 to select REPLACE Pressing CURSOR 5 cycles the mode as shown below Pressing CURSOR cycles the mode in reverse order Playing back the guide vocal only when you stop singing VOCAL REPLACE You may have experiences where you could not sing in t...

Page 43: ...on the TV screen The Karaoke menu also appears by pressing STROBE KARAOKE MENU while holding down SHIFT 2 Use CURSOR 2 3 to move to EFFECT 3 Use CURSOR 5 to select the effect Pressing CURSOR 5 button cycles the effect as follows Pressing CURSOR cycles the effect in reverse order OFF CHORUS FLANGER HARMONY CHORUS Produces a doubling effect on your vocal as if another person is singing in unison FLA...

Page 44: ...nd on the TV screen in the same way as it appears when using the key control buttons on the front panel 1 1 AUDIO L R KARAOKE SOUND NORMAL VOCAL 2 ECHO OFF EFFECT 0 KEY CONTROL 1 DISC 2 DISC 1 SLOW PREVIOUS SELECT NEXT SLOW DISC 3 PLAY MODE SUBTITLE AUDIO ANGLE DIGEST STROBE ZOOM CANCEL ENTER MENU TITLE RETURN CHOICE DISPLAY 1 2 3 4 TIME KARAOKE KARAOKEMENU RESERVE TV DVD 2 3 To cancel display of ...

Page 45: ...e are four preference pages LANGUAGE AUDIO DISPLAY and SYSTEM To turn the page move to the desired tab using CURSOR 2 3 2 Move to select the item you want to set by using CURSOR 5 3 Press CURSOR 2 3 to select the setting you want To cancel display of the preference display press RETURN CHOICE while holding down SHIFT or move to EXIT and press ENTER For details about each setting see the paragraphs...

Page 46: ...nit to the linear PCM digital input of other audio equipment STREAM PCM When you connect to the digital input of an amplifier with a built in DTS Dolby Digital or MPEG audio decoder DOLBY DIGITAL PCM When you connect to the digital input of a Dolby Digital decoder or an amplifier with a built in Dolby Digital decoder DIGITAL AUDIO OUTPUT PCM Lo Ro ON EXIT DOWN MIX COMPRESSION AUDIO DISPLAY SYSTEM ...

Page 47: ...n select the monitor type to match your TV when you playback DVD discs recorded for wide screen televisions 4 3 LB Letter Box Conversion When you connect a normal TV to the unit When you play a wide picture recorded on a DVD disc the picture is displayed with bands across the upper and lower portions of the screen 4 3 PS Pan scan Conversion When you connect a normal TV to the unit When you play a ...

Page 48: ...me is set to 30 minutes OFF The auto standby function is off RESUME You can select the resume function to be on or off See page 19 ON Pressing while stopped starts playback from the resume point if it is memorized OFF Pressing while stopped starts playback from the beginning of the disc AV COMPULINK MODE If you use the AV Compulink system you must set this item correctly Select from the three opti...

Page 49: ...t scenes supports the parental lock feature such scenes which you do not want to let children view can be cut or replaced with other scenes To set Parental Lock for the first time PARENTAL LOCK 7 While a DVD disc is stopped or no disc is inserted in the selected disc tray 1 Press ENTER while holding down SHIFT The Parental Lock on screen display appears on the TV screen 2 Use CURSOR 5 to move to C...

Page 50: ...nd CURSOR 5 do not work NOTE 1 2 PARENTAL LOCK Temporary Level Change This DISC can t play now PASSWORD YES NO PRESS ENTER EXECUTE To change the settings PARENTAL LOCK DISC 2 DISC 1 SLOW PREVIOUS SELECT NEXT SLOW DISC 3 PLAY MODE SUBTITLE AUDIO ANGLE DIGEST STROBE ZOOM CANCEL 3D PHONIC THEATER POSITION ENTER MENU TITLE RETURN CHOICE DISPLAY TV ch TV VOL 1 2 3 4 5 6 7 8 9 10 0 10 SHIFT TV VIDEO TIM...

Page 51: ...setting as follows When connecting to VIDEO 1 input terminal of the television DVD player s AV COMPU LINK setting DVD2 VCR s Remote Control Code B When connecting to VIDEO 2 input terminal of the television DVD player s AV COMPU LINK setting DVD3 VCR s Remote Control Code A If you connect a DVD player to a television and receiver via AV COMPU LINK set the DVD player s AV COMPU LINK setting to DVD1...

Page 52: ...PU LINK terminal on some televisions indicates II Do not connect a terminal indicating II with the AV COMPU LINK terminal on a receiver If connected the system will not work correctly Connect the AUDIO OUT jacks of the DVD player to the audio input jacks of a receiver that indicates DVD Otherwise the system will not work correctly There may be no description about connections to a DVD player in th...

Page 53: ...guard function is activated Connection is incorrect Input selection of amplifier is incorrect The audio signal is derived from the unit s DIGITAL OUT Disc is dirty MONITOR TYPE is not correctly set Television is not correctly set Microcomputer malfunction due to lightning or static electricity Moisture condensation caused by a sudden change of temperature or humidity Remedy Plug in securely More c...

Page 54: ...lect the desired language select the abbreviation corresponding the language you want to AA Afar AB Abkhazian AF Afrikaans AM Ameharic AR Arabic AS Assamese AY Aymara AZ Azerbaijani BA Bashkir BE Byelorussian BG Bulgarian BH Bihari BI Bislama BN Bengali Bangla BO Tibetan BR Breton CA Catalan CO Corsican CS Czech CY Welsh DA Danish DZ Bhutani EL Greek EO Esperanto ET Estonian EU Basque FA Persian F...

Page 55: ...ugal PW Palau PY Paraguay QA Qatar RE Réunion RO Romania RU Russian Federation RW Rwanda ES Spain ET Ethiopia FI Finland FJ Fiji FK Falkland Islands Malvinas FM Micronesia Federated States of FO Faroe Islands FR France FX France Metropolitan GA Gabon GB United Kingdom GD Grenada GE Georgia GF French Guiana GH Ghana GI Gibraltar GL Greenland GM Gambia GN Guinea GP Guadeloupe GQ Equatorial Guinea GR...

Page 56: ...J VC VICTOR COMPANY OF JAPAN LIMITED Printed in Japan 1099RIMUBNSAN EN ...

Reviews: