Memo :
0
After the [Security Information] screen appears,
click the [YES] button to proceed.
3
Install the camera’s Built-in Viewer.
0
When displaying the Built-in Viewer on the
Internet Explorer for the first time, the plug-in
software of the Built-in Viewer is downloaded
from the camera and installed on the PC.
When the installation screen of the Built-in
Viewer (IntegratedViewer.cab add-on)
appears, install it according to the
instructions displayed.
0
After installation is complete, the video on
the camera is displayed.
.
When the IP address of the camera is
unknown
IP address settings cannot be changed by
accessing via a computer when the IP address
of the camera is unknown. You can use the
following method to identify the IP address.
0
Access the [TOOL_E] folder of the supplied
CD-ROM disc, and search for the camera in
the LAN using the “JVC-VN-SearchTool” of
this folder.
* For details about the [JVC-VN-SearchTool],
please read through the Readme file in the
[TOOL_E] folder.
Memo :
0
This camera will perform the initial operation of
pan/tilt/zoom upon powering on. It takes about
90 seconds before the initial operation starts.
This is not a malfunction.
0
The settings required for running the Built-in
Viewer on the PC are stored in cookies.
0
Settings that are stored in cookies are
information related to the operation of the
Built-in Viewer, such as the number of the
encoder to be displayed and whether the display
size is set to a specified or variable size. Settings
related to camera operation are not stored in
cookies.
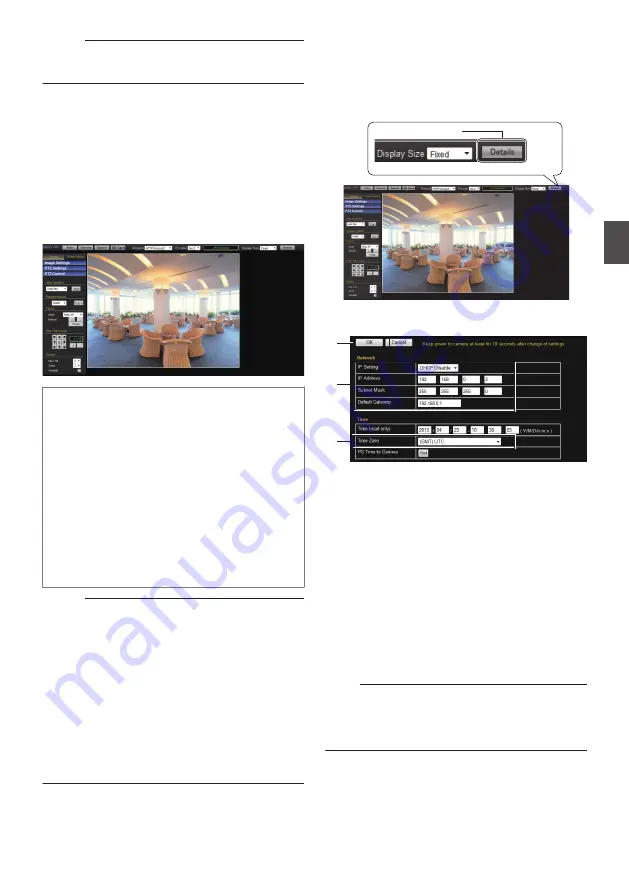
Step4 IP Address Setting
for the Camera
1
Click [Details] of Built-in Viewer.
.
Click
2
The [Basic Setting1] screen appears.
.
A
C
B
A
Specify the [Network].
0
When selecting “DHCP Disable”:
Select “DHCP Disable” for the [Network] option.
Then, enter required values in [IP Address],
[Subnet Mask], and [Default Gateway].
0
When selecting “DHCP Enable”:
The default setting is “DHCP Disable” (DHCP
client function is disabled). To assign an IP
address from the DHCP server, connect the
DHCP server to the LAN, set the [Network] of
the camera to “DHCP Enable”, and click the
[OK] button.
For details on IP addresses assigned to the
camera, consult your network administrator.
Note :
0
Set the DHCP server such that the same IP
address is always assigned to the MAC address
of the camera by the DHCP server. Connection
may fail if the above setting is not performed.
Step3 Connecting the Camera to the Computer
41
IP A
dd
ress
Se
tt
in
gs


