background image

3-21

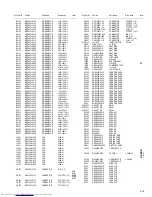
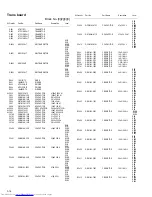
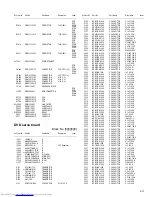
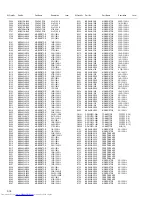
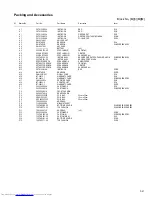
Packing and Accessories

Block No. [M][3][M][M]

Symbol No.

Part No.

Part Name

Description

Local

A  1

GVT0133-005A

INST BOOK

ENG

S3A

A  1

GVT0133-008A

INST BOOK

ENG

S3B

A  1

GVT0133-006A

INST BOOK

GER,FRE,DUT

S3E

A  1

GVT0133-007A

INST BOOK

GER,FRE,SPA,ITA,SWE,FIN,DAN

S3EN

A  1

GVT0133-009A

INST BOOK

POL,HUN,CZE

S3EV

A  2

QAL0014-001

AM LOOP ANT

A  3

RM-STHS3U

REMOCON

S3A

A  3

RM-STHS3R

REMOCON

S3B,S3E,S3EN,S3EV

A  4

QAL0457-001

ANT.WIRE

A  5

----------------------

BATTERY

(x2)

A  6

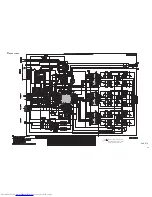
600-FHS3F0-00

SPEC LABEL(F)

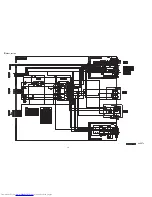
FRONT(x2)

A  6

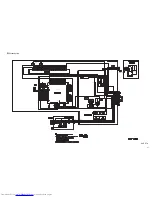
600-CHS3F0-00

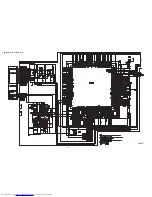
SPEC LABEL(C)

CENTER

A  6

600-RHS3F0-00

SPEC LABEL(S)

SURROUND(x2)

A  7

650-THS300-00

INST.MANUAL

ENG,GER,FRE,DUT,SPA,ITA,SWE,DAN,FIN

S3B,S3E,S3EN,S3EV

A  7

650-THS301-00

INST.MANUAL

ENG,SPA,POR,CHI,ARA

S3A

A  9

SPPWS3E-SPBOX

SPEAKER BOX

SUB WOOFER

A 10

SPTHS3FFE-SPBOX

SPEAKER BOX

FRONT(x2)

A 11

SPTHS3FCE-SPBOX

SPEAKER BOX

CENTER

A 12

SPTHS3FSE-SPBOX

SPEAKER BOX

SURROUND(x2)

A 13

GVT0133-010A

INST BOOK

RUS

S3EE

A 14

RM-STHS3R

REMOCON

S3EE

A 15

QAM0216-001

SIGNAL CORD

S3A

A 16

BT-56012-1

WARRANTY CARD

S3A

A 16

BT-54013-7

WARRANTY CARD

S3B,S3E,S3EN,S3EV

A 17

VNA3000-204

REGISTER CARD

S3B

A 18

BT-56002-2

S.CENTER LIST

S3A

A 19

BT-54013-7

WARRANTY CARD

S3EE

P  1

GV30599-002A

CARTON BOX

S3A

P  1

GV30599-001A

CARTON BOX

S3B,S3E,S3EN,S3EV

P  2

GV20256-001A

FRONT CUSHION

P  3

GV20257-001A

REAR CUSHION

P  4

QPA02503503P

POLY BAG

25cm x 35cm

P  5

QPA01002503

POLY BAG

10cm x 25cm

P  6

QPC05006530P

POLY BAG

50cm x 65cm

P  7

700-120085-10

HDPE BAG

P  8

715-250089-00

MIRAMAT SHEET

P  9

720-THS3B0-00

BOTTOM CUSHION

S3A,S3B,S3E,S3EN,S3EV

P 10

720-THS3T0-00

TOP CUSHION

S3A,S3B,S3E,S3EN,S3EV

P 11

700-120087-10

HDPE BAG

(x5)

P 12

GV30524-002A

CARTON BOX

S3EE

P 13

730-THS300-00

CARTON (E)

S3B,S3E,S3EN,S3EV

P 13

730-THS301-00

CARTON (U/UX)

S3A

P 14

720-THS3B1-00

BOTTOM CUSHION

S3EE

P 15

720-THS3T1-00

TOP CUSHION

S3EE

Summary of Contents for TH-S3

Page 1: ...SYSTEM MB187 2004 5 TH S3 TABLE OF CONTENTS 1 PRECAUTION 1 3 2 SPECIFIC SERVICE INSTRUCTIONS 1 7 3 DISASSEMBLY 1 8 4 ADJUSTMENT 1 22 5 TROUBLESHOOTING 1 27 Area suffix A Australia B U K E Continental Europe EN Northern Europe EV Eastern Europe EE Russian Federation XV THS3 SP WS3 SP THS3F SP THS3F ...

Page 2: ... W at operation 1 0 W in standby mode Dimensions W H D 360 mm 65 mm 370 mm Mass 5 3 kg Type 1 Way Bass Reflex Type Magnetically shielded Type Speaker 8 0 cm cone M 1 Power Handling Capacity 52 W Impedance 6 Ω Frequency Range 85 Hz to 20 000 Hz Sound Pressure Level 82 dB W m Dimensions W H D 105 mm 118 mm 98 mm Mass 0 60 kg each Type 1 Way Bass Reflex Type Magnetically shielded Type Speaker 8 0 cm ...

Page 3: ...ack control shafts etc to be sure the product is safe to operate without danger of electrical shock Do not use a line isolation transformer during this check Plug the AC line cord directly into the AC outlet Using a Leakage Current Tester measure the leakage current from each exposed metal parts of the cabinet particular ly any exposed metal part having a return path to the chassis to a known good...

Page 4: ...same safety characteristics as the recommended replacement parts shown in the Parts List of the Service Manual and may create shock fire or other hazards 4 The leads in the products are routed and dressed with ties clamps tubings barriers and the like to be separated from live parts high temperature parts moving parts and or sharp edges for the prevention of electric shock and fire hazard When ser...

Page 5: ...n the optical pickup The tester s internal power source can easily destroy the laser diode 1 7 Handling the traverse unit optical pickup 1 Do not subject the traverse unit optical pickup to strong shocks as it is a sensitive complex unit 2 Cut off the shorted part of the flexible cable using nippers etc after replacing the optical pickup For specific details refer to the replacement procedure in t...

Page 6: ...lock failed or defeated AVOID DIRECT EXPOSURE TO BEAM e VARNING Synlig och osynling laserstrålning när den öppnas och spärren är urkopplad Betrakta ej strålen s VARO Avattaessajasuojalukitus ohitettuna tai viallisena olet alttiina näkyvälle ja näkymättömälle lasersäteilylle Vältä säteen kohdistumista suoraan itseesi f ADVARSEL Synlig og usynlig laserstråling når maskinen er åben eller interlocken ...

Page 7: ... No MB187 1 7 SECTION 2 SPECIFIC SERVICE INSTRUCTIONS This service manual does not describe SPECIFIC SERVICE INSTRUCTIONS ...

Page 8: ...rews B attaching the metal cover See Fig 3 3 Lift the rear section of the metal cover in the direction of the arrow while extending the lower sections of the metal cov er release the claws a using a longer screwdriver from the inside as required See Fig 4 Note Do not damage any parts and boards inside the main body when releasing the joints a using the longer screwdriver See Fig 4 Fig 1 Fig 2 Fig ...

Page 9: ...reassembling connect the card wire to the con nector CN428 on the main board after passing it through the lower part of the holder board See Fig 5 4 Disconnect the card wire from the connectors CN454 on the HP terminal board See Fig 5 5 From the bottom side of the main body remove the three screws C attaching the front panel assembly See Fig 7 6 From the both and bottom sides of the main body remo...

Page 10: ...anism assembly See Fig 8 3 1 4 Removing the HP terminal board See Fig 8 Remove the metal cover and front panel assembly 1 From the top side of the main body remove the screw E at taching the HP terminal board on the chassis base 2 Take out the HP terminal board from the main body Reference When attaching the HP terminal board align the hole on the HP terminal board to the projection e of the chass...

Page 11: ... the tuner assembly from the main body 3 1 7 Removing the scart terminal board B E EN EV EE version See Figs 10 and 11 Remove the metal cover 1 From the top side of the main body disconnect the card wire from the connector CN340 on the scart terminal board See Fig 10 2 From the back side of the main body remove the two screws H attaching the scart terminal board to the rear pan el See Fig 11 3 Tak...

Page 12: ...board See Fig 12 5 Remove the three screws J and screw J attaching the main board on the chassis base See Fig 12 Reference When attaching the screw J attach the wire holder with it See Fig 12 6 From the back side of the main body remove the six screws K attaching the main board to the rear panel See Fig 13 7 Release the engagement sections g and remove the rear panel together with the scart termin...

Page 13: ... the power cord from the connector CN950 on the transformer board 3 Remove the wire holders bundling the wires Reference After attaching the transformer board bundle the wires with the wire holders as before 4 Remove the two screws M and screw M attaching the transformer board Reference When attaching the screw M attach the shield with it as before 5 Release the holder using a pliers and take out ...

Page 14: ...ut the power trans former from the main body 3 1 12 Removing the fan motor See Figs 16 and 17 Remove the metal cover 1 From the top side of the main body remove the wire hold ers bundling the wires See Fig 16 2 Disconnect the wire from the connector CN190 on the main board See Fig 16 3 From the right side of the main body remove the two screws P and take out the fan motor from the chassis base See...

Page 15: ...six screws Q attaching the front board See Fig 19 3 Take out the front board from the front panel assembly Reference When attaching the front board align the projections i of the front panel assembly to the holes of the front board See Fig 19 4 From the forward side of the front board disconnect the LED illuminate board from the connector CN451 on the front board See Fig 20 Fig 18 Fig 19 Fig 20 Fr...

Page 16: ...f the DVD mechanism assembly re move the two screws A attaching the leaf spring to the bushing and remove the leaf spring See Fig 2 3 Remove the bushing of the tray assembly from the projec tion a on the DVD mechanism assembly and move the tray assembly in the direction of the arrow See Fig 3 4 Remove the claw b of the tray assembly from the DVD mechanism assembly and take out the tray assembly Se...

Page 17: ...fore disconnecting the card wire from the connector CN101 on the DVD servo board If the card wire is disconnect ed without attaching solder the pickup may be de stroyed by static electricity See Figs 5 and 6 When attaching the DVD servo board be sure to re move solders from the short land sections c after con necting the card wire to the connector CN101 on the DVD servo board See Figs 5 and 6 3 Di...

Page 18: ...rd wire to the connector on the pickup See Figs 5 and 7 3 Remove the screw D attaching the plate and thrust spring See Fig 7 4 Remove the engagement section g attaching the plate to the feed holder and remove the plate with the thrust spring See Fig 7 5 Remove the shaft of the pickup from the section h on the traverse mechanism assembly and remove the shaft from the section i while moving it in th...

Page 19: ... and 12 Remove the traverse mechanism assembly 1 From the top side of the traverse mechanism assembly re move the screw D attaching the plate and thrust spring See Fig 7 2 Remove the engagement section g attaching the plate to the feed holder and remove the plate with the thrust spring See Fig 7 3 Remove the wires from the soldered section k on the spin dle motor board See Fig 11 Reference When at...

Page 20: ...the section r after attaching the switch board to the DVD mechanism assembly Fix the claw p on the DVD mechanism assembly with bonds after attaching the switch board 3 2 9 Removing the motor See Figs 14 and 15 Remove the tray assembly 1 From the bottom side of the DVD mechanism assembly re move the wires from the soldered section n on the switch board See Fig 14 2 From the top side of the DVD mech...

Page 21: ...en attaching the cloth frame assembly apply the bonds to the claws a of the cloth frame assembly Fig 1 3 3 2 Removing the woofer unit See Figs 2 and 3 Remove the cloth frame assembly 1 Remove the four screws A attaching the woofer unit See Fig 2 2 Take out the woofer unit from the subwoofer main body 3 From the back side of the woofer unit disconnect the wire from the terminal See Fig 3 Fig 2 Fig ...

Page 22: ...or the contents performed in TEST mode DVD test mode is canceled by except DVD source and POWER OFF It is referring to the 4 2 DVD test mode for details 3 DVD INITIALIZE DVD is initialized The RDS segment of FL is made to turn on at the time of an initialization end It is referring to the 4 2 DVD test mode for details 4 DVD region check mode A region No display is performed to FL by the toggle in ...

Page 23: ...k step SW only U version AM frequency is changed with 9k STEP 7 TUNER AM 10k step SW only U version AM frequency is changed with 9k STEP Insert the power cord in an outlet while pressing the STOP and F SKIP keys on the main unit simultaneously A main unit entered in the NTSC mode compulsively Press the STOP and B SKIP keys on the main unit simultaneously A tuner unit entered in the 9k step mode Pr...

Page 24: ...time Insert the power cord in an outlet while pressing the PAUSE and PLAY keys on the main unit simultaneously FL indication TEST bb Press the PAUSE key on the main unit FULL initialization segment of FL is turned on at the time of the completion of initialization Press the MENU key on the remote controller FL indication For Example 1234 Display the checksum of a device key on FL 4byte FL indicati...

Page 25: ...ser current display FL indication CHECK Press the 3 key on the remote controller With no assignment 2 3 FL indication CHECK FL indication FL indication CHECK Press the 6 key on the remote controller DVD_SLx1 JITTER measurement mode Press the 7 key on the remote controller The contents of a backup memory display BWD Press the 8 key on the remote controller The contents of a backup memory display FW...

Page 26: ...er Insert a adjustment disc Press the PLAY key on the main unit or remote controller Play disc Press the MENU key on the remote controller FL indication TEST bb Press the STANDBY key on the main unit or remote controller Press the 0 key on the remote controller MONITOR output change 1 SRV_MONI_CIRC 2 SRV_MONI_SERVO 3 5 SRV_MONI_ANALOG 6 7 SRV_MONI_DRC 8 11 SRV_MONI_SERVO_JIG 12 SRV_MONI_DEFAULT FL...

Page 27: ... No MB187 1 27 SECTION 5 TROUBLESHOOTING This service manual does not describe TROUBLESHOOTING ...

Page 28: ... No MB187 AV MULTIMEDIA COMPANY AUDIO VIDEO SYSTEMS CATEGORY 10 1 1chome Ohwatari machi Maebashi city 371 8543 Japan VICTOR COMPANY OF JAPAN LIMITED WPC Printed in Japan ...

Page 29: ...and parts list Subwoofer Block No M2 DVD mechanism assembly and parts list Block No MJ DVD loading base assembly and parts list Block No MN Electrical parts list Block No 01 04 Packing materials and accessories parts list Block No M3 TH S3 3 2 3 6 3 7 3 9 3 11 3 20 Area suffix A Australia B U K E Continental Europe EN Northern Europe EV Eastern Europe EE Russian Federation No MB187 ...

Page 30: ...D B B Front board HP terminal board LED illuminate board d f a Block No M M M 1 b 61 61 60 59 58 59 64 59 60 26 26 76 74 77 24 17 61 9 11 9 4 1 62 12 9 2 3 3 22 22 22 7 10 63 19 82 88 24 8 9 9 9 12 p 81 20 26 18 11 13 b 5 21 61 p 37 23 34 35 87 85 78 6 89 89 ...

Page 31: ...al board Main board Transformer board Holder board board c d f e b 38 84 70 72 45 73 74 75 77 38 69 54 53 56 86 50 55 49 48 49 47 43 79 80 39 67 30 30 27 27 27 65 14 40 39 39 38 38 46 46 46 16 29 16 15 4 42 57 20 18 25 31 28 84 51 q 55 68 66 q p 37 44 23 41 32 71 34 35 87 52 ...

Page 32: ...6Z TAPPING SCREW 3mm x 6mm x3 40 GV40500 001A HOLDER 41 GV40533 001A SHIELD 42 GV40343 004A VINYL TUBE 43 QAU0356 001 TUNER ASSY TU 1 44 GV40477 002A HEATSINK 45 QYSDSG3012M TAP SCREW M3 x 12mm x4 46 GV40509 001A THERMAL SHEET x3 47 GV10169 036A REAR PANEL S3A 47 GV10169 031A REAR PANEL S3EE 47 GV10169 030A REAR PANEL S3B S3E S3EN 47 GV10169 032A REAR PANEL S3EV 48 QYSBSGY3008M SPECIAL SCREW 3mm x...

Page 33: ...24AJ FFC WIRE 77 QUQ110 0811AJ FFC WIRE 78 QUQ110 2122AJ FFC WIRE 79 QUQ412 1009CJ FFC WIRE 80 QUQ412 1307CJ FFC WIRE S3B S3E S3EE S3EN S3EV 81 QUQ412 0408DJ FFC WIRE 82 QJJ060 031306 WIRE 84 QYSBSG3010Z TAPPING SCREW 3mm x 10mm x2 85 QQR1516 001 FERRITE CORE 86 QYSBSGY3008M SPECIAL SCREW 3mm x 8mm S3A 87 LV30226 041A SPACER 88 GV40121 004A SPACER 89 GV40536 001A SPACER x2 Symbol No Part No Part N...

Page 34: ...t Name Description Local 1 J200 THS300S 30 SUB F PANEL 2 300 J0THS31600 WOOFER UNIT 3 411 B84016AB1 SCREW x4 4 J201 THS300B 10 CLOTH FRAME ASY 5 600 0WS300 00 SPEC LABEL S3B S3E S3EN S3EV 5 600 0WS301 00 SPEC LABEL S3A 5 600 0WS302 00 SPEC LABEL S3EE 1 5 3 4 3 3 3 2 Block No M M M 2 Subwoofer ...

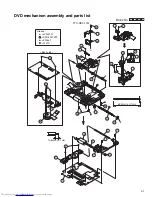
Page 35: ...m assembly and parts list Back side 63 3mm 0 1mm 10 5mm 0 1mm A A FTU DE3 11M Block No M M M J Grease 1401C PG 641 CFD 4007ZY2 JVG 31N 27 29 26 23 24 25 5 6 19 28 22 28 21 20 8 9 4 11 11 7 10 2 1 3 15 14 13 18 12 17 16 ...

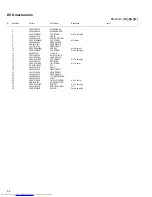
Page 36: ...11 QYSDST2605M TAP SCREW M2 6 x 5mm x2 12 QAL0507 001 PICK UP 13 LE20700 001A SW ACTUATOR 14 LE31067 002A LEAD SPRING 15 QYSPSFU1740Z TAP SCREW M1 7 x 4mm x2 16 LE40929 001A SW LEVER 17 QYSPSFU1740Z TAP SCREW M1 7 x 4mm 18 QUQ105 2411AC FFC 19 LE40931 001A SHAFT 20 LE40855 002A FEED GEAR E 21 LV41517 003A LEAD SCREW 22 LE40930 001A FEED GEAR M 23 LE40928 002A THURUST SPRING 24 LE40927 002A PLATE 2...

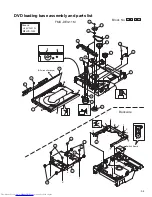
Page 37: ...sembly and parts list Switch Board Backside a b 7 95mm 0 10mm FMU DE3 11M a b e f e f c d c d All circumference Block No M M M N JVS 1003 JVG 31N Grease 7 16 2 4 11 8 10 9 12 1 5 20 19 18 17 14 13 3 15 6 21 25 24 23 24 24 22 ...

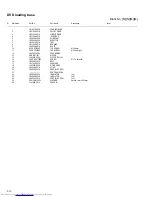
Page 38: ...98 001A SHAFT 10 QYSSSF2008Z TAP SCREW M2 x 8mm 11 QYSDSF2008Z TAP SCREW M2 x 8mm x2 12 LE40937 002A LEAF SPRING 13 QAR0197 001 MOTOR 14 LV42087 002A MOTOR PULLEY 15 QYSPSPU1730Z SCREW M1 7 x 3mm x2 16 LE40897 001A BELT 17 LE31046 003A CLAMPER 18 LV42930 003A P C MAGNET 19 LE40899 001A YOKE 20 LE40906 001A SPECIAL SCREW 21 DVD TRAMECHA 22 LE40900 003A INSULATOR x2 23 LE40900 005A INSULATOR x2 24 L...

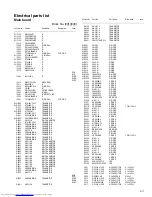
Page 39: ...TOR S3B S3E S3EE S3EN S3EV Q4101 UN2214 X TRANSISTOR Q4102 UN2211 X TRANSISTOR Q4300 UN2211 X TRANSISTOR Q5000 UN2211 X TRANSISTOR Q5001 UN2211 X TRANSISTOR Q5004 UN2211 X TRANSISTOR Q5100 UN2215 X TRANSISTOR Q5101 UN2211 X TRANSISTOR Q6001 2SA1037AK RS X TRANSISTOR D901 6A10E2 SI DIODE D902 6A10E2 SI DIODE D903 6A10E2 SI DIODE D904 6A10E2 SI DIODE D906 6A10E2 SI DIODE D907 6A10E2 SI DIODE D908 6A...

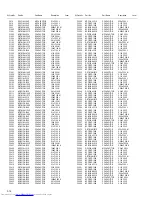
Page 40: ...103X C CAPACITOR 0 01uF 25V K Symbol No Part No Part Name Description Local C2500 NDC31HJ 331X C CAPACITOR 330pF 50V J C2501 NCF31EZ 104X C CAPACITOR 0 1uF 25V Z C2502 NCF31EZ 104X C CAPACITOR 0 1uF 25V Z C2503 NCB21HK 683X C CAPACITOR 0 068uF 50V K C2504 NCB31HK 102X C CAPACITOR 1000pF 50V K C2505 NCB21HK 683X C CAPACITOR 0 068uF 50V K C2506 QFVF1HJ 224Z MF CAPACITOR 0 22uF 50V J C2507 NCF31EZ 10...

Page 41: ...100 QETN1CM 107Z E CAPACITOR 100uF 16V M C4101 NCB31CK 104X C CAPACITOR 0 1uF 16V K C4102 NCB31CK 104X C CAPACITOR 0 1uF 16V K C4103 NCB31CK 103X C CAPACITOR 0 01uF 16V K C4104 NCB31HK 103X C CAPACITOR 0 01uF 50V K C4107 NCB31HK 103X C CAPACITOR 0 01uF 50V K C4108 QETN1HM 225Z E CAPACITOR 2 2uF 50V M C4109 NCB31HK 223X C CAPACITOR 0 022uF 50V K C4110 NCB31HK 102X C CAPACITOR 1000pF 50V K C4200 NCB...

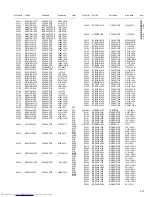
Page 42: ...kΩ 1 16W J R2711 NRSA63J 470X MG RESISTOR 47Ω 1 16W J R2712 NRSA63J 391X MG RESISTOR 390Ω 1 16W J R2720 NRSA63J 472X MG RESISTOR 4 7kΩ 1 16W J R2721 NRSA63J 472X MG RESISTOR 4 7kΩ 1 16W J R2722 NRSA63J 472X MG RESISTOR 4 7kΩ 1 16W J R2723 NRSA63J 472X MG RESISTOR 4 7kΩ 1 16W J R2724 NRSA63J 472X MG RESISTOR 4 7kΩ 1 16W J R2725 NRSA63J 472X MG RESISTOR 4 7kΩ 1 16W J Symbol No Part No Part Name Desc...

Page 43: ...L72AM 220 COIL 22uH M L2582 QQL72AM 220 COIL 22uH M L2601 QQL72AM 220 COIL 22uH M L2602 QQL72AM 220 COIL 22uH M L3100 QQL25CK 221Z COIL 220uH K L4200 QQL244K 100Z COIL 10uH K CN190 QGA2501C1 02 CONNECTOR W B 1 2 CN341 QGF1205C1 13 CONNECTOR FFC FPC 1 13 S3B S3E S3EE S3EN S3EV CN422 QGF1036C1 15 CONNECTOR FFC FPC 1 15 CN423 QGF1036C1 17 CONNECTOR FFC FPC 1 17 CN424 QGF1036C1 09 CONNECTOR FFC FPC 1 ...

Page 44: ... 330pF 50V K S3B S3E S3EE S3EN S3EV C3405 QCBB1HK 331Y C CAPACITOR 330pF 50V K S3B S3E S3EE S3EN S3EV C3406 QCSB1HJ 470Y C CAPACITOR 47pF 50V J S3B S3E S3EE S3EN S3EV C3407 QCSB1HJ 470Y C CAPACITOR 47pF 50V J S3B S3E S3EE S3EN S3EV C3408 QCSB1HJ 470Y C CAPACITOR 47pF 50V J S3B S3E S3EE S3EN S3EV C3409 QETN0JM 477Z E CAPACITOR 470uF 6 3V M S3B S3E S3EE S3EN S3EV C3410 QCSB1HJ 470Y C CAPACITOR 47pF ...

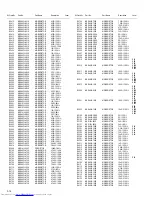
Page 45: ...261 NCB31EK 223X C CAPACITOR 0 022uF 25V K C262 NCB31EK 223X C CAPACITOR 0 022uF 25V K C300 NCB31CK 104X C CAPACITOR 0 1uF 16V K C301 NEA70GM 227X E CAPACITOR 220uF 4V M C302 NEA70GM 476X E CAPACITOR 47uF 4V M C303 NEA70GM 476X E CAPACITOR 47uF 4V M C304 NCB30JK 105X C CAPACITOR 1uF 6 3V K C305 NCB31CK 104X C CAPACITOR 0 1uF 16V K C306 NCB31CK 104X C CAPACITOR 0 1uF 16V K C307 NCB31CK 104X C CAPAC...

Page 46: ...ESISTOR 0Ω 1 16W J R345 NRSA63J 471X MG RESISTOR 470Ω 1 16W J R346 NRSA63J 223X MG RESISTOR 22kΩ 1 16W J R347 NRSA63J 203X MG RESISTOR 20kΩ 1 16W J Symbol No Part No Part Name Description Local R351 NRSA63J 681X MG RESISTOR 680Ω 1 16W J R352 NRSA63J 105X MG RESISTOR 1MΩ 1 16W J R353 NRSA63J 101X MG RESISTOR 100Ω 1 16W J R354 NRSA63J 101X MG RESISTOR 100Ω 1 16W J R355 NRSA63J 331X MG RESISTOR 330Ω ...

Page 47: ...0 4 0 0 TH301 NAD0025 103X N THERMISTOR 10kΩ X351 NAX0550 001X CRYSTAL 27 000MHz Symbol No Part No Part Name Description Local CN1 QGF1016F3 05 CONNECTOR FFC FPC 1 5 S1 QSW1007 001 DETECT SWITCH Symbol No Part No Part Name Description Local ...

Page 48: ... P2 P2 P1 P6 P4 P3 A3 P13 P9 P10 P7 1 2 1 2 2 2 P5 A1 A2 P8 P3 2 2 A6 A9 A B E EN EV EE A6 P12 P15 P8 P14 A9 P6 P2 P2 P3 A14 P3 1 2 1 2 2 2 2 2 A5 A2 A4 P4 P5 P7 A4 Block No M M M 3 A7 A5 A15 A16 A17 A18 A13 A19 A10 A12 A10 A11 A10 A12 A11 A10 P11 P11 ...

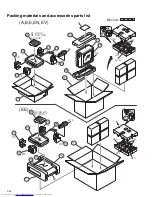
Page 49: ...FCE SPBOX SPEAKER BOX CENTER A 12 SPTHS3FSE SPBOX SPEAKER BOX SURROUND x2 A 13 GVT0133 010A INST BOOK RUS S3EE A 14 RM STHS3R REMOCON S3EE A 15 QAM0216 001 SIGNAL CORD S3A A 16 BT 56012 1 WARRANTY CARD S3A A 16 BT 54013 7 WARRANTY CARD S3B S3E S3EN S3EV A 17 VNA3000 204 REGISTER CARD S3B A 18 BT 56002 2 S CENTER LIST S3A A 19 BT 54013 7 WARRANTY CARD S3EE P 1 GV30599 002A CARTON BOX S3A P 1 GV3059...

Page 50: ... S3 Contents Block diagram Standard schematic diagrams Printed circuit boards 2 1 2 2 2 10 to 13 CD ROM No SML200405 DVD DIGITAL CINEMA SYSTEM Area suffix A Australia B U K E Continental Europe EN Northern Europe EV Eastern Europe EE Russian Federation XV THS3 SP WS3 SP THS3F SP THS3F ...

Page 51: ...e silk screen printed side parts side of the PWB diagrams the parts that are printed over with black such as the resistor diode and ICP or identified by the mark nearby are critical for safety This regulation does not correspond to J and C version ...

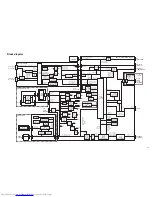
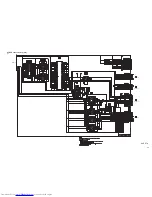
Page 52: ...UL TUR TUNED TUSDATA TUSCLK STEREO TUL TUR IC412 EEPROM EEPROMDATA EEPROMCLK IC411 RESET RESET J4400 AV COMPULINK3 AVVLR Q1600 Q1601 TU9V REG TU9V IC400 RDS DECODER RDATA RCLK Except for A version IC240 DIGITAL AUDIO PROCESSOR IC250 IC254 IC258 HALF BRIDGE J2600 SPEAKER TERMINAL FL FR SL SR C SW OUT2_A OUT2_B OUT3_A OUT3_B OUT4_A OUT4_B OUT5_A OUT5_B OUT6_A OUT6_B IC210 INPUT SEL J3400 AUDIO VIDEO...

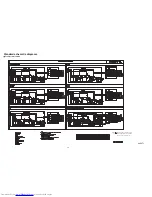
Page 53: ...001C1 04 QGA7901C1 02 QGA7901C1 02 1N4003S T5 QQT0253 002 QSK0124 001 1000 25 1N4003S T5 1SS133 T2 QCZ9105 472 QQT0442 001 QNZ0136 001Z QQT0442 002 QCZ9079 101 T1 6AL QNZ0136 001Z 1K 1K KTC3199 GL T KTC3199 GL T 10K QQR1360 001 1K QQT0442 001 0 01 KTC3199 GL T QGA2001C1 04 QGA7901C1 02 QGA7901C1 02 QQR1321 001 QGA7901C1 02 1N4003S T5 QQR1321 001 0 01 QGA2001C1 04 QQT0253 012 QSK0124 001 1000 25 1N...

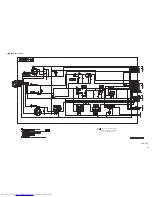
Page 54: ... C3150 D903 D901 C903 C901 C913 D918 D916 C918 C920 C921 T6 3AL PQ033RD01SZ QGA3901C1 10 PQ033ES3MX T KTA1267 YG T 10 16 5 6K 2SA1037AK RS X KTA1046 Y UN221L X 6800 25 2SD601A QR X QGA2501C1 02 2SD601A QR X UDZS6 8B X T2AL T2AL UDZS3 6B X 1K KIA7809API UDZS12B X 100 16 1K 1K 10K 4 7 50 1N4003S T5 MA111 X QJK021 042001 1N4003S T5 0 01 1N4003S T5 PQ050RDA1SZ 10 50 KTC2026 Y 1K UDZS6 2B X 47 25 2K 2K...

Page 55: ...X 22K 0 01 GP1FA352RZ 10k 10k GP1FA553TZ0F 10 16 10K 10K 47k MN101C61GFJ 10K QNS0089 001 220 220 0 QAX0263 001Z 100 16 LB1641 560p 10K RB160M 30 X 220 UN2211 X NI ICP N5 T KTA1023 OY T 100 220 UN2214 X 0 1 16 0 1 16 UN2216 X 0 0 0 0 100 220 39K 20K 15K UDZS13B X 1N4003S T5 0 1 16 0 01 47k NI RB160M 30 X 10K 0 01 UDZS6 8B X 1 5 10K QAX0246 001Z BD4826G X 0 022 0 001 QQL244K 100Z NI 10 16 4 7k 100 1...

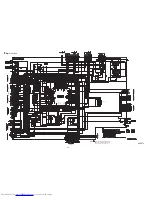
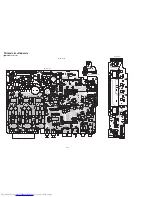
Page 56: ...406 R2423 R2424 R2425 R2208 R2810 D2201 R2851 R2402 R2803 R2809 C6002 R6001 IC600 C2100 0 1 NQR0389 003X 2SD601A QR X 4 7K 220P 7 5K 10 50 10 50 7 5K NQR0389 003X 220P 220 2SD601A QR X 0 1 10 16 NI 10 16 0 1 470 470 10 50 0 1 STA308 HT 10 50 UDZS5 6B X 0 1 0 1 0 1 0 1 0 001 0 1 22 50 0 1 0 1 0 1 STA506 X STA506 X 0 1 10K 0 1 0 1 330 50 0 1 330 50 0 1 0 01 16 22 22 QNN0659 001 0 1 39K PQ1X251M2ZP W...

Page 57: ...013 R3009 R3011 R3020 R3021 C3402 C3405 C3301 C3302 C3200 C3203 C3204 R3008 R3010 R3012 R3408 R3410 QNZ0499 001 75 75 470 6 3 0 10K 0 0 1 10 10K 470 6 3 470 6 3 470 6 3 75 NI NI QNN0662 001 NI NI QNZ0625 001 75 75 75 75 75 75 75 75 75 75 470 6 3 470 6 3 470 6 3 470 6 3 470 6 3 0 01 16 KRC102M T MM1501XN X 470 6 3 9 1k 2 2k 10k KRC102M T 47 25 MM1623XF X 220 22 50 470 10 0 KRC102M T 2K NI 330P 1 10...

Page 58: ... X QGF1210G1 04 QGF1036F1 21 QGF1210G1 04 QQR0601 001Z 0 1 QQR0601 001Z 0 01 16 0 01 QQR0601 001Z UN2211 X 0 01 QSW1059 001 1k 0 1 0 022 220 NI 0 1 QNS0170 001 1k 2 7k 0 01 16 470p 0 01 16 470p 1k 1K 1K 1K 4 3k 8 2k UN2211 X 220 6 3 1k NAX0623 001X 8 2k 100K SELU2E10C P T08 1 16 SLR 342VC T15 0 01 10K 10k 220 0 NI 1K 0 01 16 CLOCK INITIAL G13 DATAIN KEY1 KEY2 RESET INITIAL DATAIN G5 G6 G7 G8 G1 G9...

Page 59: ... 27k 0 1 16 NI 560p 0 1 16 0 1 16 1k 0 1 16 DGND 0 1 16 1 10 0 1 16 0 1 16 UN2119 X 150 150 150 150 NAX0550 001X 15p D2V 0 DGND 18p 0 6 8 0 10k 0 1 16 2 2k 0 1 16 0 0 NI DGND S3 3V 470 1k 1k 330 330 330 330 0 1 16 0 1 16 NI 1k 680 NI 100 100 0 1 16 P3 3V NI 330 20k 22k 0 015 16 0 01 16 NI NI NI NI NI NI NI 330 NI 330 330 330 QGF0523F1 24W 27 470 27 470 24k KTA1001 Y X KTA1001 Y X 47 6 3 47 6 3 2 2...

Page 60: ...9 002X MGND DGND NI NI NI NI 10k 0 NI 10k NI K4S643232F TC60 0 1 16 SN74LVC373APW X SN74LVC373APW X 0 1 16 0 1 16 1 10 0 1 16 0 1 16 NI NI NI SN74AHC1G08DC X NI NI NI NI NI 0 DGND NI NI 0 NI NI NQR0251 004X NI NQR0251 004X NI NI 0 0 0 NQR0251 004X NI 0 0 NQR0360 003X NI 0 NI 0 0 0 NI NI NI 470p NI 1 16 2 2 10 0 10k NI NI NI QGF1016F2 15W QGF1016F2 17W NQR0360 003X NQR0502 001X QGF1016F2 08W QGA100...

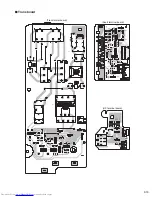
Page 61: ...663 Q2664 Q2665 Q2666 Q2667 Q2668 Q2669 Q2670 Q2671 Q2672 Q4101 Q4102 Q4300 Q4500 R1001 R1002 R1100 R1101 R1102 R1103 R1200 R1201 R1600 R1601 R1900 R2000 R2001 R2002 R2003 R2004 R2110 R2200 R2201 R2202 R2203 R2204 R2300 R2401 R2500 D4201 R2502 R2503 R2504 R2520 R2304 R2522 R2523 R2540 D2301 R2542 R2543 R2544 R2560 D2302 R2562 R2563 R2580 K2801 R2582 R2583 R2584 R2600 K2802 R2602 R2603 R2650 R2651 ...

Page 62: ... C2590 C2606 C2610 C2660 C2661 C2662 C2663 C2664 C2665 C2704 C2724 C2751 C3415 C3002 C3102 C3104 C3109 C3110 C3111 C3201 C3205 C4000 C4003 C4004 C4008 C4100 C4108 C4202 C905 CN341 CN351 D1400 Z905 CN190 CN429 CN901 CP410 D901 D902 D903 D904 D906 D907 D908 D909 D913 D914 D916 D917 D918 D919 D1000 D1001 D1002 IC130 IC140 IC150 IC420 IC450 IC451 J2000 J2600 J3200 J4400 D1401 D1402 L3100 L4200 Q1000 Q...

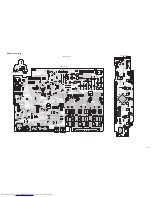
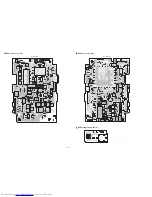
Page 63: ...TP72 TP73 TP74 TP75 TP76 TP77 TP78 TP79 TP80 TP81 TP82 TP90 TP91 TP92 TP93 TP94 TP95 TP96 TP97 TP98 TP99 TP220 TP221 TP226 TP227 TP231 TP304 TP305 C300 TP310 C329 TP314 TP315 TP316 TP317 TP318 TP319 TP320 TP325 TP327 TP328 TP329 C328 TP751 TP752 TP753 TP980 TP990 C101 C102 C103 C105 C106 C107 C108 C109 C110 C204 C217 C263 C264 C301 C302 C303 C308 C309 C310 C311 C312 C313 C315 C316 C317 C318 C320 C...

Page 64: ...3 R954 R956 R955 D953 C954 HS950 RY950 S950 T950 Z950 D955 Z951 Z952 Z953 C959 C960 C961 C958 PP950 PP951 PP952 CN953 C2780 R2781 J2780 K2780 K2781 K2782 R2780 C2781 C2782 C2783 CN453 B2702 C2784 C3400 C3401 C3402 C3403 C3404 C3405 C3406 C3407 C3408 C3409 C3410 J3400 Q3400 Q3401 Q3402 Q3403 R3400 R3401 R3402 R3403 R3404 R3405 R3406 R3407 R3408 R3409 R3410 R3411 R3412 R3413 R3414 R3415 R3416 R3417 ...

Page 65: ...VICTOR COMPANY OF JAPAN LIMITED No MB187SCH Printed in Japan WPC AV MULTIMEDIA COMPANY AUDIO VIDEO SYSTEMS CATEGORY 10 1 1chome Ohwatari machi Maebashi city 371 8543 Japan ...

Reviews: