background image

For Customer Use:

Enter below the Model No. and Serial 
No. which are located either on the rear, 
bottom or side of the cabinet. Retain this 
information for future reference.

Model No.

Serial No.

LVT0396-005A

[E]

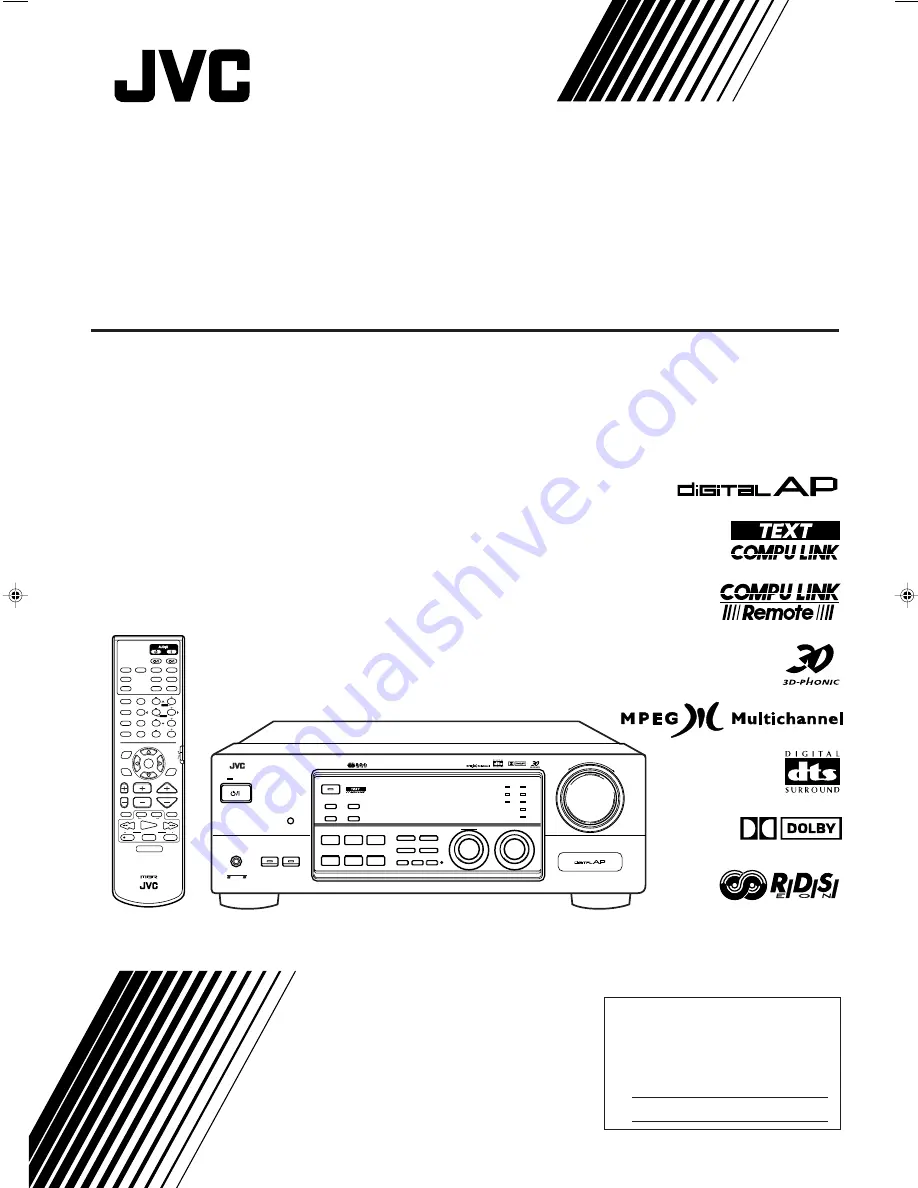
RX-7000RBK

INSTRUCTIONS

BEDIENUNGSANLEITUNG

MANUEL D’INSTRUCTIONS

GEBRUIKSAANWIJZING

MANUAL DE INSTRUCCIONES

ISTRUZIONI

AUDIO/VIDEO CONTROL RECEIVER

AUDIO/VIDEO-RECEIVER MIT STEUEREINHEIT
AMPLI/TUNER DE COMMANDE AUDIO/VIDEO
GEINTEGREERDE AUDIO/VIDEO-VERSTERKER
RECEPTOR DE CONTROL DE AUDIO/VÍDEO
RICEVITORE DI CONTROLLO AUDIO/VIDEO

RM-SRX7000R    REMOTE  CONTROL

CONTROL

CHANNEL

VOLUME

TV VOL

STOP

PAUSE

FF/

/REW

VCR

TV/VIDEO

TAPE/MD

MUTING

REC

PLAY

DVD

DVD MUILTI

CD

TAPE/MD

TV/DBS

PHONO

FM/AM

VCR

ANALOG/DIGITAL

SURROUND

CENTER

SURROUND

TEST

REAR-L

CD-DISC

MODE

ON/OFF

EFFECT

REAR-R

SOUND

SEA MODE

SUBWOOFER

RETURN

SET

MENU

AUDIO/
TV/VCR

EXIT

TEXT

DISPLAY

SLEEP

1

2

3

4

5

6

7

/P

8

9

10

0

+10

100+

FM MODE

CATV/DBS

MENU

MENU

ENTER

ENTER

TV/CATV/DBS

VCR 

PTY SEARCH

PTY

PTY

+

RX-7000R AUDIO/VIDEO CONTROL RECEIVER

STANDBY

SPEAKERS

1

2

PHONES

SURROUND ON/OFF

DSP  MODE

BALANCE/SURROUND

ADJUST

SEA MODE

SEA ADJUST

SETTING

MULTI  JOG

MASTER  VOLUME

SOURCE  SELECTOR

THEATER

LIVE CLUB

DANCE CLUB

HALL

PAVILION

INPUT

ANALOG/DIGITAL

FM/AM TUNING

TUNER PRESET

TUNER/SEA MEMORY

FM MODE

DVD

TV SOUND/DBS

PHONO

TAPE/MD

VCR

FM

AM

CD

SOUND SELECT

INPUT ATT.

BASS BOOST ONE TOUCH OPERATION

SOURCE NAME

COMPULINK

Remote

D I G I T A L

ENHANCED COMPULINK CONTROL SYSTEM

PTY SEARCH

DISPLAY MODE

EON

TA/NEWS/INFO

STANDBY/ON

D I G I T A L

RX-7000R[E]COVER/f

00.4.25, 0:01 PM

1

Summary of Contents for RX-7000RBK

Page 1: ... DVD MUILTI CD TAPE MD TV DBS PHONO FM AM VCR ANALOG DIGITAL SURROUND CENTER SURROUND TEST REAR L CD DISC MODE ON OFF EFFECT REAR R SOUND SEA MODE SUBWOOFER RETURN SET MENU AUDIO TV VCR EXIT TEXT DISPLAY SLEEP 1 2 3 4 5 6 7 P 8 9 10 0 10 100 FM MODE CATV DBS MENU MENU ENTER ENTER TV CATV DBS VCR PTY SEARCH PTY PTY RX 7000R AUDIO VIDEO CONTROL RECEIVER STANDBY SPEAKERS 1 2 PHONES SURROUND ON OFF DS...

Page 2: ...ent le courant LecommutateurSTANDBY ON necoupejamaiscomplètementla ligne de secteur quelle que soit sa position Le courant peut être télécommandé Voorzichtig STANDBY ON schakelaar Om de stroomtoevoer geheel uit te schakelen trekt u de stekker uit het stopkontakt Anders zal er altijd een geringe hoeveelheid stroom naar het apparaat lopen ongeacht de stand van de STANDBY ON schakelaar U kunt het app...

Page 3: ...en Zijkanten Minstens 10 cm aan weerszijden vrij houden Bovenkant Niets bovenop plaatsen 10 cm speling geven Achterkant Minstens 15 cm ruimte achteraan vrij houden Onderkant Opstellen op een egaal horizontaal oppervlak Bovendien moet er rondom voldoende luchtdoorstroming zijn zoals in de afbeelding aangegeven Precaución Ventilación Adecuada Para evitar el riesgo de choque eléctrico e incendio y pa...

Page 4: ...PTY Codes 21 Switching to a Broadcast Program of Your Choice Temporarily 23 Using the SEA Modes 24 SelectingYour Favorite SEA Mode 24 Creating Your Own SEA Mode 24 Using the DSP Modes 25 Available DSP Modes According to the Speaker Arrangement 27 Adjusting the 3D PHONIC Modes 28 Adjusting the DAP Modes 28 Adjusting the Surround Modes 29 Activating the DSP Modes 31 Using the DVD MULTI Playback Mode...

Page 5: ...EXT DISPLAY button 41 u CHANNEL buttons 47 49 i VOLUME buttons 11 o MUTING button 12 Front Panel 1 STANDBY ON button and STANDBY lamp 10 2 Remote sensor 9 3 SURROUND ON OFF button and lamp 30 31 4 SEA MODE button 24 5 INPUT ANALOG DIGITAL button 16 6 FM AM TUNING button 19 7 FM MODE button 20 8 Display 10 9 Source lamps 10 p MASTER VOLUME control 11 q PHONES jack 12 w SPEAKERS 1 2 buttons and lamp...

Page 6: ... receiver or remove screws covers or cabinet Do not expose the receiver to rain or moisture Checking the Supplied Accessories Check to be sure you have all of the following items which are supplied with the receiver The number in the parentheses indicates quantity of the pieces supplied Remote Control 1 Batteries 2 AM MW LW Loop Antenna 1 FM Antenna 1 If anything is missing contact your dealer imm...

Page 7: ...EXT terminal Keep the AM MW LW loop antenna connected Connecting the Speakers You can connect the following speakers Two pairs of front speakers to produce normal stereo sound One pair of rear speakers to enjoy the surround effect One center speaker to produce more effective surround effect to emphasize human voices One subwoofer to enhance the bass IMPORTANT After connecting the speakers listed a...

Page 8: ...ound enhancing device such as a graphic equalizer between the source components and this receiver the sound output through this receiver may be distorted RIGHT LEFT TAPE MD IN PLAY OUT REC CD PHONO AUDIO Turntable To audio output Turntable If an earth cable is provided for your turntable connect the cable to the screw marked H on the rear panel Connecting the rear and center speakers Connect rear ...

Page 9: ...r to the TAPE MD jacks When connecting an MD recorder to the TAPE MD jacks change the source name which will be shown on the display when selected as the source to MD See page 13 for details If your audio components have a COMPU LINK 3 or TEXT COMPU LINK jack See also page 39 for detailed information about the connection and the COMPU LINK 3 remote control system See also page 40 for detailed info...

Page 10: ...t Ç To S video output Î To front left right channel audio output To rear left right channel audio output Ï To composite video output DVD player Note When connecting the DBS tuner to the TV SOUND DBS jacks change the source name which will be shown on the display when selected as the source to DBS See page 13 for details DBS RIGHT VIDEO VIDEO S VIDEO RIGHT LEFT AUDIO IN PLAY OUT REC IN PLAY OUT REC...

Page 11: ...ug the protective plug DVD player DBS tuner When the component has a digital optical output terminal connect it to the DIGITAL 2 CD or DIGITAL 3 TV terminal using the digital optical cable not supplied When the component has a digital coaxial output terminal connect it to the DIGITAL 1 DVD terminal using the digital coaxial cable not supplied Digital coaxial cable not supplied between digital coax...

Page 12: ...rd When unplugging the cord always grasp the plug so as not to damage the cord Putting Batteries in the Remote Control Before using the remote control put two supplied batteries first When using the remote control aim the remote control directly at the remote sensor on the receiver 1 On the back of the remote control remove the battery cover 2 Insert batteries Make sure to match the polarity to 3 ...

Page 13: ...DVD O DVD MULTI O TV SOUND or DBS O VCR O back to the beginning The selected source lamp also lights up The DVD lamp lights up both for DVD and DVD MULTI From the remote control Press one of the source selecting buttons DVD DVD MUILTI CD TAPE MD TV DBS PHONO FM AM VCR Selected source name appears DVD Select the DVD player DVD MULTI Select the DVD player for viewing the digital video disc using the...

Page 14: ...ecting buttons CD TAPE MD PHONO FM AM TV DBS while viewing the picture from a video component such as the VCR or DVD player etc Notes Once you have selected a video source pictures of the selected source are sent to the TV until you select another video source The TV DBS button only works for selecting DBS as the source but not for selecting TV SOUND When you use the DBS tuner change the source na...

Page 15: ...ction turns on BASSBOOST ON and off BASSBOOST OFF Select BASSBOOST ON to activate the bass boost function The BASS BOOST indicator lights up on the display Select BASSBOOST OFF to cancel it The indicator goes off Note This function affects the front speaker sounds only Attenuating the Input Signal When the input level of the playing source is too high the sounds will be distorted If this happens y...

Page 16: ...t setting 2 Turn MULTI JOG to register whether you have connected a subwoofer or not As you turn it the subwoofer setting alternates between YES and NO YES Select this when a subwoofer is used SUBWFR lights up on the display see page 11 NO Select this when no subwoofer is used MULTI JOG SOURCE SELECTOR BASS BOOST SOURCENAME SETTING MULTI JOG IMPORTANT When using the remote control check to see if ...

Page 17: ...rear speaker output Turn it clockwise to increase the delay time from 0 msec R DELAY 0ms to 15 msec R DELAY 15ms Turn it counterclockwise to decrease the delay time from 15 msec R DELAY 15ms to 0 msec R DELAY 0ms Notes Rear delay time setting is not valid for the DVD MULTI playback mode You cannot adjust the rear delay time when you have set REAR SPK to NONE Setting the Speakers for the DSP Modes ...

Page 18: ... sound is distorted while playing back a source using Dolby Digital DTS Digital Surround or MPEG Multichannel follow the procedure below On the front panel ONLY 1 Press SETTING repeatedly until LFE ATT Low Frequency Effect Attenuator appears on the display The display changes to show the current setting 80Hz 100Hz 120Hz 2 Turn MULTI JOG to select the low frequency effect attenuator level As you tu...

Page 19: ...digital signal indicator for the detected signal lights up automatically When the receiver cannot recognize the incoming signal format correctly the frame of the digital signal indicator flashes If this happens select the same digital input mode with the incoming digital signal DOLBY DIGITAL DTS or MPEG To change the input mode back to analog input select ANALOG Digital Input DIGITAL IN Terminal S...

Page 20: ...ave connected an MD recorder or CD player equipped with TEXT COMPU LINK remote control system see page 40 you can show the text information such as disc title or track title on the display of this receiver To show it on the display follow the procedure below Before you start remember There is a time limit in doing the following steps If the setting is canceled before you finish start from step 1 a...

Page 21: ...ERATION lamp lit the settings for the currently selected source are recalled when the source is selected To cancel the One Touch Operation function Press ONE TOUCH OPERATION so that the lamp goes off Even though the One Touch Operation function is canceled the recalled sound effects remain active Notes If the source is FM or AM MW LW you can assign a different setting for each band The DSP modes a...

Page 22: ...cted channel number stops flashing The station is assigned to the selected channel number 5 Repeat steps 1 to 4 until you store all the stations you want To erase a stored preset station Storing a new station on a used number erases the previously stored one Receiving Radio Broadcasts You can browse through all the stations or use the preset function to go immediately to a particular station AUDIO...

Page 23: ...while tuning into the stations The AUTO MUTING indicator goes off on the display SOURCE SELECTOR TUNER PRESET MULTI JOG Note When using the FM MODE button on the remote control be sure that the 10 keys are activated for the tuner not for the CD and others See page 45 Assigning Names to Preset Stations You can assign a name of up to four characters to each preset station When a preset station is tu...

Page 24: ...ample the stations send their station names as well as information about what type of program they broadcast such as sports or music etc When tuned to an FM station which provides the RDS service the RDS indicator lights up on the display With the receiver you can receive the following types of RDS signals PS Program Service Shows commonly known station names PTY Program Type Shows types of broadc...

Page 25: ... and tunes in that station To continue searching after the first stop Press PTY SEARCH again while the indications on the display are flashing If no program is found NOTFOUND appears on the display From the remote control 1 Press PTY SEARCH while listening to an FM station PTY SELECT flashes on the display 2 Press and hold PTY until the PTY code you want appears on the display while PTY SELECT is ...

Page 26: ...ing the program you have selected the receiver automatically switches to the station The indicator of received PTY code starts flashing When the program is over the receiver goes back to the previously selected source but still remains in EON standby mode The indicator of received PTY code stops flashing and remains lit If the FM station you are listening to is broadcasting the program you have se...

Page 27: ...ly until SEA OFF appears The SEA indicator goes off from the display From the remote control 1 Press SOUND The 10 keys are activated for sound adjustments 2 Press SEA MODE repeatedly until the SEA mode you want appears on the display To cancel the SEA mode Press SEA MODE repeatedly until SEA OFF appears in step 2 above The SEA indicator goes off from the display AUDIO TV VCR CATV DBS SEA MODE SOUN...

Page 28: ...this receiver and REAR SPK and CENTER SPK are set to NONE see page 14 DAP modes The sound heard in a concert hall or club consists of direct sound and indirect sound early reflections and reflections from behind Direct sounds reach the listener directly without any reflection On the other hand indirect sounds are delayed by the distances of the ceiling and walls These direct sounds and indirect so...

Page 29: ...er In addition Dolby Digital enables stereo rear sounds and sets the cutoff frequency of the rear treble at 20 kHz comparing to 7 kHz for Dolby Pro Logic These facts enhance the sound movement and being there feelings much more than Dolby Pro Logic To enjoy the software encoded with Dolby Digital you must connect the source component using the digital terminal on the rear of this receiver See page...

Page 30: ...SURROUND MODE DOLBY DTS MPEG SURROUND DOLBY PRO LOGIC DOLBY DIGITAL DTS SURROUND or MPEG SURROUND THEATER LIVE CLUB DANCE CLUB HALL PAVILION 3D ACTION DSP OFF DSP mode is canceled Activated automatically only when AUTO PCM is selected as the digital input and playback source is encoded with Dolby Digital Activated automatically only when AUTO PCM is selected as the digital input and playback sourc...

Page 31: ...eaker output level AUDIO TV VCR CATV DBS DSP MODE DSP EFFECT 1 DSP EFFECT 2 DSP EFFECT 3 DSP EFFECT 4 DSP EFFECT 5 EFFECT 7 P MULTI JOG BALANCE SURROUND ADJUST BALANCE SURROUND ADJUST IMPORTANT When using the remote control check to see if its remote control mode selector is set to the correct position To operate this receiver set it to AUDIO TV VCR Adjusting the 3D PHONIC Modes Once you have adju...

Page 32: ...level As you turn it the effect level changes as follows As the number increases the selected DAP mode becomes stronger From the remote control 1 Press SURROUND MODE repeatedly until the DAP mode LIVE CLUB DANCE CLUB HALL or PAVILION appears on the display The DSP indicator also lights up on the display When you have set REAR SPK to NONE the 3D PHONIC indicator also lights up 2 Press SOUND The 10 ...

Page 33: ...evel press REAR R from 10 dB to 10 dB On the front panel You can also use the buttons on the front panel to adjust the Surround modes However no test tone is available when using the buttons on the front panel So make adjustments while listening to the sound of the source played back 1 Press SURROUND ON OFF to activate an appropriate Surround mode PRO LOGIC DOLBY DIGITAL DTS SURROUND or MPEG SURRO...

Page 34: ...lso use the buttons on the front panel to adjust the Surround modes However no test tone is available when using the buttons on the front panel So make adjustments while listening to the sound of the source played back 1 Press DSP MODE repeatedly until THEATER appears on the display The Ÿ PRO LOGIC and DSP indicators also light up on the display 2 Adjust the speaker output levels 1 Press BALANCE S...

Page 35: ...on the DSP modes change 2 Select and play a sound source To enjoy 3D PHONIC and JVC Theater Surround play back a software encoded with Dolby Surround and labeled with DOLBY SURROUND mark To cancel the DSP mode Press SURROUND MODE repeatedly until DSP OFF appears on the display Note While playing back MPEG Multichannel or Dolby Digital source through a digital input terminal you can neither select ...

Page 36: ...st the DVD MULTI playback mode while playing back a DVD using the analog discrete output mode on the DVD player Once you have made adjustments the receiver memorizes the adjustments until you change them You also need to set the DVD player to the analog discrete output mode Before you start remember There is a time limit in doing the following steps If the setting is canceled before you finish sta...

Page 37: ... Pressing one of the fi buttons also displays the MAIN MENU 2 Press fi to move to MODE 3 Press to select the DSP mode you want to use 4 When you finish press EXIT The menu disappears from the TV Selecting the Analog or Digital Input Mode Also see page 16 This selection is only possible when the digital input DIGITAL IN terminal setting has been correctly done for the digital source currently selec...

Page 38: ... CONTROL then press The SOUND CONTROL menu appears 3 Press fi to move to SUBWFR LEVEL 4 Press to adjust the subwoofer output level 5 When you finish press EXIT repeatedly until the menu disappears from the TV Adjusting the DSP Modes Also see pages 28 31 1 Press MENU The MAIN MENU appears on the TV Pressing one of the fi buttons also displays the MAIN MENU 2 Press fi to move to MODE 3 Press to sele...

Page 39: ... DSP EFFECT Select the effect level For Dolby Pro Logic TEST TONE Output a test tone CENTER LEVEL Adjust the center speaker output level REAR L LEVEL Adjust the left rear speaker output level REAR R LEVEL Adjust the right rear speaker output level For Dolby Digital DTS Digital Surround and MPEG Multichannel TEST TONE Output a test tone CENTER LEVEL Adjust the center speaker output level REAR L LEV...

Page 40: ...requency see page 15 SETTING 1 SUBWOOFER NO FRONT SPK LARGE CENTER SPK SMALL REAR SPK LARGE CNTR DELAY 3msec REAR DELAY 5msec CROSSOVER 100Hz NEXT PAGE ENTER SETTING 2 LFE ATT 0dB COMP MID DIGITAL 1 DVD DIGITAL 2 CD DIGITAL 3 TV FL DISP NORMAL PREVIOUS PAGE ENTER LFE ATT Set the low frequency effect attenuator level see page 15 COMP Set the dynamic range compression see page 15 DIGITAL 1 2 3 Set t...

Page 41: ...ess fi to move to TUNER CONTROL then press The TUNER CONTROL menu appears 3 Tune into a station on the TUNER CONTROL menu referring to Operating the Tuner on the previous page 4 Press fi to move to PRESET MEMORY then press The PRESET MEMORY menu appears 5 Press to select a preset station number you want 6 Press SET to store the setting 7 When you finish press EXIT repeatedly until the menu disappe...

Page 42: ...Remote Control System The COMPU LINK remote control system allows you to operate JVC audio components through the remote sensor on the receiver Turntable CD player Cassette deck or MD recorder COMPU LINK 3 SYNCHRO Automatic Power On Off Standby only possible with the COMPU LINK 3 connection Both the CD player and cassette deck or MD recorder turn on and off standby along with the receiver When you...

Page 43: ... it is the last item in the series of components For example the CD player in the diagram to the left TEXT COMPULINK SOURCE NOT CONNECTED appears on the display in the following cases When the connections explained to the left are not correctly done When you try to use the TEXT COMPU LINK function a few seconds after you turn on the connected equipment This is not a malfunction of the units Refer ...

Page 44: ...ppear Note on 9 For example the SET button will be used to start play PLAY to go to the next screen ENTER and to determine the selection ENTER To exit from the Disc information screen Press EXIT Notes The on screen display will disappear in the following cases if no operation is done for about 10 minutes if you do any operation other than explained in this section To control the MD recorder using ...

Page 45: ...search Press fi until they appear Going back to the DISC TITLE SEARCH screen Press EXIT Searching for a Disc Only for the CD player Search for a disc by its performer 1 Press TEXT DISPLAY while CD is selected as the source The Disc Information screen appears on the TV 2 Press fi to move to SEARCH then press SET The DISC SEARCH screen appears 3 Press fi to move to PERFORMER then press SET The PERFO...

Page 46: ...on For the CD Player with the disc memory function You can use the disc memory function through this receiver The disc information its performer disc title and music genre of normal audio CDs will be stored into the memory built in the CD player For the disc memory function refer to the manual supplied with your CD player The performer disc title and music genre information are usually recorded in...

Page 47: ...u can enter a song title for the song currently selected indicated in yellow on the TV screen 5 Enter the song title referring to steps 3 and 4 of For the CD Player with the disc memory function on page 43 You can enter up to 32 characters for the song title 6 Press fi to move to the song title you have just entered then press SET The song title is stored into the memory and the Disc Information s...

Page 48: ...sts the subwoofer output level CENTER Adjusts the center speaker output level REAR L Adjusts the left rear speaker output level REAR R Adjusts the right rear speaker output level EFFECT Selects the effect level TEST Turns on or off the test tone output Note After adjusting sounds press the corresponding source selecting button or CD DISC to operate your target source by using the 10 keys otherwise...

Page 49: ...ote You can use either TAPE MD button or the TAPE MD CONTROL button to activate the buttons listed above If you press TAPE MD the playing source also changes On the other hand if you press TAPE MD CONTROL the playing source does not change CD player changer After pressing CD DISC with the remote control mode selector set to AUDIO TV VCR you can perform the following operations on a CD player chang...

Page 50: ...e control mode selector set to AUDIO TV VCR you can perform the following operations on a DVD player PLAY Starts playing 4 Returns to the beginning of the current or previous track Skips to the beginning of the next track STOP Stops playing PAUSE Stops playing temporarily To release it press PLAY After pressing DVD or DVD MULTI these buttons can be used for the DVD menu operations Note For detaile...

Page 51: ...SOUND SEA MODE SUBWOOFER RETURN SET MENU AUDIO TV VCR EXIT TEXT DISPLAY FM MODE SLEEP 1 2 3 4 5 6 7 P 8 9 10 0 10 100 CATV DBS MENU ENTER To change the transmittable signals for operating another manufacturer s TV 1 Set the remote control mode to AUDIO TV VCR 2 Press and hold TV CATV DBS 3 Press TV DBS 4 Enter manufacturer s code three digits using buttons 1 9 and 0 See the list on pages 50 and 51...

Page 52: ...her manufacturer s VCR 1 Set the remote control mode to AUDIO TV VCR 2 Press and hold VCR 3 Press VCR 4 Enter manufacturer s code three digits using buttons 1 9 and 0 See the list on pages 52 and 53 to find the code Examples For a JVC product press 0 0 then 8 For an NEC product press 0 3 then 8 5 Release VCR The following button can be used for operating the VCR with the remote control mode select...

Page 53: ...163 217 287 346 374 480 Magnadyne 087 102 247 516 Magnafon 076 102 213 516 Manesth 217 235 264 320 Marantz 037 556 Marelli 087 Mark 037 Matsui 009 011 035 036 037 072 177 208 211 217 235 294 354 355 371 443 487 516 579 Manufacturers codes for TV Acura 009 Admiral 087 163 213 Adyson 032 217 AGB 516 Akai 208 361 516 Akura 218 264 369 Alba 009 036 037 211 218 235 371 Allorgan 294 Amplivision 217 400 ...

Page 54: ... 530 BT 515 668 McMichael 043 Mediator 012 037 Memorex 009 Memphis 337 Metz 087 213 367 535 Minerva 070 487 535 554 Minoka 369 412 Mitsubishi 036 087 108 150 201 354 512 535 Mivar 216 290 291 292 516 Motion 076 MTC 349 512 Multitech 009 076 102 216 Neckermann 037 087 191 213 349 505 554 556 NEI 037 337 431 Nesco 179 Nikkai 032 035 037 072 216 218 264 337 Nobliko 076 102 Nokia 361 480 548 Nordmende...

Page 55: ...19 628 Radiola 200 Radix 396 RFT 200 220 288 Saba 336 520 Sabre 455 Salora 108 Manufacturers codes for CATV converters Brigminghan Cable Communications 276 British Telecom 003 105 Decsat 423 Filmnet 443 France Telecom 451 Jerrold 003 276 MNet 443 PVP Stereo Visual Matrix 003 Salora 382 Scientific Atlanta 008 277 Tele 1 443 United Cable 003 Westminster 105 Zenith 000 Manufacturers codes for VCR Aiw...

Page 56: ...ech 072 ESC 240 278 Ferguson 041 084 098 107 320 321 Fidelity 000 Finlandia 081 104 Finlux 000 042 081 104 105 Firstline 037 043 045 072 209 Fisher 046 047 054 104 Frontech 020 Funai 000 GEC 081 General 020 GoldHand 072 GoldStar 037 225 Goodmans 000 020 037 072 278 403 Graetz 005 041 104 240 344 Granada 046 081 104 Grandin 000 037 072 Grundig 003 006 007 016 072 081 195 207 226 347 349 403 Hanseat...

Page 57: ...gh volume Speakers are overloaded because of short circuit of speaker terminals The remote control mode selector is not set correctly There is an obstruction in front of the remote sensor on the receiver Batteries are weak SOLUTION Plug the power cord into an AC outlet Check speaker wiring and reconnect if necessary Press SPEAKERS 1 and 2 correctly Select the correct source Press MUTING to cancel ...

Page 58: ...m Corresponding to Linear PCM Dolby Digital DTS Digital Surround and MPEG Multichannel with sampling frequency 32 kHz 44 1 kHz 48 kHz Audio Output Level TAPE MD VCR 200 mV Digital output Optical DIGITAL OUTPUT Signal wave length 660 nm Output level 21 dBm to 15 dBm Signal to Noise Ratio 66 IHF DIN PHONO 70 dB 66 dB at REC OUT CD TAPE MD TV SOUND DBS VCR DVD 87 dB 67 dB Frequency Response 8 Ω PHONO...

Page 59: ... Stereo Separation at REC OUT 35 dB at 1 kHz Alternate Channel Selectivity 60 dB 400 kHz Frequency Response 30 Hz to 15 kHz 0 5 dB 3 dB AM MW LW tuner Tuning Range MW 522 kHz to 1 629 kHz LW 144 kHz to 288 kHz Usable Sensitivity Loop antenna 400 µV m Signal to Noise Ratio 50 dB 100 mV m General Power Requirements AC 230 V 50 Hz Power Consumption 210 W at operation 2 W in standby mode Dimensions W ...

Page 60: ...VICTOR COMPANY OF JAPAN LIMITED EN GE FR NL SP IT J VC 0400HIMMDWJEIN ...

Reviews: