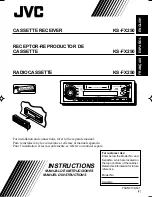
background image

CASSETTE RECEIVER

KS-FX250

ENGLISH

ESP

AÑOL

RECEPTOR-REPRODUCTOR DE
CASSETTE

KS-FX250

RADIOCASSETTE

KS-FX250

INSTRUCTIONS

MANUAL DE INSTRUCCIONES

MANUEL D’INSTRUCTIONS

For customer Use:
Enter below the Model No. and
Serial No. which are located on
the top or bottom of the cabinet.
Retain this information for future
reference.

Model No.

Serial No.

FSUN3108-631

[J]

For installation and connections, refer to the separate manual.
Para la instalación y las conexiones, refiérase al manual separado.
Pour l’installation et les raccordements, se référer au manuel séparé.

FRAN

Ç

AIS

ATT

EN00.COVER.KS-FX250[J]/1

17/12/1999, 05:43 PM

3

Summary of Contents for KS-FX250 - Radio / Cassette Player

Page 1: ...e Enter below the Model No and Serial No which are located on the top or bottom of the cabinet Retain this information for future reference Model No Serial No FSUN3108 631 J For installation and connections refer to the separate manual Para la instalación y las conexiones refiérase al manual separado Pour l installation et les raccordements se référer au manuel séparé FRANÇAIS ATT ...

Page 2: ...oudness function 12 Selecting preset sound modes 12 Adjusting the sound 13 Using the Sound Control Memory 14 Selecting and Storing the sound modes 14 Recalling the sound modes 15 Canceling Advanced SCM 16 Storing your own sound adjustments 17 OTHER MAIN FUNCTIONS 18 Setting the clock 18 Selecting the level display 19 Detaching the control panel 20 CD CHANGER OPERATIONS 21 Playing CDs 21 Selecting ...

Page 3: ...tening to any source ATT starts flashing on the display and the volume level will drop in a moment To resume the previous volume level press the button briefly again To turn off the power Press for more than 1 second BASIC OPERATIONS Note When you use this unit for the first time set the built in clock correctly see page 18 Note on One Touch Operation When you select a source in step 2 below the p...

Page 4: ...play Now you can manually change the frequency while M is flashing 3 Press or 4 repeatedly until the frequency you want is reached If you hold down the button the frequency keeps changing until you release the button RADIO OPERATIONS Listening to the radio 1 Select the band FM1 FM2 FM3 or AM You can select any one of FM1 FM2 and FM3 to listen to an FM station To search stations of lower frequencie...

Page 5: ...west frequency to No 6 highest frequency When automatic preset is over the station stored in number button 1 will be automatically tuned in Storing stations in memory You can use one of the following two methods to store broadcasting stations in memory Automatic preset of FM stations SSM Strong station Sequential Memory Manual preset of both FM and AM stations FM station automatic preset SSM You c...

Page 6: ...to a station 3 Press and hold the button for more than 2 seconds 4 Repeat the above procedure to store other station into other preset numbers Notes A previously preset station is erased when a new station is stored in the same preset number Preset stations are erased when the power supply to the memory circuit is interrupted for example during battery replacement If this occurs preset the station...

Page 7: ...you want 2 Select the number 1 6 for the preset station you want Tuning into a preset station You can easily tune into a preset station Remember that you must store stations first If you have not stored them yet see pages 5 and 6 FM1 FM2 FM3 AM 1 2 ...

Page 8: ... area other than North or South America When this unit is shipped from the factory the channel intervals are set to 10 kHz for AM and 200 kHz for FM You can change the channel intervals by following the procedure below 1 Press SEL select for more than 2 seconds CLOCK H CLOCK M SCM LINK LEVEL AREA B SKIP or LINE IN appears on the display Displayed only when one of the following sources is selected ...

Page 9: ...he tape direction changes alternatively forward and reverse To stop play and eject the cassette Press 0 Tape play stops and the cassette automatically ejects from the cassette compartment If you change the source to AM FM or TAPE the tape play also stops without ejecting the cassette this time You can also eject the tape with the unit turned off Note on One Touch Operation When a cassette is alrea...

Page 10: ...layback starts automatically Notes While locating a specified tune If the tape is rewound to its beginning playback starts from the beginning of that side If the tape is fast forwarded to the end it is reversed and played from the beginning of the other side In the following cases the Multi Music Scan function may not operate correctly Tapes with tunes having long pianissimo passages very quiet pa...

Page 11: ...ect the desired mode with the control dial The Blank Skip mode alternates between on and off ON Ô OFF Note When the tape reaches its end while fast forwarding the tape direction will be changed automatically Repeat Function Press the RPT button while a tune you would like to hear over again is being played back When the tape reaches the end of the tune the tape is automatically rewound to the begi...

Page 12: ...preset sound adjustment suitable to the music genre Each time you press SCM the sound mode changes as follows Indication For Preset values Bass Treble Loudness SCM OFF Flat sound 00 00 On BEAT Rock or disco music 2 00 On POP Light music 4 1 Off SOFT Quiet background music 1 3 Off Notes You can adjust the preset sound mode as you like and store in memory If you want to adjust and store your origina...

Page 13: ...reble FAD Adjust the front and rear speaker R6 rear only F6 front only Fader balance BAL Adjust the left and right speaker L6 left only R6 right only Balance balance VOL Adjust the volume 00 min 50 max Volume Note If you are using a two speaker system set the fader level to 00 2 Adjust the level Note Normally the control dial work as the volume control buttons So you do not have to select VOL to a...

Page 14: ...use the same sound mode for all the sources see Canceling Advanced SCM on page 16 1 1 Select the sound mode you want Each time you press the button the sound mode changes as follows If the Link indicator is lit on the display with SCM LINK set to LINK ON see page 16 the selected sound mode can be stored in memory for the current souce and the effect applies to the current souce If the LINK indicat...

Page 15: ...st each sound mode to your preference and store it in memory If you want to adjust and store your original sound mode see Storing your own sound adjustments on page 17 To adjust the bass and treble reinforcement levels or to turn on off the loundness function temporarily see page 12 and 13 Your adjustments will be canceled if another source is selected Equalization pattern of the selected sound mo...

Page 16: ...d modes simply by changing the sources LINK ON Advanced SCM different SCMs for different sources LINK OFF Conventional SCM one SCM for all sources 2 1 4 3 1 Press and hold SEL for more than 2 seconds CLOCK H CLOCK M SCM LINK LEVEL AREA B SKIP or LINE IN appears on the display Displayed only when one of the following sources is selected FM AM and TAPE 2 Select SCM LINK if not shown on the display 3...

Page 17: ... for details 4 Press and hold SCM until the sound mode you have selected in step 1 flashes on the display Your setting is stored in memory 5 Repeat the same procedure to store other settings To reset to the factory settings Repeat the same procedure and reassign the preset values listed in the table on page 12 Storing your own sound adjustments You can adjust the sound modes BEAT POP SOFT see page...

Page 18: ...t the minute 4 Finish the setting To check the current clock time changing the display mode Press DISP repeatedly Each time you press the button the display mode changes as follows If the unit is not in use when you press DISP the power turns on the clock time is shown for 5 seconds then the power turns off 1 2 1 2 3 1 4 2 Clock Frequency During tuner operation During tape operation During CD Chan...

Page 19: ...rnates AUDIO 1 setting and illumination display OFF Erases the audio level indicator 1 Press and hold SEL for more than 2 seconds CLOCK H CLOCK M SCM LINK LEVEL AREA B SKIP or LINE IN appears on the display 2 Select LEVEL if not shown on the display 3 Select the desired mode AUDIO 1 AUDIO 2 or OFF 4 Finish the setting 2 3 1 4 Displayed only when one of the following sources is selected FM AM and T...

Page 20: ...he right side of the control panel to fix it to the panel holder Detaching the control panel You can detach the control panel when leaving the car When detaching or attaching the control panel be careful not to damage the connectors on the back of the control panel and on the panel holder Note on cleaning the connectors If you frequently detach the control panel the connectors will deteriorate To ...

Page 21: ...r Refer also to the Instructions supplied with your CD changer If no discs are in the magazine of the CD changer or the discs are inserted upside down NO CD or NO DISC will appear on the display If this happens remove the magazine and set the discs correctly If RESET 1 RESET 8 appears on the display something is wrong with the connection between this unit and the CD changer If this happens check t...

Page 22: ...g of the next tracks is located and played back Press 4 briefly while playing a CD to go back to the beginning of the current track Each time you press the button consecutively the beginning of the current tracks is located and played back To go to a particular disc directly Press the number button corresponding to the disc number to start its playback To select a disc number from 1 6 Press 1 7 6 ...

Page 23: ... tracks of the next disc and so on RND2 Flashes All tracks of all discs inserted in the magazine To play back tracks repeatedly Repeat Play Each time you press SCAN RPT Scan Repeat while playing a CD CD repeat play mode changes as follows Mode RPT Indicator Plays repeatedly RPT1 Lights The current track or specified track RPT2 Flashes All tracks of the current disc or specified disc RND1 RND2 Canc...

Page 24: ...ting the external component using the following procedure select the external input correctly See Selecting the external component to use on page 25 1 Select the external component If LINE IN does not appear on the display see page 25 and select the external input LINE IN 2 Turn on the connected device and start playing the source 3 Adjust the volume Note on One Touch Operation When you press CD C...

Page 25: ... factory CD changer is selected as the external component LINE IN To use the external component other than CD changer CHANGER To use the CD changer 1 Change the source to FM AM or TAPE 2 Press and hold SEL for more than 2 seconds CLOCK H CLOCK M SCM LINK LEVEL AREA B SKIP or LINE IN appears on the display 3 Select LINE IN if not shown on the display 4 Select the desired mode LINE IN or CHANGER 5 F...

Page 26: ...rops out Do not play dirty or dusty tapes Do not touch the highly polished head with any metallic or magnetic tools To keep the tape clean Always store the tapes to their storage cases after use Do not store tapes in the following places Subject to direct sunlight With high humidity At extremely hot temperatures CAUTIONS Do not play the tapes with peeling labels otherwise they can damage the unit ...

Page 27: ...ions are not good The volume control is turned to the minimum level Connections are incorrect Signals are too weak The antenna is not connected firmly No CD is in the magazine CDs are inserted incorrectly This unit is not connected to a CD changer correctly The built in microcomputer may function incorrectly due to noise etc Remedies Insert the cassette with the exposed tape facing right Clean it ...

Page 28: ...val set to 9 kHz FM Tuner Usable Sensitivity 11 3 dBf 1 0 µV 75 Ω 50 dB Quieting Sensitivity 16 3 dBf 1 8 µV 75 Ω Alternate Channel Selectivity 400 kHz 65 dB Frequency Response 40 to 15 000 Hz Stereo Separation 30 dB Capture Ratio 1 5 dB AM Tuner Sensitivity 20 µV Selectivity 35 dB CASSETTE DECK SECTION Wow Flutter 0 11 WRMS Fast Wind Time 100 sec C 60 Frequency Response 30 to 16 000 Hz 3 dB Signa...

Page 29: ... VC EN SP FR VICTOR COMPANY OF JAPAN LIMITED Having TROUBLE with operation Please reset your unit Refer to page of How to Reset Still having trouble USA ONLY Call 1 800 252 5722 http www jvcservice com We can help you ...

Reviews: