


38
䡵
S
et to the Manual shooting mode.
1 .
Set to the aperture adju
s
tment mode.
Press the IRI
S
b
utton.
●
The current F-num
b
er is displayed.
2 .
Select an F-number.
Turn the ADJ./VOL. kno
b
up or down.
●
The selected F-num
b
er is displayed.
3 .
Confirm the F-number.
Press the ADJ./VOL. kno
b
.
●
Doing so exits the adjustment mode and the F-num
b
er is
displayed in white.
Memo :
●
The F-num
b
er appears in yellow if it is different from the
preset value.
●
When in the still picture mode, aperture cannot
b
e
adjusted manually if exposure and shutter speed are set to
the manual mode. (The A.PR display flashes for a
b
out 5
seconds on the screen and its setting
b
ecomes invalid.)
䡵
S
etting values
F1.8 - F8.0 (14 steps)
The open F-num
b
er of the aperture varies according to the zoom
position.
Wide (W) end : F1.8
Tele (T) end
: F2.8
䡵
1/
3
-step display when zooming to the tele (T) end
When the aperture is set to F1.8 at the (W) end of the zoom
range, the aperture value may fall
b
elow the open F-num
b
er
when zoomed to the (T) end. In this case, the aperture value is
not fixed,
b
ut changes according to the open F-num
b
er of the
respective zoom positions. The F-num
b
er nearest to the open F-
num
b
er is displayed in 1/
3
steps. (F1.8, F2.0, F2.2, F2.5, F2.8)
䡵
S
etting aperture to AUTO
Press the IRI
S
b
utton twice to clear the display.
Applica
b
le to: Manual shooting mode
M
Brightness of a specific area can
b
e corrected automatically
to the optimal state
b
y selecting one of the three photometry
areas indicated
b
y the frames on the screen.
S
et using [PHOTOMETRY AREA] in the [CAMERA
PROCE
SS
] menu.
When [PHOTOMETRY AREA] is set to [WHOLE
S
CREEN],
the
b
rightness of the entire screen is automatically adjusted
to an optimal level.
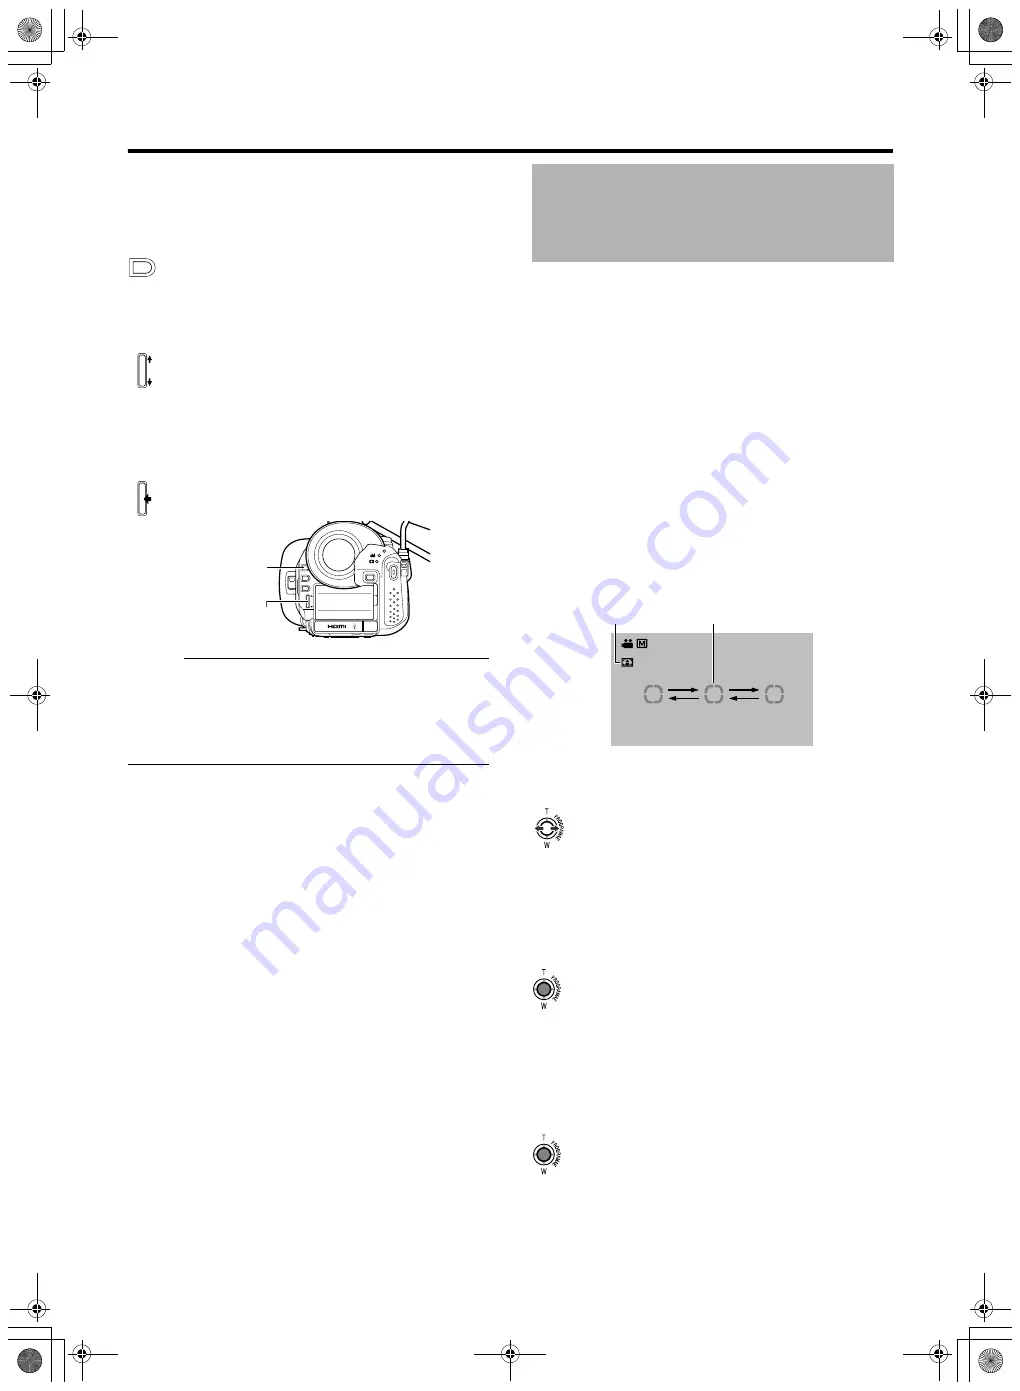
䡵
S
et to the Manual shooting mode.
1 .
Di
s
play the photometry area
s
etting
s
creen.
S
et [PHOTOMETRY AREA] in the [CAMERA PROCE
SS
]
menu to [
S
POT].
●
The photometry area frame is displayed at the center of
the screen.
The photometry area icon appears in
b
lue.
(
S
elect a photometry area from the left, center, and right
frames on the screen.)
2 .
Select a photometry area.
Push the
S
et Lever to the left or right.
The right or left photometry area frame is displayed.
3 .
Confirm the photometry area.
Press the center of the
S
et Lever.
●
The confirmed photometry area is displayed, and the
photometry area icon appears in white.
●
Brightness within the frame is always automatically
corrected to an optimal level.
䡵
Locking the brightne
ss
of the photometry area
Press the center of the
S
et Lever for 1 second or longer while
setting the photometry area or after confirming the setting.
●
The photometry area frame disappears, and a Lock icon
(
L
) appears.
●
The automatically corrected
b
rightness within the
photometry area is locked. (AE Lock)
䡵
Setting the entire
s
creen a
s
the photometry area
S
et [PHOTOMETRY AREA] in the [CAMERA PROCE
SS
]
menu to [WHOLE
S
CREEN].
IRI
S
ADJ./VOL
ADJ./VOL
DC
OPEN
REC
PUSH
IRIS
SHUTTER
AE
±
ADJ
./ V
OL.
CLOSE
ACCESS
IRI
S
ADJ./VOL.
Kno
b
Setting the Photometry
Area
Photometry Area Icon
Photometry Area Frame
M9H7_EN_001D.book Page 38 Thursday, August 26, 2010 11:51 AM


