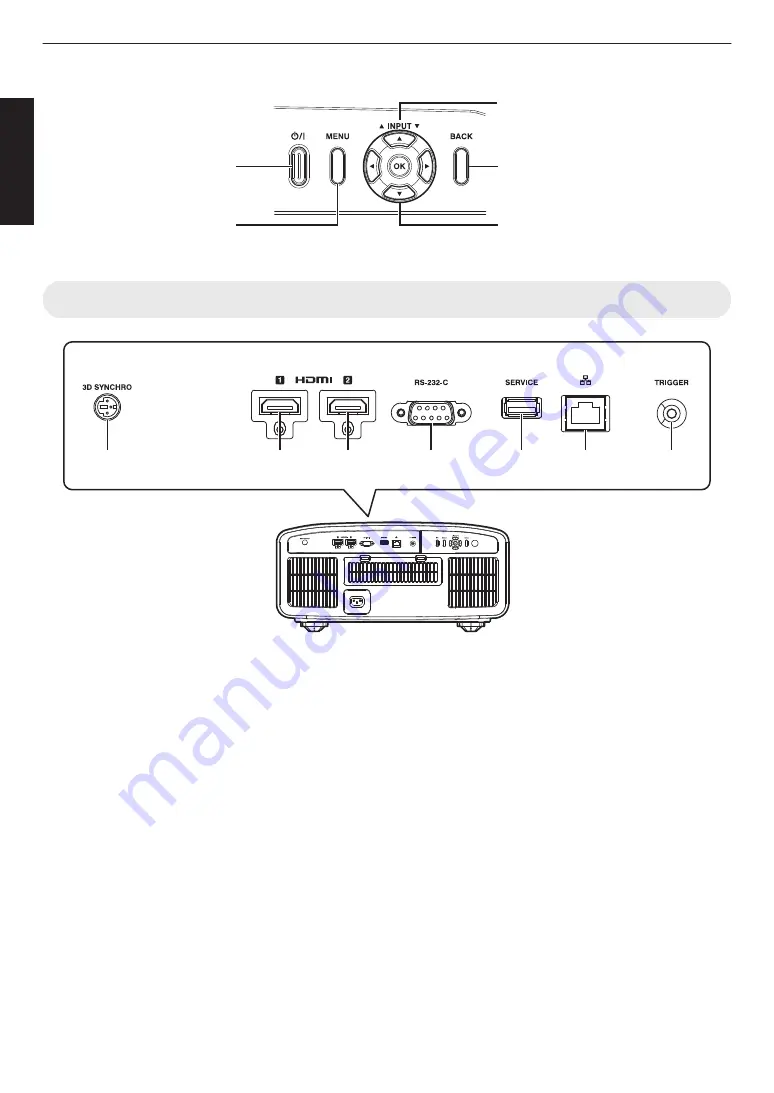
Operation panel
[MENU]: Displays the menu
[BACK]: Returns to the previous menu
[
JKH
I
] keys: Selects an item
[OK]: Confirms a selection
[
J
INPUT
K
]: Switches the input
A
: Turns “on”/“off” the
power
Main Unit - Input Terminals
A
B
C
D
E
F
G
A
[3D SYNCHRO] terminal
By connecting a 3D Synchro Emitter (sold separately)
to this terminal, you can view 3D movies.
B
[HDMI 1] input terminal
C
[HDMI 2] input terminal
For connecting to devices that support HDMI output.
(P. 19)
It is fitted to the M3 lock hole. The depth of the screw
hole is 3 mm (0.1 in).
D
[RS-232C] terminal (D-sub 9-pin
male)
The projector can be controlled by connecting a PC to
this terminal.
E
[SERVICE] terminal
For updating the software using a commercially
available USB flash drive.
F
[LAN] terminal (RJ-45)
The projector can be controlled by connecting it to a
PC through the computer network for control
commands to be sent to the projector.
G
[TRIGGER] terminal
Output terminal for DC 12 V, 100 mA power supply. It
is used for sending output signals to control devices
such as an elevating screen that is equipped with a
trigger function.
Note that improper connection may damage the
projector. (Tip=DC +12 V, Sleeve=GND)
12
Getting Started


